Videography
Colour grading on DaVinci Resolve

Color grading is the transformative process of enhancing and stylizing the visual look of a video through color manipulation. With its powerful features and intuitive interface, DaVinci Resolve has become a go-to tool for professional colorists and aspiring filmmakers alike. In this guide, we’ll explore the fundamentals of colour grading on (using) DaVinci Resolve.
Understanding the Interface
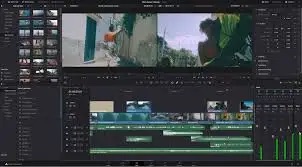
DaVinci Resolve’s interface is divided into several panels, each serving a specific purpose in the color grading process. The Media Pool allows you to import and organize your footage, while the Edit panel is where you assemble your timeline. The Color panel is where the magic happens, with various tools and controls for adjusting color, contrast, and saturation. Finally, the Delivery panel is where you export your graded footage.

Setting the Tone with Primary Corrections


Fine-Tuning with Secondary Corrections
For more precise adjustments, utilize secondary corrections to target specific areas of your image. DaVinci Resolve offers a range of tools for isolating and manipulating colors, including qualifiers, power windows, and masks. Use these tools to selectively adjust hues, saturation, and luminance, ensuring consistency and coherence across your footage.
Creating Mood with Creative LUTs and Looks
Once you’ve balanced and refined your colors, it’s time to unleash your creativity with creative LUTs (Look-Up Tables) and looks. DaVinci Resolve comes with a library of built-in LUTs and presets to help you achieve a variety of cinematic styles and moods. Experiment with different combinations until you find the perfect look for your project.
Harnessing the Power of Nodes
Nodes are the building blocks of DaVinci Resolve’s color grading workflow, allowing you to create complex adjustments and effects with ease. Use nodes to organize your corrections, create parallel adjustments, and apply effects such as vignettes, glows, and blurs. By chaining nodes together, you can achieve intricate and nuanced grading effects.
Collaborating and Sharing
DaVinci Resolve offers robust collaboration and sharing features, making it easy to work with a team and deliver your final graded footage to various platforms. Use the collaboration tools to share projects, exchange feedback, and work concurrently on different aspects of your project. When it’s time to export your graded footage, DaVinci Resolve provides a range of export options and presets for different delivery formats and resolutions.
Color grading is a crucial step in the filmmaking process, allowing filmmakers to evoke emotions, enhance storytelling, and create visually stunning works of art. With its comprehensive feature set and user-friendly interface, DaVinci Resolve empowers filmmakers of all levels to unleash their creativity and bring their vision to life. So whether you’re a seasoned colorist or just starting out, dive into DaVinci Resolve and unlock the full potential of your footage.