Social media
How to Post Pictures on Youtube

How to post pictures on Youtube. YouTube is a place for self-expression and creativity in addition to being a platform for video sharing. Even while videos are the main medium, many content producers often include photographs to improve narrative or offer more detail. Don’t worry if you’re unsure about how to upload images to YouTube; it’s a simple process that can enhance your channel’s visual appeal and depth.
HOW TO POST PICTURES ON YOUTUBE
Tap “Photo” or “What’s on your mind?” at the top of your Feed in the Facebook app, pick an image from your camera roll, add a description if you’d like, and then click “Post.” Click “Photo/Video” in the post box on a desktop, then click “Post” after choosing your image.
Step 1: Prepare Your Images


Before uploading images to YouTube, ensure they are in a compatible format. Common formats include JPEG, PNG, and GIF. Additionally, make sure your images are high-quality and relevant to your video content. You can use photo editing software to enhance or resize your images if necessary.
Step 2: Access YouTube Studio
Log in to your YouTube account and navigate to YouTube Studio, YouTube’s dashboard for managing your channel and its content. Once you’re in YouTube Studio, locate the video to which you want to add images and click on it to open the video details.
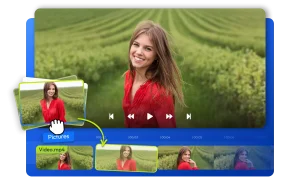
Step 3: Add Images to Your Video

HOW TO POST PICTURES ON YOUTUBE
In the video details section, look for the “Editor” tab. Click on it to access the video editor tool. Within the video editor, you’ll see a timeline representing your video content. To add images, click on the “Add” button and select “Add image.” Choose the image file from your computer and upload it to the editor.
Step 4: Arrange and Customize Images
Once uploaded, drag and drop the image onto the timeline at the desired point in your video. You can adjust the duration of the image display by dragging its edges on the timeline. Additionally, YouTube offers basic editing features such as cropping and adding text overlays to your images. Experiment with these tools to enhance the visual appeal of your content.
Step 5: Preview and Save Changes


After arranging and customizing your images, preview the video to ensure everything looks as intended. Use the playback controls to review the timing and placement of your images within the video. If everything looks good, click on the “Save” or “Publish” button to apply the changes to your video.
Step 6: Finalize and Publish


HOW TO POST PICTURES ON YOUTUBE
Before publishing your video with images, double-check all aspects of your content, including image quality, relevance, and timing. Once satisfied, click on the “Publish” button to make your video live on YouTube. Congratulations – you’ve successfully posted pictures on YouTube.
Summary
You may improve your content and engage your audience in new ways by including photos in your YouTube videos. You can easily incorporate images into your films and improve the narrative experience for your audience by following these easy steps. So let your imagination go wild and begin posting eye-catching images on YouTube right now!