Social media
Whatsapp and Facebook Linkage

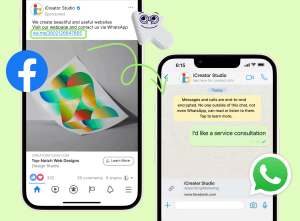

Whatsapp and facebook linkage. Integrating several communication channels helps improve your reach and streamline your online presence in today’s connected digital world. Making the strategic decision to link your Facebook page and WhatsApp account enables you to take advantage of both platforms’ strengths for smooth audience engagement and communication. We’ll walk you through each step of connecting your Facebook page and WhatsApp account in this guide.
WHATSAPP AND FACEBOOK LINKAGE
These instructions will allow you to easily connect your Facebook page and WhatsApp account, facilitating effective audience engagement and communication on both platforms. Whether you are a digital marketer, social media influencer, or small company owner, combining WhatsApp with Facebook can improve your online visibility and expedite your communication.
1. Ensure Compatibility:


Before proceeding, ensure that your WhatsApp account is compatible with linking to a Facebook Page. This feature is available for WhatsApp Business accounts, so if you haven’t already, consider upgrading your personal WhatsApp account to WhatsApp Business.
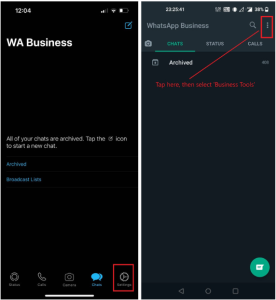
2. Access WhatsApp Business Settings:
Open the WhatsApp Business app on your smartphone and navigate to the settings menu. This can usually be accessed by tapping on the three vertical dots in the top-right corner of the screen.
3. Tap on Business Tools:

WHATSAPP AND FACEBOOK LINKAGE
Within the settings menu, locate and tap on the “Business Tools” option. This section contains a variety of tools and integrations designed to enhance your business’s communication capabilities.
4. Select Facebook:
In the Business Tools section, you’ll find an option labeled “Facebook.” Tap on this option to proceed with linking your WhatsApp account to your Facebook Page.
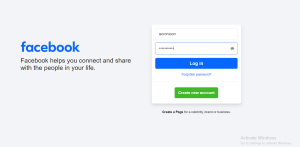
5. Log in to Facebook:

WHATSAPP AND FACEBOOK LINKAGE
You’ll be prompted to log in to your Facebook account. Enter your Facebook credentials (email address and password) to proceed. Make sure you have administrative access to the Facebook Page you want to link with your WhatsApp account.
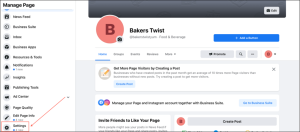
6. Choose Your Page:
After logging in, you’ll be presented with a list of Facebook Pages associated with your account. Select the Page that you want to link to your WhatsApp account from the list.
7. Confirm the Link:

Screenshot
Following your selection of the relevant Facebook Page, you will be prompted to verify the connection between your WhatsApp account and the chosen Page. Check the details and authorization needed for the integration, then click “Proceed.”
8. Customize Settings:
Depending on your preferences and business needs, you may have the option to customize various settings related to the integration between WhatsApp and Facebook. Explore the available options and adjust them according to your requirements.
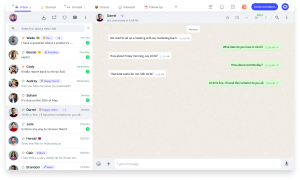
9. Test the Integration:

WHATSAPP AND FACEBOOK LINKAGE
After linking your WhatsApp account to your Facebook Page, it’s a good idea to test the integration to ensure that messages and communication flow smoothly between the two platforms. Send a test message from your Facebook Page’s inbox to your linked WhatsApp account, and vice versa, to verify the connection.
10. Monitor and Manage Interactions:

WHATSAPP AND FACEBOOK LINKAGE
Track and manage WhatsApp and Facebook conversations inside their respective platforms after the linkage is configured. Respond promptly to messages, inquiries, and customer interactions to maintain a high level of engagement and satisfaction.
Summary
Click Settings after selecting Settings & privacy. After selecting Linked accounts under Permissions from the menu on the left, select View next to WhatsApp. The only place to locate WhatsApp is on your company’s Facebook page. Your personal Facebook profile does not contain WhatsApp.