TECHNOLOGY
eSim Installation Hacks

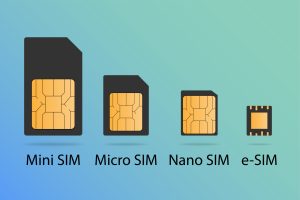

eSim installation hacks. For mobile users, switching to eSIM on Android offers a whole new level of convenience and flexibility because it’s a hassle-free process, especially for business or travel users. By doing away with the need for a physical card, the eSIM allows consumers to manage their cell plans digitally and frees up space on the Android device.
eSIM INSTALLATION HACKS
The emergence of eSIM activation technology in recent years has completely changed how we connect our gadgets to cellular networks. Because eSIMs are integrated directly into devices rather than being physical, detachable chips like traditional SIM cards, they offer more flexibility, convenience, and space-saving advantages. Whether a new tablet, smartphone, wristwatch, or other compatible device is being activated, here’s a step-by-step guide on how to install an eSIM:
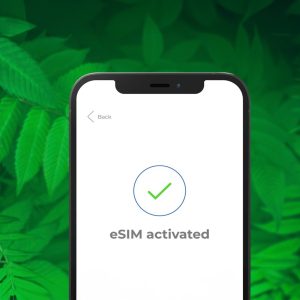
1. Check Device Compatibility;
![]()

Before attempting to install an eSIM, ensure that your device supports eSIM technology. Many modern smartphones, tablets, and wearable devices are equipped with eSIM capabilities, but it’s always best to verify compatibility with the manufacturer or your cellular provider.
2. Obtain eSIM Activation Information;

Contact your cellular provider to obtain the necessary eSIM activation information, including the QR code or activation code required to provision the eSIM. This information is unique to your device and cellular plan and is essential for activating the eSIM.
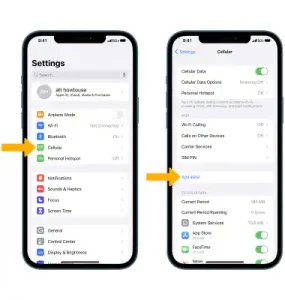
3. Access eSIM Settings;
On your device, navigate to the settings menu and locate the section related to cellular or mobile network settings. Depending on the device and operating system (iOS, Android, etc.), the location of the eSIM settings may vary. Look for options such as “Cellular,” “Mobile Network,” or “SIM & Network” to access eSIM settings.
4. Add eSIM;

Once in the eSIM settings menu, look for an option to “Add eSIM” or “Add Cellular Plan.” Select this option to begin the eSIM activation process.
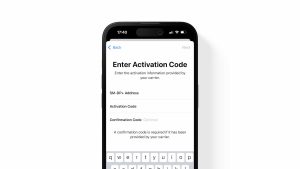
5. Scan QR Code or Enter Activation Code;
Depending on your cellular provider’s instructions, you will either need to scan a QR code or manually enter the activation code provided by your provider. Follow the on-screen prompts to complete this step.
6. Confirm esim Activation;

eSIM INSTALLATION HACKS
After scanning the QR code or entering the activation code, your device will prompt you to confirm the activation of the eSIM. Review the information carefully to ensure accuracy before proceeding.
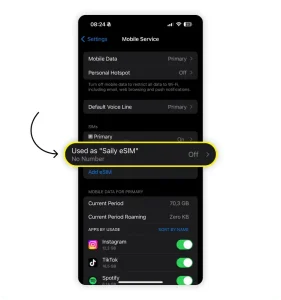
7. Set Primary Line;
If your device supports dual SIM functionality, you may have the option to set one of the SIM cards (physical or eSIM) as the primary line for calls, texts, and data. Choose your preferred configuration based on your usage preferences.
8. Complete esim Activation;

eSIM INSTALLATION HACKS
Once you’ve confirmed the activation details, your device will begin provisioning the eSIM with your cellular provider’s network settings. This process may take a few moments, so be patient and avoid interrupting the activation process.
9. Test Connectivity esim activation;
After the eSIM activation is complete, test the connectivity of your device by placing a test call, sending a text message, or accessing the internet using cellular data. Ensure that all functions are working correctly before relying on the eSIM for regular use.
10. Enjoy Seamless Connectivity;


eSIM INSTALLATION HACKS
With the eSIM successfully installed and activated, you can now enjoy the benefits of seamless connectivity without the need for a physical SIM card. Whether you’re traveling internationally, switching between multiple carriers, or simply streamlining your device setup, eSIM technology offers greater convenience and flexibility for modern users.
Summary
You may quickly install an eSIM on your compatible device and take advantage of seamless connectivity wherever you go by following these steps. A more connected and efficient digital experience is anticipated as eSIM technology develops and becomes more widely used. It promises to make connecting our devices to cellular networks even easier.