Social media
How to start a live broadcasting on Facebook

In today’s digital age, live video has emerged as a powerful tool for connecting with audiences in real-time and engaging with them on a personal level. Facebook Live, in particular, provides a convenient platform for individuals, businesses, and organizations to broadcast live video content to their followers. Whether you’re looking to host a Q&A session, share behind-the-scenes footage, or broadcast a live event, going live on your Facebook page can help you connect with your audience in a meaningful way. In this guide, we’ll walk you through the steps to successfully go live on your Facebook page.
Step 1: Access Your Facebook Page
To go live on your Facebook page, you’ll first need to log in to your Facebook account and navigate to your page. You can do this by clicking on the page’s name in the left sidebar of your Facebook homepage.
Step 2: Click on the Live Video Option
Once you’re on your page, look for the “Live” option, typically located near the top of the page. Click on this option to start the process of going live.
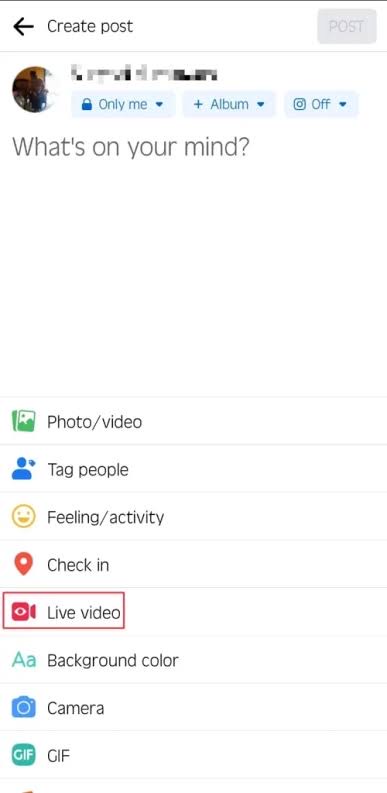

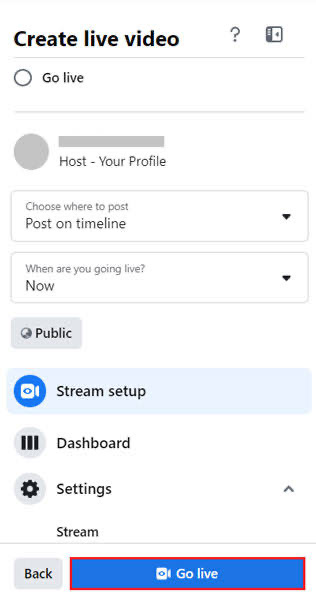
Step 3: Configure Your Live Video Settings
Before you start broadcasting, Facebook will prompt you to configure your live video settings. Here, you can add a description for your live video, choose who can see it (public, friends, specific groups, etc.), and select any additional settings, such as allowing viewers to comment or react during the broadcast.

Step 4: Set Up Your Camera and Microphone
Next, make sure your camera and microphone are set up and working correctly. You can use your device’s built-in camera and microphone or connect external equipment for higher quality audio and video.
Step 5: Choose Your Audience and Privacy Settings
Once your camera and microphone are set up, you’ll need to choose your audience and privacy settings. Decide whether you want to broadcast to the public, specific friends, or a custom audience, and adjust your settings accordingly.
Step 6: Add a Compelling Description
Before you go live, take a moment to add a compelling description for your video. This description will appear alongside your live video and can help attract viewers to tune in.
Step 7: Click on the “Go Live” Button
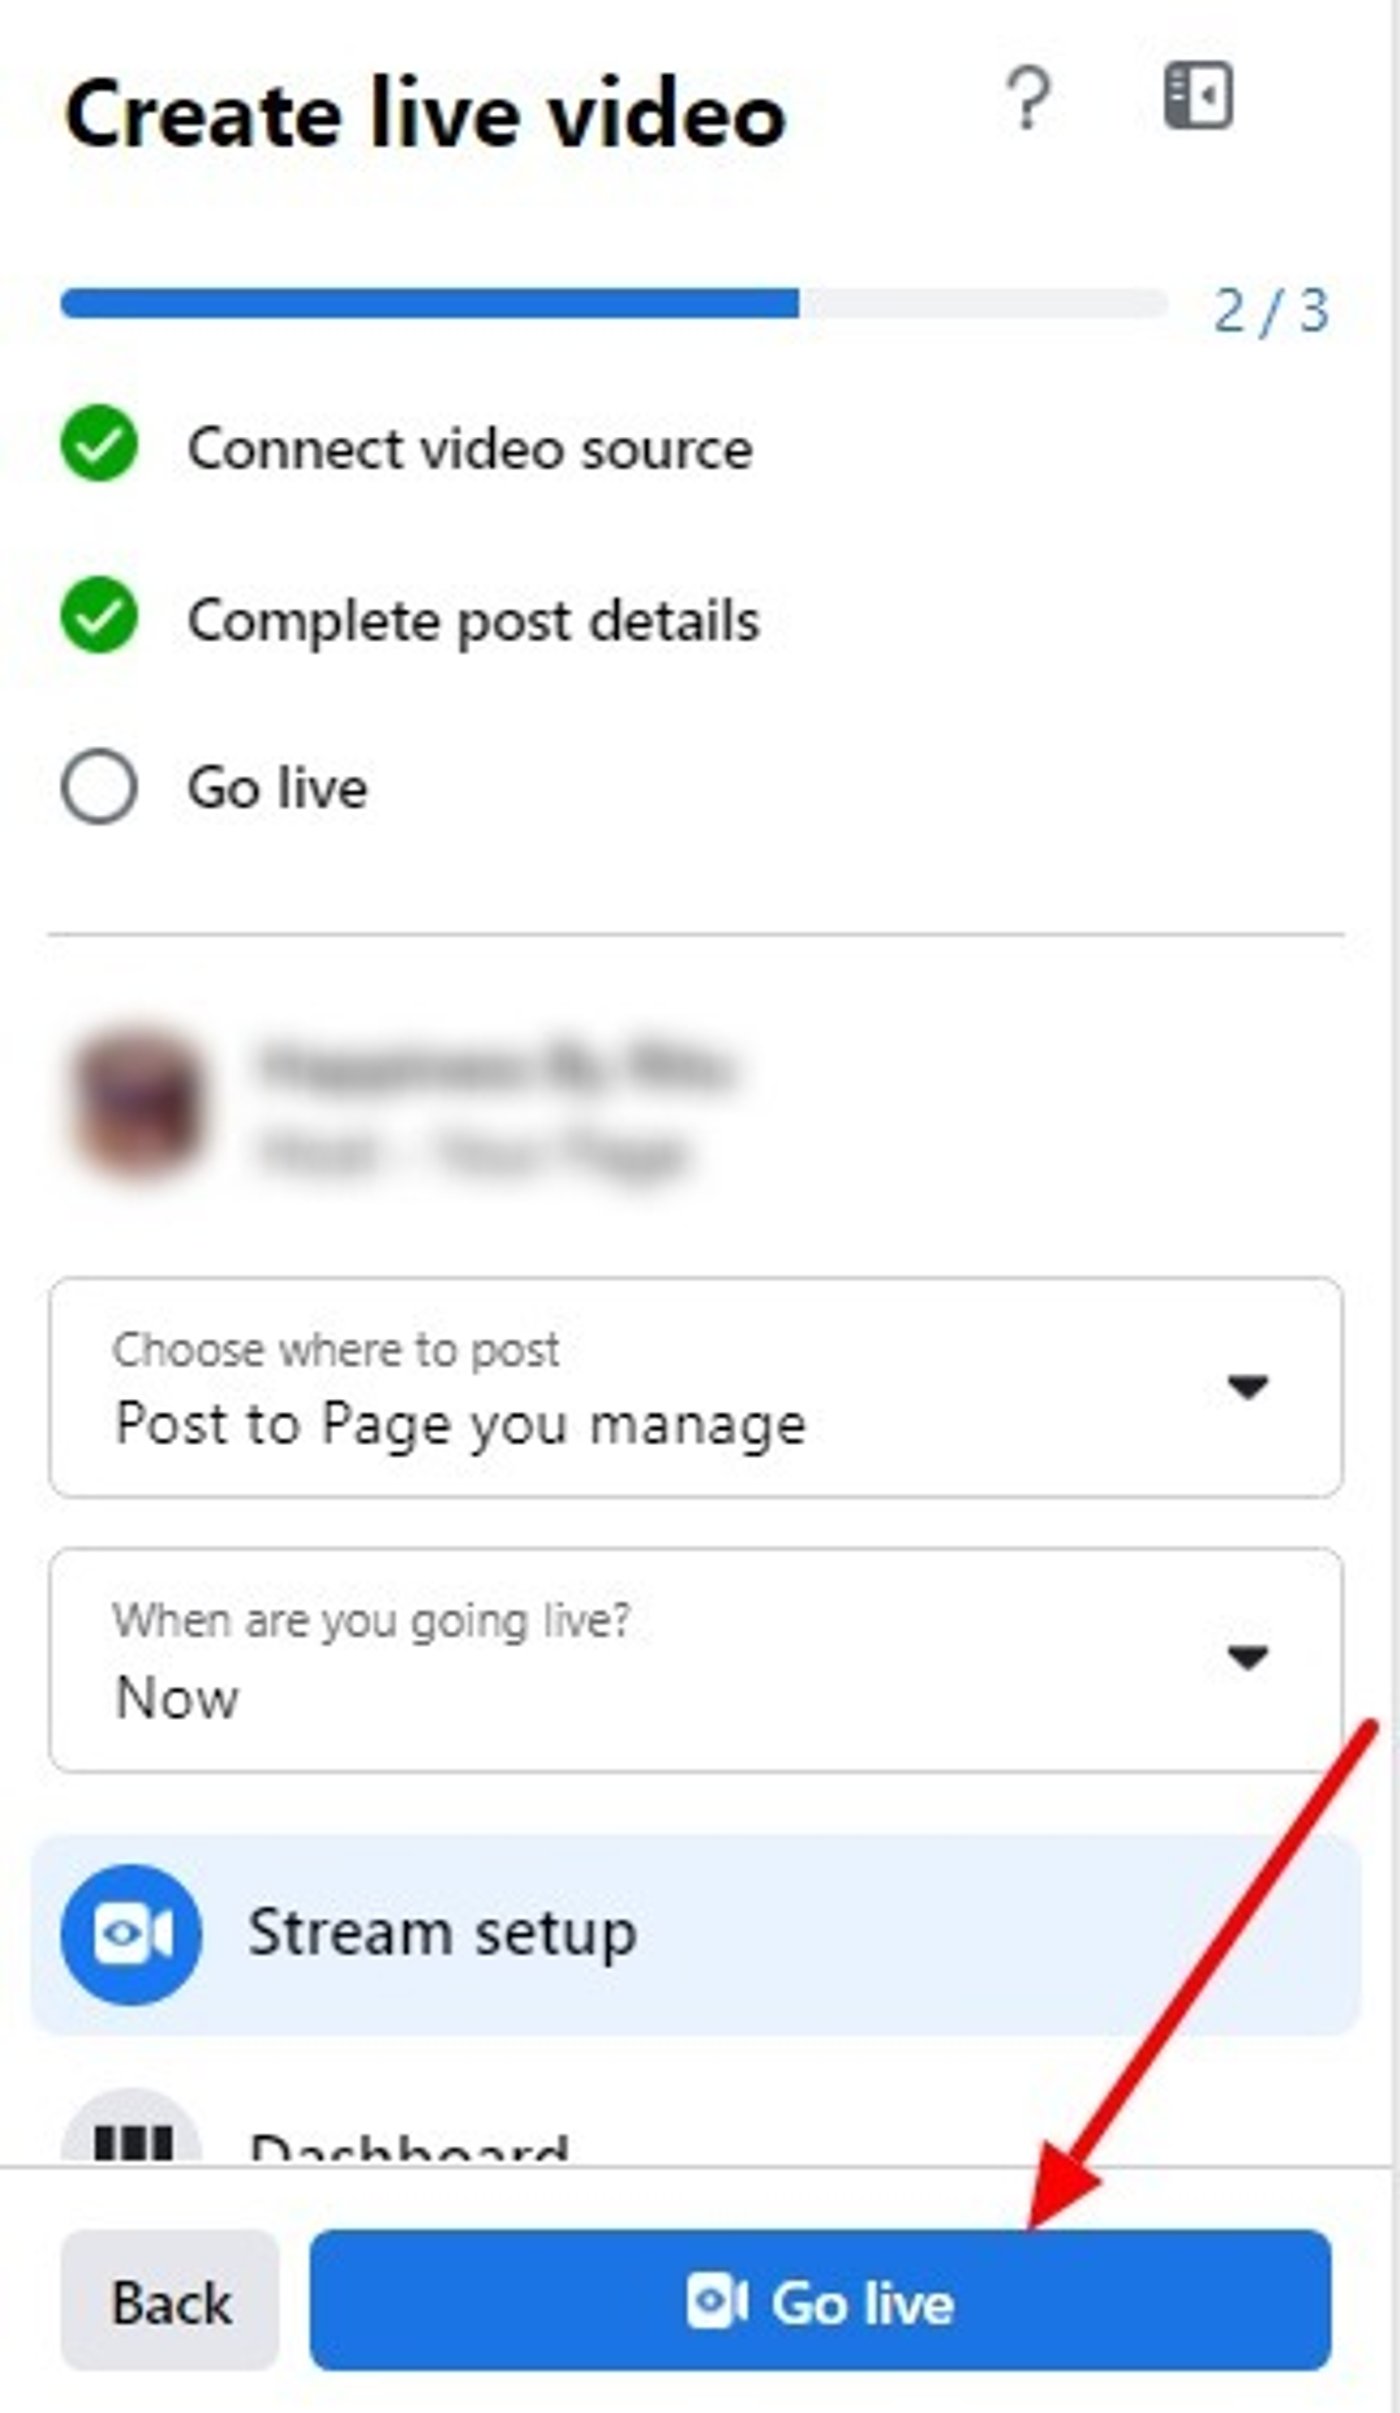

When you’re ready to start broadcasting, click on the “Go Live” button. Facebook will count down from three, giving you a final chance to prepare before your live video begins.
Step 8: Interact with Your Audience
Once you’re live, take advantage of the opportunity to interact with your audience in real-time. Respond to comments, answer questions, and engage with viewers to make the experience more interactive and engaging.
Step 9: End Your Broadcast
When you’re ready to end your live broadcast, simply click on the “Finish” button. Facebook will give you the option to save your video to your page for later viewing or delete it if you prefer.
Step 10: Review Your Performance
After your live broadcast ends, take some time to review your performance using Facebook Insights. Insights provide valuable data on your video’s reach, engagement, and audience demographics, allowing you to learn from your experience and improve future broadcasts.
By following these steps and leveraging the power of Facebook Live, you can connect with your audience in a meaningful way, share valuable content, and strengthen your online presence on the world’s largest social media platform.
Pingback: Essential Gear for Facebook Live Streaming - SimplExplainer