WRITING
Tips for Creating Online Google Forms

Tips for creating online google forms. Start with a clear title and description to direct replies when creating an efficient Google Form. To break up lengthy surveys, use section breaks and a variety of question kinds, such as multiple choice, checkbox, and dropdown. Use Google Forms to examine real-time results via Google Sheets, enable “Required” for important questions, and personalize themes for branding.
TIPS FOR CREATING ONLINE GOOGLE FORMS
The process of creating a Google Form is simple and enables you to collect data quickly and easily. Google Forms offers an easy-to-use platform for customisation, whether you’re planning an event, conducting a survey, or gathering feedback. Here’s how to make a Google Form step-by-step:
1. Access Google Forms:

• Open your web browser and navigate to Google Forms by visiting “forms.google.com” or accessing it through Google Drive.
2. Sign in to your Google Account:
• If you’re not already signed in, sign in to your Google Account. If you don’t have one, you can create a Google Account for free.
3. Click on “+ Blank” or Choose a Template:

• On the Google Forms homepage, click on the “+ Blank” button to start a new form. Alternatively, you can choose a template that suits your needs.
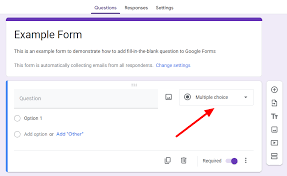
4. Create Your Form:
• Title your form by clicking on “Untitled Form” at the top. Enter a descriptive title that reflects the purpose of your for
• Add questions to your form by clicking on the “+” button. Choose from various question types, including multiple-choice, short answer, or paragraph text.
• Customize each question by adding options, setting required responses, and adjusting the question type as needed.
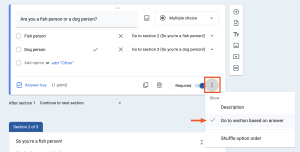
5. Organize Sections:


Tips for creating online google forms
• Organize your form into sections if it involves different topics or categories. Click on the three lines icon in the bottom-left corner to access the form settings, then click “Add section.”
6. Personalize Your Form:
• Customize the theme of your form by clicking on the color palette icon. Select a color scheme or add a background image to give your form a personalized touch.
7. Add Media:
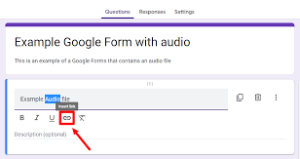

• Enhance your form by inserting images or videos. Click on the image or video icon to upload media from your computer or provide a URL.
8. Preview Your Form:
• Before sharing your form, click on the eye icon to preview how it will appear to respondents. Ensure that the questions, layout, and design meet your expectations.
9. Adjust Settings:

Tips for creating online google forms
• Access the form settings by clicking on the gear icon. Customize settings such as collecting email addresses, limiting responses, or turning on/off accepting responses.
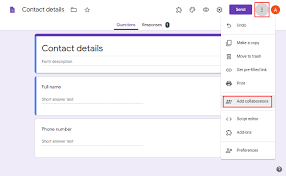
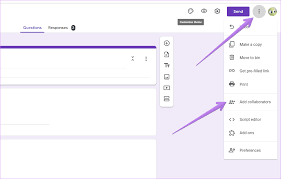
10. Share Your Form:

Tips for creating online google forms
– Click on the “Send” button in the upper-right corner to share your form. You can share it via email, generate a link, or embed it on a website. Google Forms also provides options to share on social media or through Google Classroom.
Summary
You may easily customize surveys and questionnaires to meet your unique requirements by creating a Google Form. Try with various question formats, topics, and layouts to create a form that works for you and successfully engages your respondents.