Social media
Tips for Setting up Youtube Premiere

Tips for setting up Youtube premiere. One of the best ways to make your video release an unforgettable experience for your viewers is to organize a YouTube Premiere. You may plan and personalize your premiere, create excitement among your audience, and interact with them in real time during the event by following these easy steps. So instead of merely releasing a video, why not give it a premiere? Plan your next YouTube premiere to give your audience an experience they won’t soon forget.
TIPS FOR SETTING UP YOUTUBE PREMIERE
For creators, releasing a new video on YouTube is a thrilling occasion, but why not make it an event instead? With YouTube Premieres, producers can showcase their films in real time, interacting with viewers and creating excitement for their upcoming releases. We’ll go over how to set up a YouTube Premiere step-by-step in this guide, making your video release an unforgettable event for your audience.
Step 1: Create Your Video
Before setting up a YouTube Premiere, ensure that you’ve already uploaded your video to your YouTube channel.This video will serve as the content for your Premiere event, so make sure it’s polished and ready for public viewing.

Step 2: Access YouTube Studio
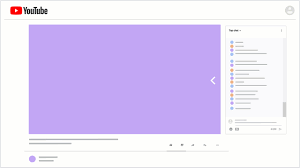
Log in to your YouTube account and navigate to YouTube Studio, the hub for managing your channel and its content. Once in YouTube Studio, locate the video you want to premiere and click on it to open the video details.
Step 3: Schedule the Premiere

Tips for setting up Youtube premiere
In the video details section, look for the “Editor” tab. Click on it to access the video editor tool. Within the editor, you’ll find an option labeled “Premiere” in the top menu. Click on “Premiere” to open the Premiere scheduling settings.
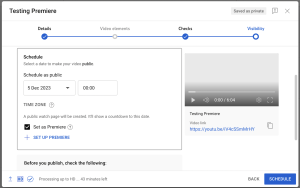
Step 4: Set Premiere Details
In the Premiere scheduling settings, you’ll be prompted to specify the date and time for your Premiere event. Choose a date and time that works best for you and your audience. You can also customize the Premiere settings, such as enabling live chat and adding a countdown timer to build excitement.
Step 5: Customize Your Premiere Page

Tips for setting up Youtube premiere
After setting the date and time, you’ll have the opportunity to customize the Premiere page. Add a catchy title and description to entice viewers to join the Premiere. You can also upload a custom thumbnail to make your Premiere stand out in search results and recommendations.
Step 6: Publish Your Premiere
Once you’ve finalized the Premiere details and customized the page to your liking, click on the “Schedule Premiere” button to publish your Premiere event. YouTube will then confirm the scheduling of your Premiere and provide you with a shareable link to promote the event.
Step 7: Promote Your Premiere

Tips for setting up Youtube premiere
Spread the word about your Premiere across your social media channels, website, and other platforms where your audience engages. Encourage your followers to set a reminder for the Premiere and join you live for the unveiling of your new video.
Step 8: Engage During the Premiere
On the day of the Premiere, be present and engaged with your audience in the live chat. Answer questions, share behind-the-scenes insights, and interact with viewers as they watch your video together for the first time.

Summary
By setting up a YouTube Premiere, pre-recorded videos can be seen live, enabling real-time chat interaction. To increase participation, it’s important to plan ahead, personalize the countdown timer, and actively participate in the live chat.