
Fitness
How to do plank exercise effectively
The plank is a highly effective exercise for building core strength, stability, and endurance. It engages multiple muscle groups, including the abdominals, back, shoulders, and legs. To maximize the benefits and prevent injury, it’s essential to perform the plank with proper form. Here’s a comprehensive guide on how to do plank exercises correctly:
Preparation and Setup for plank exercise
1. Find a Suitable Surface:
– Choose a flat, stable surface like a mat or the floor to perform your planks.
2. Warm Up:
• Warm up with light cardio or dynamic stretches for 5-10 minutes to prepare your muscles and joints.
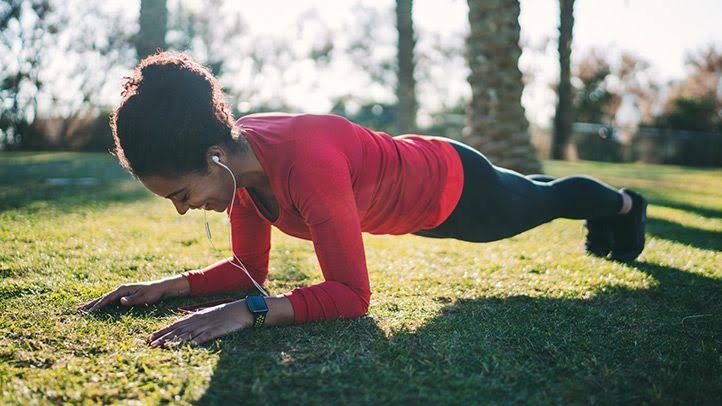
Basic Forearm Plank exercise
1. Starting Position:
– Begin by lying face down on the mat.
– Place your forearms on the ground with your elbows directly beneath your shoulders.
– Your forearms should be parallel to each other, with hands flat on the floor or fists clenched.
– Extend your legs straight back, with your toes tucked under and feet hip-width apart.
2. Engage Core and Lift:
– Engage your core muscles by drawing your navel towards your spine.
– Lift your body off the ground, creating a straight line from your head to your heels.
– Ensure your hips are not sagging or piking up; maintain a neutral spine.
3. Hold the Position:
– Hold this position for as long as you can while maintaining proper form.
– Keep your head in a neutral position by looking slightly ahead of you, not down.
– Breathe steadily throughout the hold.
Tips for Proper Form
– Body Alignment: Ensure your body forms a straight line from head to heels. Avoid letting your hips drop or rise too high.
– Elbow and Shoulder Alignment: Keep your elbows directly under your shoulders to avoid unnecessary strain on your shoulders.
– Core Engagement: Actively engage your core muscles to support your lower back and maintain stability.
– Breathing: Breathe steadily and avoid holding your breath.
Modifications and Variations
1. Knee Plank:

– If the standard plank is too challenging, start with a knee plank.
-Perform the same steps as the forearm plank but keep your knees on the ground.
– Ensure your body forms a straight line from head to knees.
2. High Plank (Straight Arm Plank):
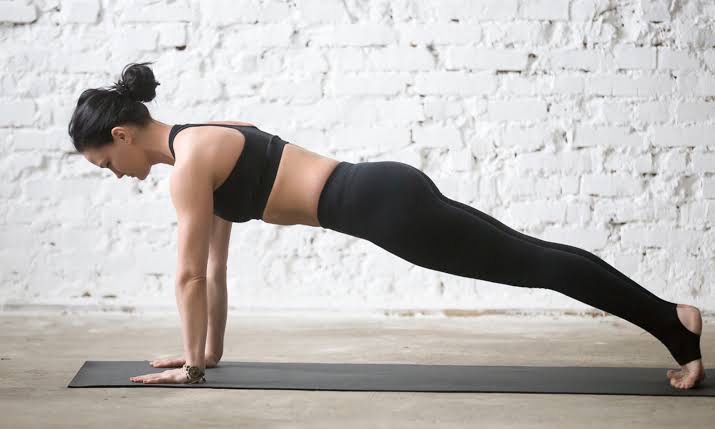
– Begin in a push-up position with your hands directly under your shoulders.
– Extend your legs back, keeping your body in a straight line.
– Engage your core and hold the position.
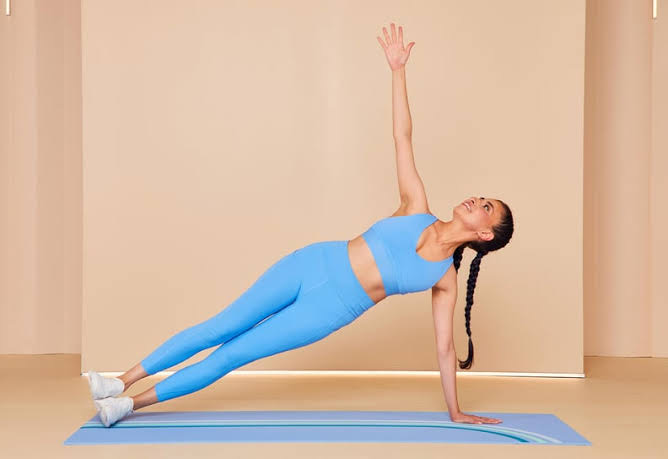
3. Side Plank:

– Lie on your side with your legs extended.
– Prop yourself up on one forearm, with your elbow directly under your shoulder.
– Stack your feet on top of each other and lift your hips to form a straight line from head to feet.
– Hold the position and then switch sides.
4. Plank with Leg Lift:

– Start in a standard forearm or high plank position.
– Lift one leg off the ground, keeping it straight and in line with your body.
– Hold for a few seconds, then switch legs.
5. Plank with Arm Lift:
– Begin in a high plank position.
– Lift one arm off the ground and extend it straight in front of you.
– Hold for a few seconds, then switch arms.
6. Plank to Push-Up:
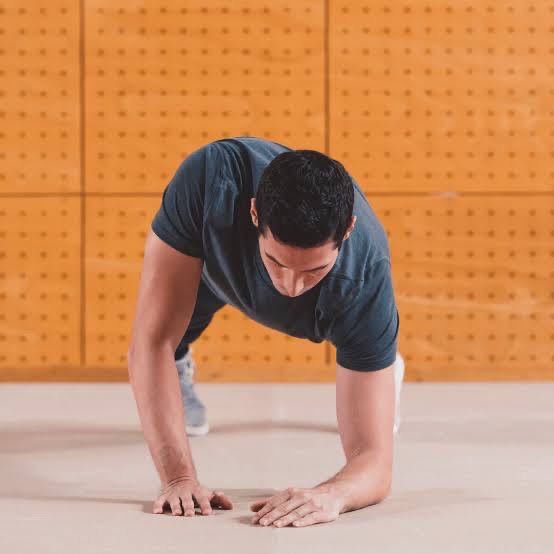
-Start in a forearm plank.
– Transition to a high plank by pushing up onto one hand, then the other.
– Lower back down to the forearms, alternating which hand you lift first.
Progression
– Increase Duration: Gradually increase the time you hold the plank as your strength and endurance improve.
– Add Variations: Incorporate different plank variations to challenge your muscles and prevent boredom.
– Increase Intensity: Once you can hold a plank with proper form for over a minute, consider adding resistance by wearing a weighted vest or using resistance bands.
Plank exercises are a versatile and effective way to build core strength and stability. By following the proper form and incorporating variations and progressions, you can maximize the benefits of your plank routine. Always listen to your body and avoid pushing through pain to prevent injury. With consistency and dedication, planks can be a valuable addition to your fitness regimen.


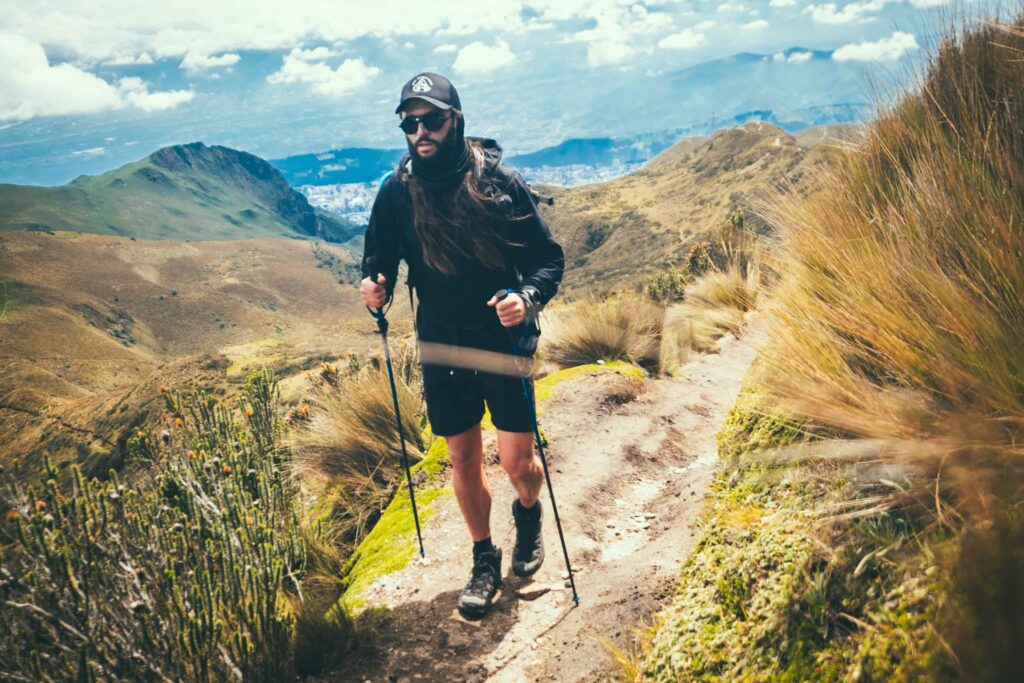
Trekking health impacts. It combines cardiovascular exercise with natural immersion, which has major positive effects on one’s physical, mental, and personal growth. It lowers tension and anxiety while strengthening muscles, increasing endurance, and improving heart health. Additionally, it provides a digital detox for mental clarity, promotes awareness of the environment, and cultivates a connection with nature.
TREKKING HEALTH IMPACTS
Significant health benefits of trekking include greater bone density, weight loss, increased muscle strength (legs, glutes, and core), and improved cardiovascular fitness. Because it lowers stress, anxiety, and depression, it is an effective aid for mental health. Heat exhaustion, altitude sickness, and sprains are among the risks.
1. Overall increased fitness;
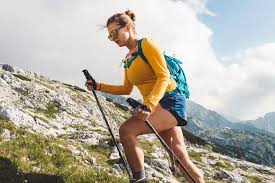
Trekking has several advantages, one of which is that it greatly enhances your physical well-being. Your entire body gets a workout when you spend many hours on the path, climbing over boulders, rock hopping, and climbing slopes. This enhances your strength, agility, and cardiovascular fitness.
2. Reduces stress
Going on an active vacation or trekking in the outdoors is a great way to get your head clear of the stress and problems that come with living at home.
3. Increases cardiovascular strength;
Because the heart must work harder to meet the oxygen demands of trekking, regular trekking can improve cardiovascular strength. By increasing blood flow to the brain and muscles, this enhances the health of the respiratory and circulatory systems.
4. Social advantages;

Trekking health impacts
Engaging in trekking with others might result in friendships that last a lifetime. Trekking allows you to spend time with other group members, inspiring and supporting one another to keep going and persist through difficult situations.
5. Softer skill development;

Trekking has advantages for more than only your physical, mental, or social well-being; it may also, and this may surprise you, improve your managerial abilities! As you plan your adventure, you might find yourself establishing goals, organizing your schedule, learning how to adjust to change, building your mental toughness, and setting fitness targets.
6. Inner Cleanse;

Trekking health impacts
While trekking, you’ll consume a lot of water and whole foods, but you’re much less likely to drink coffee or alcohol. A week or more of eating only healthy things has favorable effects on one’s inner wellness. Your skin will feel rejuvenated, you will feel great, and when your body goes natural, you will feel empowered.
7. Cultural comprehension;
in which going to the forest is equivalent to going to the home of wildlife! Among the many delights of a walk are wildlife and bird viewing, which can provide a unique perspective on a destination’s ecosystems.
Summary
Trekking provides a number of mental and physical benefits, including quiet moments for reflection, breathtaking views, and challenging oneself in the great outdoors. Here are some benefits of hiking and athletic vacations.
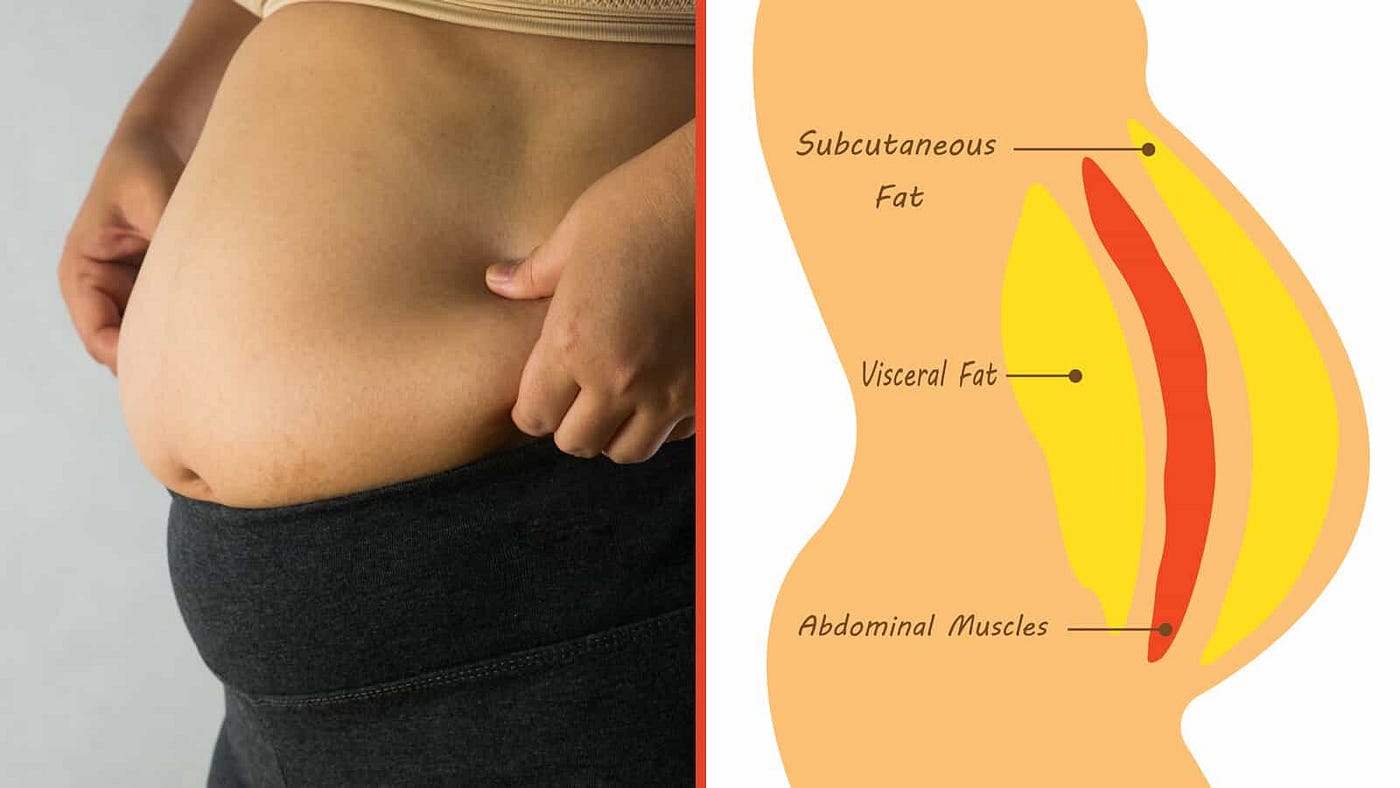
Causes of fat belly. Abdominal obesity, sometimes known as “fat belly,” is the result of excessive visceral fat surrounding internal organs, which is frequently brought on by sedentary lifestyles, high calorie meals, aging, or heredity. Increased risk for conditions like diabetes and heart disease is indicated by a waist circumference of more than 35 inches for women and 40 inches for men.
CAUSES OF BELLY FAT
The main causes of belly fat are a sedentary lifestyle, a high intake of processed foods and sugar, and an energy imbalance—consuming more calories than burnt. High levels of cortisol (stress), hormonal changes (such as decreased estrogen during menopause), smoking, poor sleep, and heredity are important contributing factors.
Types;
Body fat around the abdomen is referred to as belly fat. Two kinds of abdominal fat exist:
1. Also, Visceral: This fat envelops the body’s organs.
2. However, Subcutaneous: This type of fat is found beneath the skin.
Causes
Bad eating habits;

Meanwhile, A person may gain weight and increase their storage of fat if they consume more calories than they burn off over time Therefore, diets that are heavy in foods that are high in calories but low in nutrients can raise a person’s risk of gaining weight and developing belly fat. Not exercising Physical activity
energy out equation;
However, This is the second important component of energy. Lack of exercise is one of the main risk factors for obesity and rising body fat percentages. It can also be more difficult for someone to begin exercising if they are overweight and physically inactive.
The genetics Evidence;

Also, this suggests that a person’s genes may influence their likelihood of developing obesity. Researchers believe genes can affect metabolism, behavior, and the likelihood of obesity.
Not getting enough sleep;
However, Shorter average sleep durations have been associated with higher visceral body fat, according to research. An increase in food intake is associated with short sleep periods, which may contribute to the formation of belly fat.
Smoking;

CAUSES OF BELLY FAT
Also, studies reveal that smokers tend to have larger amounts of visceral abdominal fat than nonsmokers, even when there is an overall tendency toward decreased body fat. How to reduce body fat
Making dietary improvements;
Meanwhile, In addition to helping someone lose weight, a balanced, healthful diet is likely to improve their general well-being.
Cutting back on alcohol intake;

CAUSES OF BELLY FAT
However, Alcohol use can be tracked by someone who wants to reduce excess belly fat. Drinks with alcohol frequently have added sugar, which can cause weight gain.
Summary
Stress, poor diet, and inactivity are just a few of the many factors that contribute to belly obesity. Making dietary changes, increasing physical activity, and implementing other lifestyle changes can all help people lose belly fat.
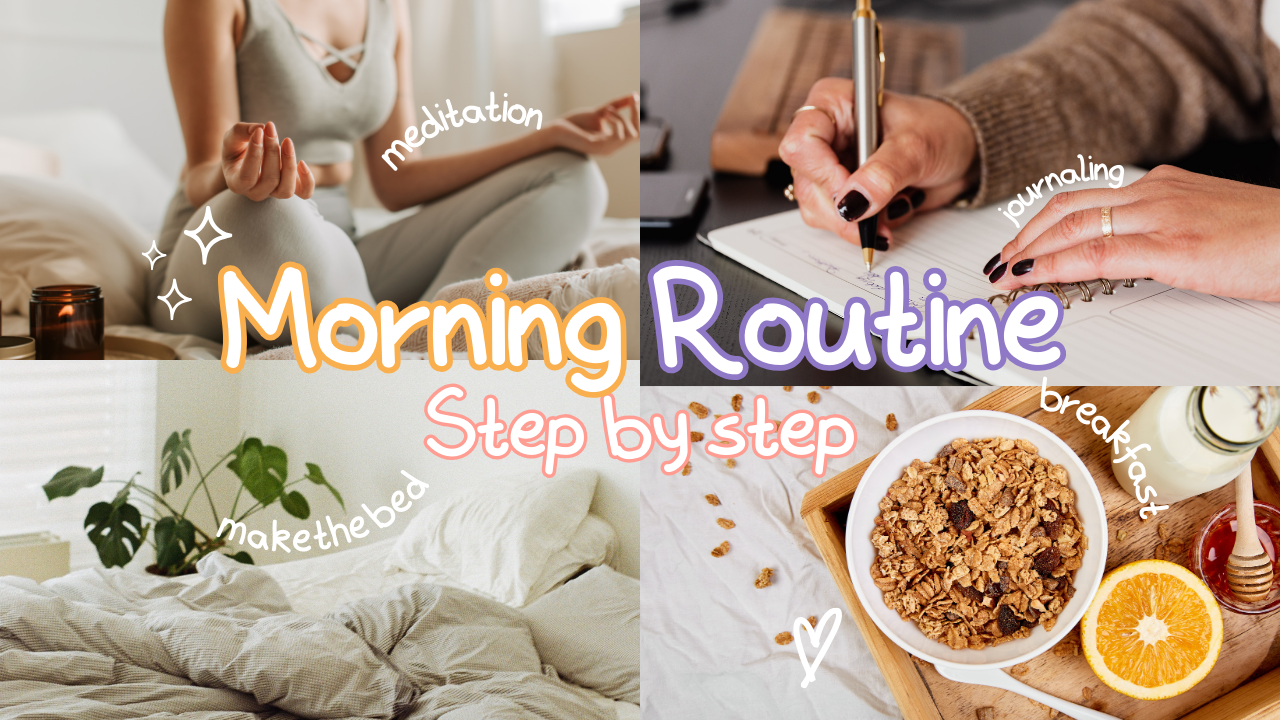
Morning routine guidelines. When you get up early, you can smell coffee. You decide to work out for a little while at home in the morning before making breakfast and starting your workday because you have some free time. You may create a morning routine that works for you in a number of ways, from avoiding social media to drinking water and listening to a podcast.
MORNING ROUTINE GUIDELINES
By adopting persistent, deliberate practices, an organized morning routine enhances health, mental clarity, and productivity. Avoiding the snooze button, staying hydrated right away, getting 5 to 20 minutes of natural light, moving about, and postponing phone use are important rules. Establishing a regular routine, especially on the weekends, aids in controlling the body’s internal clock
Tips;
1. Wind down at the end of the day: steer clear of demanding pursuits like hard lifting and exercise in the latter part of the day. Alternatively, read a book to make yourself drowsy or relax with a warm bath.
2. Turn off the TV at a predetermined time: establish a time for turning off the TV and other devices. Instead, settle in with a hot cup of decaf tea on the couch or in bed.

Morning routine guidelines
3. Appropriately set your alarm clock: to guarantee that you get enough sleep, set your alarm for eight hours or longer after bed.
4. counting to five is a simple method to use when getting out of bed feels hard. Get out of bed and start your day after five o’clock.
5. Having slippers beside your bed: on chilly mornings, slippers can help you get out of bed a little more easily. Keep them beside your nightstand so you may always be near them.

Morning routine guidelines
6. Presetting your coffee maker: the scent of coffee may be enough to pull you out of bed if you consume it. Your coffee maker can be programmed to brew coffee for you when you wake up.
7. Sip water from a glass. The secret to your health and well-being is staying hydrated. An excellent morning routine must include drinking water since when you’re feeling good, you’re more focused and, consequently, more productive.

Morning routine guidelines
8. Sip on some tea or coffee. Maintaining hydration is essential to a healthy routine, but you should also enjoy it. In addition to making waking up easier, this will make your habit more likely to persist.
9. Make a nutritious morning meal. Make a nutritious breakfast with items that promote well-being to boost your motivation and kickstart your day.
Summary
Avoiding the snooze button, drinking water, getting some sunlight, moving around, and eating a nutritious breakfast are all important components of a great morning routine, which increases energy, attention, and mental clarity. Setting daily goals, stretching lightly, and staying hydrated can all be part of a straightforward, efficient routine.

Lyrics for fresh wind

Eggs consumption and health conditions

RED URINE CAUSES

A Step-by-Step Guide to Deleting Reels on Instagram

A Comprehensive Guide to Setting Up a YouTube Premiere

How to Create a WhatsApp Group
-

 Flight4 weeks ago
Plane Tickets Relevance
-

 Social media2 weeks ago
How to Delete Reels on IG
-

 Flight4 weeks ago
Airline Travellers and Baggage Allowances
-

 Social media1 week ago
Tips for likes and Followers on Facebook
-

 Social media1 week ago
Guidelines for Creating a Facebook Page
-

 Social media1 week ago
Tips on how to Archive Instagram Post
Pingback: How to Do Pushups Correctly - SimplExplainer
Pingback: Tips for Pushups - SimplExplainer