
Photography
Professional Video Tools
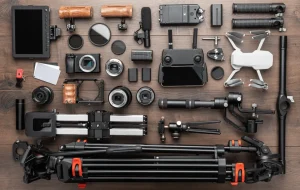
Professional video tools. The best video software for creating high-quality videos is Ap Professional-grade editing programs like Adobe Premiere Pro, Final Cut Pro, and DaVinci Resolve are examples of the technology and software used to produce high-quality video material. In order to create captivating audiovisual experiences for movies, TV shows, and other media, these tools offer sophisticated features for cutting, color grading, visual effects, and sound mixing.
PROFESSIONAL VIDEO TOOLS
Additional categories include text-to-video tools, AI-powered content generators for digital avatars, and collaborative platforms that facilitate effective teamwork. Creating a professional video requires a combination of technical expertise, creativity, and the right tools. Here are some essential tools needed for making a professional video:
1. Camera

A high-quality camera is essential for capturing crisp, clear footage. Whether it’s a DSLR, mirrorless camera, or cinema camera, choose one that meets your needs in terms of resolution, frame rate, and low-light performance.
2. Lenses
Invest in a selection of lenses to achieve different focal lengths and perspectives. Wide-angle lenses are great for capturing expansive scenes, while telephoto lenses are ideal for close-ups and detail shots.
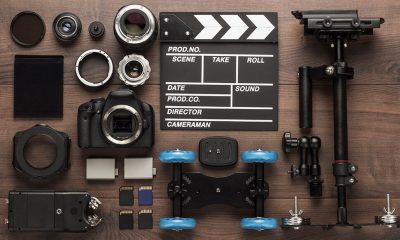
3. Tripod

A sturdy tripod is essential for keeping your camera stable and ensuring smooth, shake-free shots. Look for one with adjustable legs and a fluid head for precise positioning and panning.
4. Microphone
Good audio is just as important as good video quality. Invest in a high-quality microphone to capture clear, professional sound. Options include shotgun microphones for on-camera use, lavalier microphones for interviews, and boom microphones for capturing dialogue on set.
5. Lighting
![]()
Proper lighting can make or break a video. Invest in a lighting kit with adjustable lights, softboxes, and diffusers to control the intensity and direction of light. Consider using natural light or LED panels for a soft, flattering look.
6. Editing Software
Choose a professional video editing software like Adobe Premiere Pro, Final Cut Pro, or DaVinci Resolve to edit and enhance your footage. These programs offer a wide range of editing tools, effects, and color grading capabilities to bring your vision to life.
7. Computer

A powerful computer with ample processing power and storage is essential for editing high-resolution video files. Make sure your computer meets the system requirements of your chosen editing software to ensure smooth performance.
8. External Hard Drive
Invest in an external hard drive to store and backup your video files. This will not only free up space on your computer but also provide a safe and secure way to archive your footage.
9. Graphics and Animation Software
Depending on your project, you may need graphics and animation software to create titles, lower thirds, and visual effects. Adobe After Effects is a popular choice for motion graphics and compositing.
10. Color Calibration Tools

Ensure color accuracy by using color calibration tools to calibrate your monitor and maintain consistent color throughout the editing process. This will help ensure that your video looks its best across different devices and platforms.
Summary
By investing in these essential tools and honing your skills, you’ll be well-equipped to create professional-quality videos that captivate and engage your audience.


Ring light usage. By evenly distributing light around the subject’s face, a ring lamp creates illumination that is both pleasing and shadow-free. It reduces wrinkles and imperfections, distinguishes the subject from the background, and produces an eye-catching, eye-catching circular reflection.
RING LIGHT USAGE
For uniform, shadow-free illumination, ring lights are crucial circular lighting instruments used by professionals, photographers, and artists. Standard 12–14″ USB-powered models typically cost ₦15,000 in Nigeria, while large 18″ RGB models with stands and batteries cost more than ₦45,000.
HOW TO USE A RING LIGHT

A ring light is a simple, relatively inexpensive way to get started with studio photography – and with the right approach, it can look really, really good. Here are just a few photos I’ve taken using a ring light:
But how can you use a ring light to create portraits like these? And furthermore, how can you go beyond standard ring light photography to capture photos that stand out from the crowd?
What is a ring light?

A ring light is a circular, ring-shaped light designed to be placed directly in front of a subject. You then position your camera in the center of the ring and capture your photos.
Here is a standard external ring light, photographed from the back (left) and front (right):
There are two types of rings lights you should be familiar with:
Off-camera ring lights, which attach to an external light stand, offer a wide band of illumination, and include a large aperture into which a camera can fit.
TWO EXAMPLES OF RING LIGHT;
Smartphone ring lights

Ring light usage
These compact ring lights are designed to be attached to smartphones so they are ideal if you enjoy taking photos on the go with your phone. They are typically lightweight and portable, making them convenient for spontaneous content creation
Macro ring lights;
Ring light usage
These are specialised ring lights designed for macro photography. They attach to the front of macro lenses and provide close-up illumination for small subjects. Hard light is poor for macro photography so ring lights are essential for reducing shadows and emiting a soft light perfect for capturing intricate details.
Summary
A ring light is a circular lighting device used to directly illuminate a subject with uniform, shadowless light. Makeup applications, portrait photography, multimedia production, and live broadcasting are among its common uses.

Video editing and photography comparison. Photography and video editing both have their own special difficulties and benefits. The intricacy and technical demands of video editing may make it more difficult for some people, while the artistic vision and accuracy needed for photography may be difficult for others. In the end, each discipline’s level of difficulty varies depending on a person’s strengths, interests, and experience. Both offer chances for artistic expression and personal development, regardless of whether you’re inclined to the timeless beauty of photography or the dynamic storytelling of video production.
VIDEO EDITING AND PHOTOGRAPHY COMPARISON
Comparing the difficulty of video editing and photography is subjective and depends on various factors, including individual skills, experience, and preferences. Both disciplines require creativity, technical knowledge, and attention to detail, but they involve different processes and challenges.
Video Editing:

Video editing involves assembling and manipulating video footage to create a cohesive and compelling narrative. It requires proficiency in editing software, understanding of pacing, rhythm, and storytelling techniques, and the ability to synchronize audio and visual elements effectively. Video editing can be complex and time-consuming, especially for projects with multiple scenes, special effects, and intricate timelines. Additionally, video making often involves working with large files and managing storage space, which can pose logistical challenges.
Photography:

Video editing and photography comparison
Photography, on the other hand, involves capturing still images that convey a message, evoke emotions, or tell a story. While photography requires technical knowledge of camera settings, composition, and lighting, it also relies heavily on creativity and artistic vision. Photographers must have a keen eye for detail, patience to wait for the perfect moment, and the ability to work with natural or artificial light to create visually stunning images. Post-processing techniques, such as editing in software like Adobe Lightroom or Photoshop, are also integral to the photography process and require skill and precision.
Summary
While both video editing and photography are potent visual media, photography is mainly static and spatial, with an emphasis on capturing “decisive moments.” Since video editing is sequential and temporal, you must create pacing, rhythm, and continuity over a timeline.
Photography and camera exploration. A wide variety of camera types are available in the photography industry to accommodate every taste, ability level, and style. even if you work as a professional photographer. Whether you’re an aficionado or just a casual shooter, there is a camera out there to help you express your creativity and capture your vision. From small point-and-shoot cameras and film cameras to DSLRs and mirrorless cameras. To encourage photographers to use their lenses to explore the world, each kind offers a unique combination of characteristics and capabilities.
PHOTOGRAPHY AND CAMERA EXPLORATION
Photography has evolved significantly over the years. With advancements in technology leading to a wide range of camera types suited to various preferences, skill levels, and photographic needs. From compact point-and-shoot cameras to professional-grade DSLRs and mirrorless cameras, each type offers unique features and capabilities.
1. Digital Single-Lens Reflex (DSLR) Cameras;
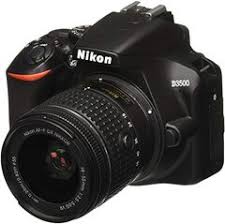
– DSLR cameras are popular among professional photographers and enthusiasts for their versatility, excellent image quality, and interchangeable lens system.
– They feature a mirror mechanism that reflects light from the lens to an optical viewfinder. Allowing photographers to preview the scene directly through the lens.
– DSLRs offer manual control over exposure settings, autofocus capabilities, and compatibility with a wide range of lenses. Making them ideal for various genres of photography, including portraits, landscapes, and sports.
2. Mirrorless Cameras for photography;
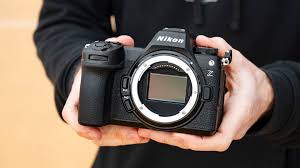
– Mirrorless cameras, as the name suggests, lack the mirror mechanism found in DSLRs, resulting in a more compact and lightweight design.
– Instead of an optical viewfinder, mirrorless cameras use electronic viewfinders (EVFs) or rear LCD screens to display a digital preview of the scene.
– Mirrorless cameras offer similar image quality and performance to DSLRs but often feature advanced autofocus systems, 4K video capabilities, and in-body image stabilization (IBIS).
3. Compact Point-and-Shoot Cameras for photography;

Photography and camera exploration
– Compact cameras are small, portable, and easy to use, making them popular among casual photographers and travelers.
– They typically feature fixed lenses with zoom capabilities and automatic exposure modes, making them suitable for everyday snapshots and casual photography.
– While compact cameras may not offer the same level of control or image quality as DSLRs or mirrorless cameras, they are convenient for capturing spontaneous moments on the go.
4. Bridge Cameras;
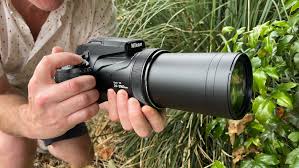
– Bridge cameras bridge the gap between compact point-and-shoot cameras and interchangeable lens systems, offering a versatile all-in-one solution.
– They feature fixed, long-range zoom lenses with a wide focal range, allowing photographers to capture a variety of subjects without changing lenses.
– Bridge cameras often include advanced features such as manual exposure modes, electronic viewfinders, and image stabilization, making them suitable for amateur photographers looking for more control and versatility.
5. Medium Format Cameras;
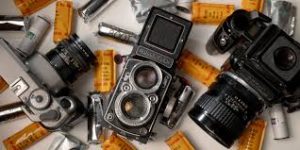
– Medium format cameras use larger image sensors than traditional DSLRs and mirrorless cameras, resulting in higher resolution and superior image quality.
– They are favored by professional photographers for commercial, studio, and landscape photography, where detail and dynamic range are critical.
– Medium format cameras are available in both digital and film formats, with digital medium format cameras offering features such as high-resolution sensors, interchangeable digital backs, and advanced autofocus systems.
6. Action Cameras;
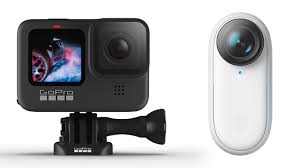
Photography and camera exploration
– Action cameras are designed for capturing fast-paced action and extreme sports in challenging environments.
– They are compact, rugged, and waterproof, making them ideal for mounting on helmets, bikes, or vehicles to capture immersive POV (point-of-view) footage.
Summary
Through a variety of viewpoints and technical experimentation, photographers are able to record, examine, and interpret the world, making photography an essential instrument for exploration. Walking, observing, and employing strategies like slow-shutter panning, low-angle shots, and silhouette creation are important ways to discover new compositions.
Foods Rich in Zinc

Appetite Enhancement Tips

Nutritional Value of Rolled Oats

A Step-by-Step Guide to Deleting Reels on Instagram

A Comprehensive Guide to Setting Up a YouTube Premiere

How to Create a WhatsApp Group
-

 Health4 weeks ago
Harmful side effects of earphones
-

 Self esteem4 weeks ago
Tips for self esteem improvement
-

 Exercise4 weeks ago
Regular physical activities importance
-

 Business3 weeks ago
Local business promotion
-

 Health4 weeks ago
Headphones safety tips
-

 Entertainment3 weeks ago
Women and British dance music