Health
How to Use a Quick HIV Test Strip

Quick HIV test strips provide a fast and convenient way to screen for HIV (Human Immunodeficiency Virus) in various settings, including at home. These tests typically detect antibodies to HIV in your blood or saliva. Here’s a step-by-step guide on how to use a quick HIV test strip:
Step 1: Preparation
1. Read Instructions: Thoroughly read the instructions provided with the test kit to understand the specific procedures and any variations between brands.
2. Check Expiry Date: Ensure the test strip is not expired, as using an expired test may yield inaccurate results.
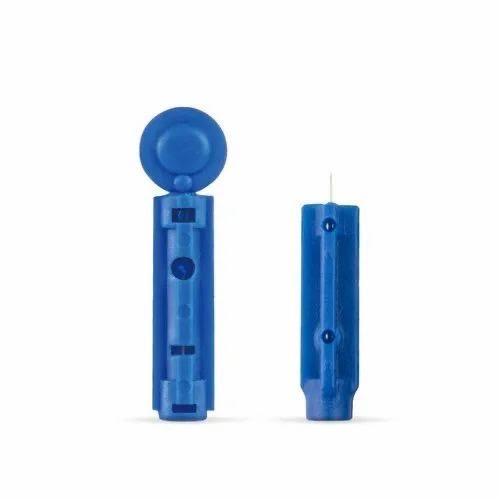
3. Gather Supplies: Have the test kit ready, which typically includes the test strip, a lancet or swab (depending on whether it’s a blood or saliva test), a dropper, a buffer solution, and a timer.
Step 2: Sample Collection
For a Blood Test:
1. Wash Hands: Clean your hands thoroughly with soap and water to maintain hygiene.
2. Prepare Lancet: Open the lancet provided in the kit.
3. Puncture Finger: Use the lancet to prick the side of your fingertip to get a small blood sample. 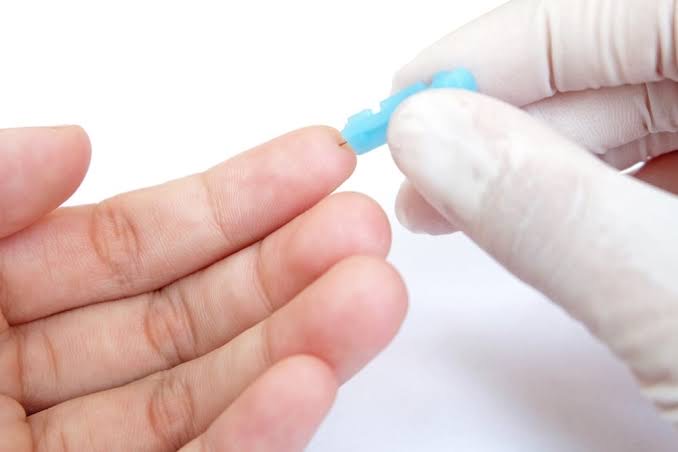
4. Collect Blood: Use the dropper provided to collect the blood sample. 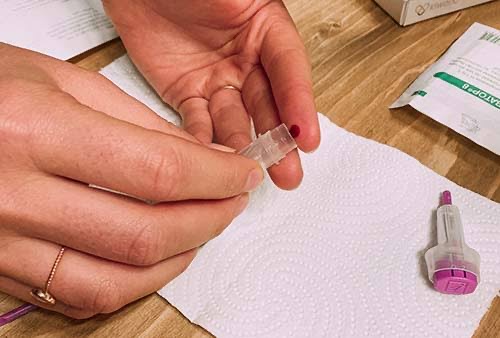
For a Saliva Test:
1. Avoid Eating or Drinking: Do not eat, drink, or use oral care products at least 30 minutes before the test.
2. Swab Gums: Use the provided swab to gently rub along your upper and lower gums to collect a saliva sample. 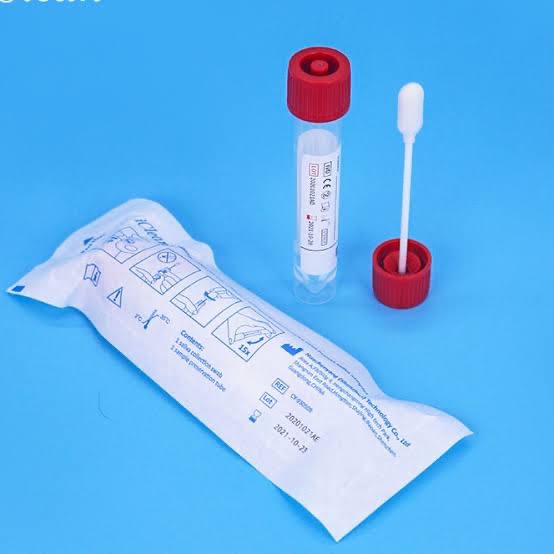
Step 3: Applying the Sample
1. Prepare Test Strip: Place the test strip on a flat surface.
2. Add Sample to Test Strip:
• Blood Sample: Add the collected blood to the designated area on the test strip, usually with a dropper. Follow up with the buffer solution as instructed.
• Saliva Sample: Insert the swab into the test device as directed.
Step 4: Waiting for Results
1. Set Timer: Start the timer as indicated in the instructions, typically for about 15 to 20 minutes.
2. Wait: Allow the test to develop without moving or disturbing it during the waiting period.
Step 5: Interpreting the Results

1. Control Line: Ensure a control line appears on the test strip to confirm the test is valid.
2. Test Line: Check for a second line in the test area:
– Positive Result: Two lines (control and test) indicate a positive result, suggesting HIV antibodies are present.
– Negative Result: Only one line (control) indicates a negative result, suggesting no HIV antibodies were detected.
– Invalid Result: If no lines appear or only the test line appears, the test may be invalid, and you should repeat it with a new kit.
Step 6: Post-Test Procedures
1. Record Results: Write down the date and results for your records.
2. Dispose of Materials: Safely dispose of the test kit components as instructed.
3. Follow Up: If the result is positive, contact a healthcare provider for confirmatory testing and further guidance. If the result is negative but you believe you may have been exposed to HIV recently, consult a healthcare provider about retesting or other steps.
Using a quick HIV test strip is a straightforward process that can provide rapid results in the privacy of your home. Following these steps carefully will help ensure accurate results and appropriate follow-up actions.
Why feel cold always. Everybody’s body responds to cold in a somewhat different way, and some people experience cold more frequently than others. We refer to this as cold intolerance. There are several possible causes of feeling chilly all the time, and these causes may include a variety of symptoms. Certain symptoms may seem like insignificant irritations, but others may indicate a more serious underlying illness. If you feel cold all the time despite covering up and taking other steps to stay warm, you could have an underlying ailment that’s generating this discomfort.
WHY FEEL COLD ALWAYS
Many people have the experience of being cold when everyone around them are warm. That isn’t always a bad thing, but i would advise you see a doctor. There are a lot of potential causes for feeling chilly. As an illustration :
1. Low body weight;

Muscle mass and fat assist the body stay warm. Heat is produced by moving muscles and fat insulates. You may be more sensitive to chilly temperatures if you have recently dropped a large amount of weight or if you have always been slender.
2. Skipping meals;
Some individuals become chilled when they skip meals or eat insufficiently. When this occurs, the body creates less heat because it automatically conserves energy.
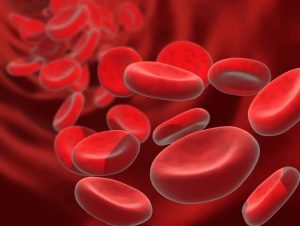
3. Low red blood cell count;
Why feel cold always
Although its uncommon for anemia to produce a really frigid feeling, it might cause a person to feel cold. An anemia test can be performed.
4. Raynaud’s phenomenon;
In order to keep the internal organs warm, our body’s natural reaction to cold weather is to draw blood away from the skin. That instinctive reaction is severe in those who have Raynaud’s phenomenon. Blood flow to the skin is substantially reduced as a result of the microscopic blood vessels becoming excessively restricted; this usually affects the fingers and toes. For a brief while, one or more digits become blue or white. Individuals who have this illness typically react considerably more strongly to even little temperature dips.
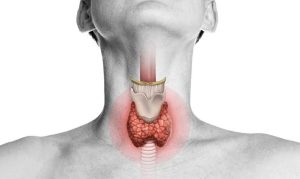
5. An under active thyroid;
Why feel cold always
Being chilly is a typical sign. If you have this issue, a straightforward blood test for thyroid stimulating hormone ( TSH) can identify it.
Summary
It’s normal to be more sensitive to chilly temperatures. You might just have a natural tendency to be colder than others.However, you may have a medical problem that requires care if you’ve been feeling colder than normal for a long time or if you’re cold even in warm weather.
Ulcer causes and types. An ulcer is a painful sore that heals slowly and occasionally comes back. Ulcers are not unusual. Their underlying reasons usually determine why they manifest and the symptoms that accompany them.
Ulcers can appear anywhere in or on your body, from the lining in your stomach to the outer layer of your skin.
Ulcers can occasionally go away on their own. In other cases, they need medical care to avoid major issues.
ULCER CAUSES AND TYPES
An ulcer is an open sore on the lining of the stomach, small intestine, or esophagus (peptic ulcer), or a rupture in the skin or mucous membrane.Long-term use of NSAID painkillers and an H. pylori bacterial infection are the two most frequent culprits.
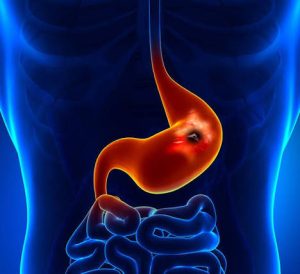
What Are Stomach Ulcers?
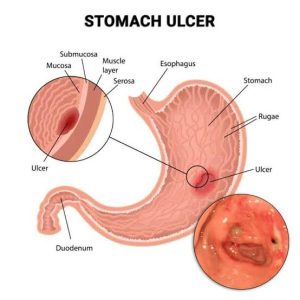
Peptic ulcers, another name for ulcers, are open sores in the upper portion of the small intestine or stomach lining. The mucus lining the inside of your digestive tract becomes eroded by stomach acid, resulting in the formation of an ulcer.
Types of peptic ulcers
1. Gastric ulcer: It happens when a sore develops in the stomach lining.
2. Duodenal ulcer: This is the result of an upper intestinal sore developing.
3. Esophageal ulcer: This is the process by which a sore develops in the lining of your esophagus, the tube that travels from your throat to your stomach to carry food and liquids.
Causes of Stomach Ulcers;

Prior until the mid 1980s, the general consensus was the ulcers were caused by stress, a genetic predisposition to increased acid secretion, and unhealthy lifestyle choices ( such as bingeing on rich, fatty foods, alcohol, caffeine and smoke). It was thought that these conditions would cause an accumulation of stomach acids which could damage the lining that protects the stomach, duodenum, or esophagus.
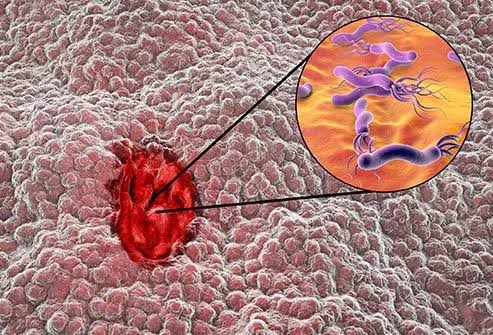
Although excessive release of acid undoubtedly contributes to the formation of ulcers, a more recent idea suggests that bacterial infection is the main cause of peptic ulcers. since the mid 1980s, research has indicated over 80% of stomach ulcers and over 90% of duodenal ulcers are caused by the bacteria Helicobacter pylori, or H. pylori more recent data, though, shows that those percentages are falling.
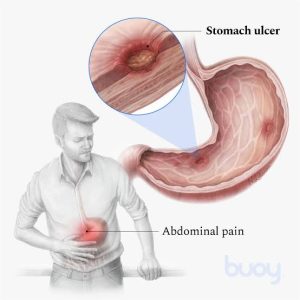
Stomach Ulcer Symptoms;
Ulcer causes and types
Most likely, you’ll have discomfort or scorching ache between your breastbone and belly button. When you’re empty handed, such at night or in between meals, you can sense it more than usual. If you take an antacid, the pain can go away for a short while, but it might come back.
The discomfort may come and go for several days or weeks, lasting a few minutes or several hours.
Other symptoms may include:
Ulcer causes and types
1. Easily feeling satisfied
2. Pain preventing you from wanting to eat reflux
3. Acid reflux chest ache weary
4. Feeling bloated Burping
5. Absence of hunger or reduction in weight emesis dark or bloody excrement
Summary
Certain ulcers, such as arterial ulcers, may not heal at all or may take months to heal. With the right care, some types, such as stomach or peptic ulcers, can recover in a month.

Stress reduction activities. I don’t know about you, but even in normal, non-chaotic situations, I can tell when I’m nervous because my digestion gets irregular, my shoulders tense and merge with my ears, and my boyfriend and kids report that I become a lot of fun to be around. Stress usually shows up as your body and brain inexplicably fighting what you’re trying to regulate, though everyone experiences it differently.
STRESS REDUCTION ACTIVITIES
Your body’s normal physical and mental response to difficulties, pressures, or unforeseen changes is stress. Short bursts of stress can help you avoid danger or fulfill deadlines, but long-term, mismanaged stress has a negative impact on your health.

If you feel nervous or that your heart is acing quicker than usual due to stress, short burst of activity, even if it’s just ten pushups or situps, or twenty jumping jacks, will activate several neurotransmitter, including dopamine, serotonin, and norepinephrine that enhance your mood and help cushion some of that anxiety and stress, the author says.
According to Kissen, returning to the present moment can be achieved by turning your attention from your thoughts to your senses—in this example, your touch sense. It helps you get back into your body, whether you’re popping bubble wrap, sorting your change jar to cash in at the bank, or using the littles to make homemade slime. Alternatively, try this short workout. “What is one thing you can taste, smell, touch, etc.?” is the question Kissen poses to the audience. “Using all of your senses is a grounded technique that works well.”

Stress reduction activities
You have the ability and willingness to release the tension in your muscles; nobody else can. ” it also helps you become more conscious of the tense areas in your body so you can intentionally relax those area.” Some good locations include your shoulders, the hinge of your jaw, the large ropy muscle in the front of your neck, and pressure points in the palm of your hand. If you are unable to visualize it, view some of Nagle’s amazing movies
Give yourself a specific job, like sorting your shoes or solving a word puzzle, if you are experiencing more mental than physical stress and feel like your mind is racing.

Stress reduction activities
Of course, turning on your favourite music and having a good time is a great way to release tension and is recommend workout According to Kissen, “it also stimulates the mind and inspire feelings of creativity ” You can destress by dancing to music that reminds you of joyful times and places in your past. Dancing can also bring back happy memories.
Take a bath and relax. “The entire sensory slowing down its like rebooting a computer that has all these windows open performing too much processing is what happens when the body temperature changes,” you can get unstuck by turning it off and starting again. Feel free to incorporate additional relaxing sensory stimulants, such as aromatherapy soap or soothing music.
Summary
Effective stress reduction necessitates both lasting lifestyle practices and quick physiological resets. You may swiftly restore equilibrium to your neurological system by incorporating these practical actions into your daily routine.

Agricultural sector of the economy

Agricultural forms

Tips for successful proofreading

A Step-by-Step Guide to Deleting Reels on Instagram

A Comprehensive Guide to Setting Up a YouTube Premiere