Home Sanitation
Understanding The Formation and Effective Removal Techniques of cobwebs

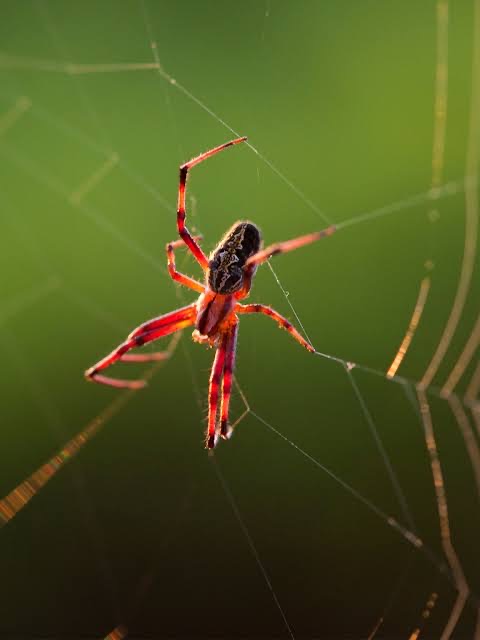
Cobwebs, those intricate networks of dusty strands spun by spiders, are a common sight in many homes and buildings. While they may seem harmless, cobwebs can accumulate quickly and detract from the cleanliness and appearance of a space. Understanding how cobwebs form and implementing effective removal techniques can help keep your environment free of these unsightly nuisances.
Formation of Cobwebs:
Cobwebs are created by spiders as they weave silk threads to construct their webs. Spiders use cobwebs to capture prey, provide shelter, and lay eggs. When spiders abandon or relocate their webs, the abandoned silk strands remain, forming what we commonly refer to as webs.
Webs are most commonly found in areas with low traffic and minimal disturbance, such as corners, ceilings, and behind furniture. They tend to accumulate dust and debris over time, giving them a grayish or dirty appearance.
Health and Hygiene Concerns:
While webs themselves are not inherently harmful, they can harbor dust, allergens, and even insects. For individuals with allergies or respiratory conditions, exposure to cobwebs and the debris they collect can exacerbate symptoms and contribute to poor indoor air quality.
Additionally, the presence of webs can give the impression of neglect or lack of cleanliness, impacting the overall hygiene and aesthetic appeal of a space.
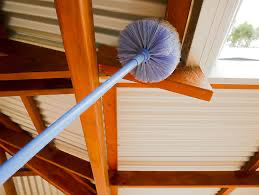
Effective Removal Techniques:
1. Dusting:
The most straightforward way to remove webs is to use a duster or a vacuum cleaner with a brush attachment to gently sweep away the webs. Start from the top of the room and work your way down to ensure that you capture all the webs.
2. Vacuuming:
For hard-to-reach areas such as high ceilings or tight corners, a vacuum cleaner can be an effective tool for removing webs. Use a handheld vacuum or a vacuum cleaner with an extension wand and brush attachment to carefully suction away the webs.
3. Wiping with a Cloth:
For areas with delicate surfaces or where vacuuming is not feasible, gently wipe away webs with a clean, damp cloth. Avoid using excessive force to prevent damaging the surface.
4. Preventive Measures:
To minimize the formation of webs in the future, regularly clean and dust your home or building, paying special attention to corners, ceilings, and other areas where cobwebs are likely to form. Seal cracks and crevices to prevent spiders from entering your space and building new webs.
5. Professional Cleaning:
In cases of severe cobweb infestation or if you’re unable to remove cobweb yourself, consider hiring a professional cleaning service. Professional cleaners have the expertise and tools necessary to effectively remove cobweb and restore cleanliness to your space.
Webs may be a common occurrence, but with the right approach, they can be effectively managed and removed. By understanding how cobwebs form and implementing proper cleaning techniques, you can keep your home or building free of these unsightly nuisances and maintain a clean and hygienic environment for yourself and others. Regular cleaning and preventive measures are key to keeping cobweb at bay and ensuring a comfortable and inviting space for all.

Indoor air quality is vital for a healthy home, but commercial air purifiers can be expensive. Fortunately, you can create DIY air purification solutions using simple, budget-friendly methods. Here are some effective DIY strategies to improve the air quality in your living space.
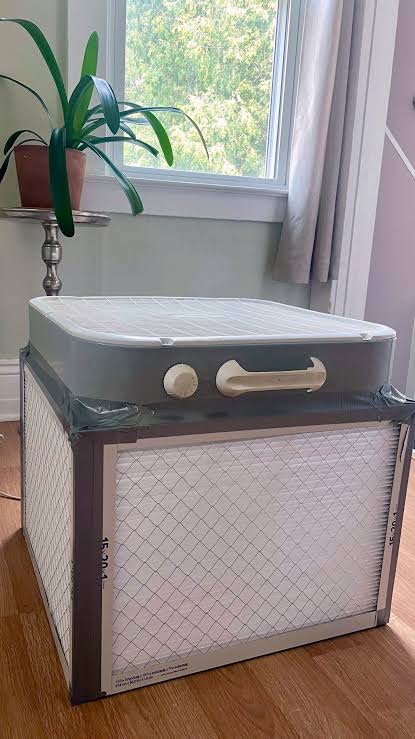
1. Create a DIY Air Purifier

A DIY air purifier can be made with just a few items:
– Materials Needed: A box fan, a high-efficiency particulate air (HEPA) filter, and duct tape.
– Steps:
1. Secure the HEPA filter to the back of the box fan using duct tape, ensuring the airflow goes through the filter.
2. Turn on the fan to circulate and clean the air.
This setup is affordable, effective, and easy to maintain by replacing the filter periodically.
2. Use Activated Charcoal

Activated charcoal is a natural air purifier that absorbs odors, toxins, and pollutants.
– Place small bags or containers of activated charcoal in rooms, closets, or near litter boxes to neutralize airborne impurities.
– Replace the charcoal every 2-3 months for maximum effectiveness.
3. Make a Natural Air Freshener
Synthetic air fresheners can release harmful chemicals into the air. Instead, make a natural alternative:
– Ingredients: Baking soda, essential oils, and a small jar.
– Steps: Fill the jar halfway with baking soda, add a few drops of essential oil, and poke holes in the lid. This mixture will absorb odors and release a pleasant scent.
4. Incorporate Houseplants

Certain houseplants, like snake plants, pothos, and spider plants, naturally filter toxins from the air.
– Group a few plants in different rooms to improve air circulation and purification.
– Ensure proper care to prevent mold or pests.
5. DIY Beeswax Candles
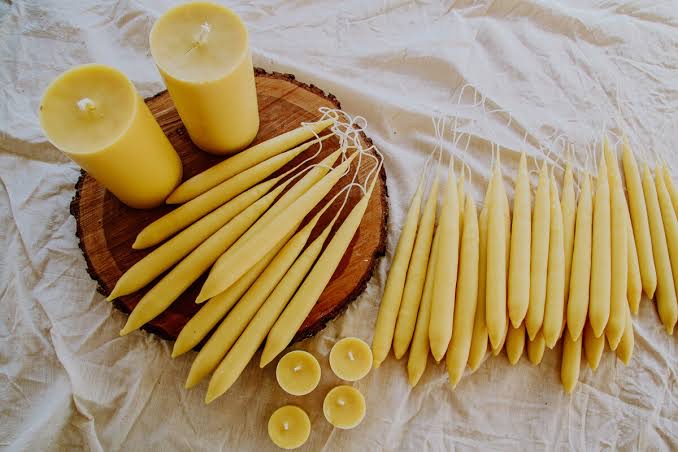
Beeswax candles can help clean the air by releasing negative ions that bind to pollutants.
– Create your own by melting beeswax and pouring it into jars with wicks.
– Burn them occasionally to purify the air and create a calming ambiance.
Conclusion
DIY air purification methods are cost-effective, sustainable, and easy to implement. Whether you’re building a homemade air purifier or using natural materials like charcoal and plants, these solutions will help you breathe cleaner, fresher air without breaking the bank.
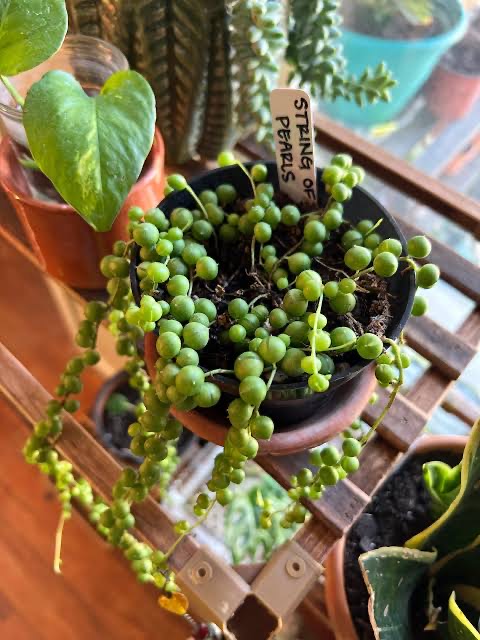
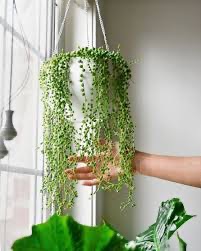
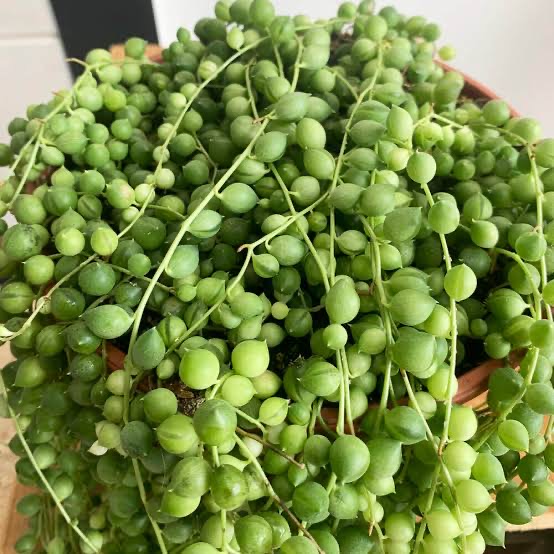
The String of Pearls (Senecio rowleyanus) is one of the most eye-catching succulents, loved for its delicate, cascading strands of bead-like leaves. Native to the arid regions of South Africa, this plant has become a popular choice for hanging planters and indoor décor. Its whimsical appearance and low-maintenance needs make it a favorite among both beginner and seasoned plant enthusiasts.
Characteristics of String of Pearls
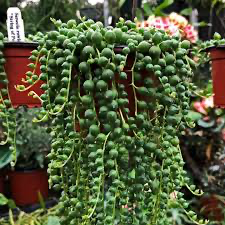
– Appearance: The plant’s slender stems are adorned with round, pea-like leaves, which resemble a string of pearls. This unique shape is an adaptation to store water and reduce evaporation.
– Size: The trailing stems can grow up to 2-3 feet long, making it perfect for hanging baskets or shelf displays.
– Flowers: In the right conditions, it blooms with small, white, cinnamon-scented flowers shaped like daisies.
Benefits of Growing String of Pearls
1. Aesthetic Appeal: Its cascading growth habit adds texture and charm to any indoor or outdoor space.
2. Low Maintenance: The String of Pearls is drought-tolerant and thrives with minimal care.
3. Space-Saving: Ideal for hanging planters, it adds greenery without occupying floor space.
How to Care for String of Pearls
1. Light Requirements
• Place in bright, indirect sunlight. Too much direct sunlight can scorch the leaves, while too little light may cause the strands to become sparse.
2. Watering
• Water sparingly, allowing the soil to dry out completely between waterings. Overwatering is the most common cause of problems. During winter, reduce watering even further.
3. Soil and Potting
• Use a well-draining succulent or cactus soil mix. A pot with drainage holes is essential to prevent water retention.
4. Temperature and Humidity
• String of Pearls thrives in temperatures between 65–80°F. It prefers dry air, so avoid placing it in overly humid areas.
5. Fertilization
• Feed with a diluted succulent fertilizer once a month during the growing season (spring and summer) for optimal growth.
Propagation
Propagating String of Pearls is simple and rewarding:
1. Take a 3-4 inch cutting from a healthy strand.
2. Allow the cut end to dry and callus for a day or two.
3. Lay the cutting on top of moist, well-draining soil and press lightly.
4. Keep the soil slightly moist until roots develop, which usually takes 2-3 weeks.
Common Problems and Solutions
– Shriveling Pearls: Indicates underwatering or overwatering. Adjust your watering schedule accordingly.
– Browning or Sunburn: Caused by excessive direct sunlight. Move the plant to a spot with filtered light.
– Sparse Growth: Often due to insufficient light. Place it closer to a bright window.
Decorating with String of Pearls
– Hanging Baskets: Showcase its cascading growth by placing it in a macramé hanger or decorative basket.
– Shelf Displays: Add it to high shelves for a natural, cascading effect.
– Mixed Planters: Pair it with other trailing succulents for a stunning arrangement.
Conclusion
The String of Pearls (Senecio rowleyanus) is a striking succulent that combines beauty and ease of care. Its unique, trailing form and spherical leaves make it a standout in any collection. With proper light, watering, and attention, this plant will thrive and add an elegant touch to your home or garden. Whether you’re a beginner or an experienced gardener, the String of Pearls is a must-have addition to your plant family.
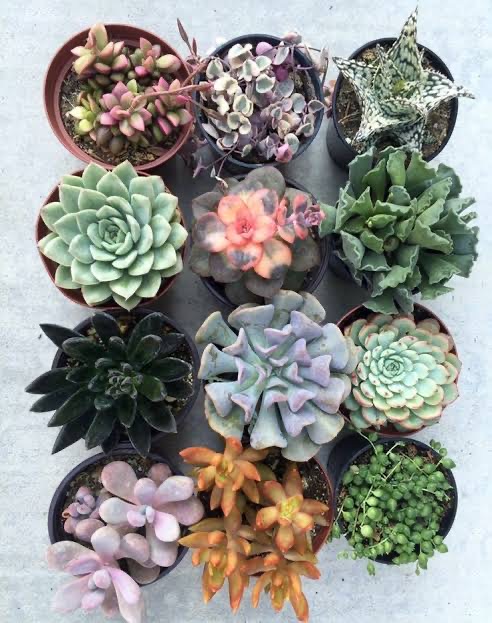
Succulent plants are some of the most captivating and versatile houseplants, celebrated for their thick, water-storing leaves and incredible variety of shapes, sizes, and colors. Native to arid regions across the globe, succulents have evolved to survive harsh conditions, making them hardy, low-maintenance plants perfect for both beginners and seasoned plant enthusiasts.
What Are Succulents?
Succulents are plants with specialized tissues that store water in their leaves, stems, or roots, allowing them to thrive in dry environments. This adaptation gives their leaves a plump, fleshy appearance. While succulents are often associated with deserts, they can be found in diverse habitats, including rainforests and high-altitude regions.
Popular Succulent Varieties
1. Aloe Vera
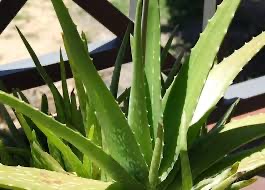
Known for its medicinal properties, aloe vera has thick, spiky leaves filled with soothing gel.
2. Echeveria
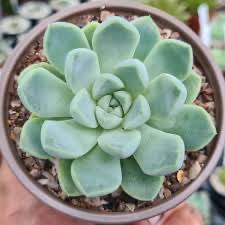
Recognized by its rosette-shaped leaves in various colors, Echeveria is a favorite among succulent enthusiasts.
3. Jade Plant (Crassula ovata)
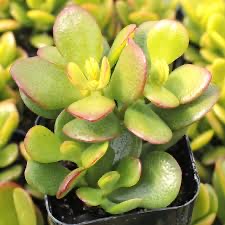
A symbol of prosperity, the jade plant has round, glossy green leaves.
4. Hens and Chicks (Sempervivum)

This variety produces rosette clusters, with “chicks” growing around the “hen.”
5. String of Pearls (Senecio rowleyanus)
A trailing succulent with bead-like leaves, perfect for hanging baskets.
6. Zebra Plant (Haworthia fasciata)
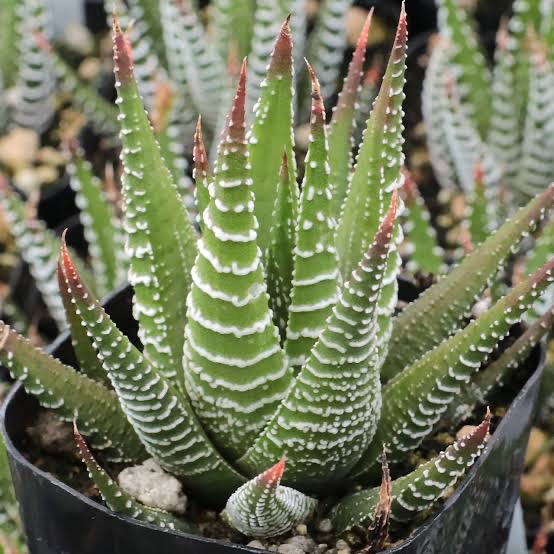
Features striking white stripes on dark green, spiky leaves.
Why Succulents Are So Popular
1. Low-Maintenance
Succulents require minimal care, thriving in neglectful conditions that might harm other plants.
2. Aesthetic Appeal
With their unique shapes and vibrant colors, succulents add charm to any space.
3. Air Purification
Some succulents, like aloe vera, improve air quality by removing toxins and releasing oxygen.
4. Compact Size
Many succulents stay small, making them ideal for desks, shelves, and small apartments.
5. Drought Tolerance
Their water-storing capabilities make succulents perfect for those who often forget to water their plants.
Caring for Succulent Plants
1. Light Requirements
– Succulents thrive in bright, indirect sunlight.
– Place them near a sunny window, ensuring they get 4–6 hours of light daily.
2. Watering
– Water deeply but infrequently. Allow the soil to dry out completely between waterings.
– Overwatering is the leading cause of succulent death.
3. Soil
Use a well-draining potting mix, such as a cactus or succulent blend, to prevent root rot.
4. Temperature and Humidity
•Succulents prefer warm temperatures (60–80°F or 15–27°C).
•They thrive in dry environments and don’t require high humidity.
5. Fertilization
Feed succulents with a diluted, balanced fertilizer during the growing season (spring and summer). Avoid fertilizing in winter.
Common Issues and Solutions
1. Overwatering
Symptoms: Mushy leaves or root rot.
Solution: Reduce watering and let the soil dry completely.
2. Underwatering
Symptoms: Wrinkled or shriveled leaves.
Solution: Increase watering, but avoid overcompensating.
3. Stretching (Etiolation)
Symptoms: Leggy growth and stretched stems.
Solution: Move the plant to a brighter location.
4. Pest Infestations
Symptoms: Mealybugs, spider mites, or aphids on leaves.
Solution: Use neem oil or insecticidal soap to treat pests.
Decorating with Succulents
Succulents are incredibly versatile for home decor:
– Use small succulents in terrariums or glass jars.
– Create succulent arrangements in decorative pots or bowls.
– Combine trailing varieties, like string of pearls, with upright ones for dynamic displays.
Conclusion
Succulent plants are more than just trendy houseplants; they’re a celebration of nature’s adaptability and beauty. Their low-maintenance nature, combined with their diverse forms and colors, makes them a joy to grow and care for. Whether you’re a seasoned gardener or just starting your plant journey, succulents are an excellent choice to brighten up your space with greenery and life.

Holidays and Vacations

Bilingual Education Impacts

Career Tips

A Step-by-Step Guide to Deleting Reels on Instagram

How to Create a WhatsApp Group