
accessories
Benefits of Rode Wireless Go

BENEFITS OF RODE WIRELESS GO
Benefits of Rode wireless Go. A well-liked wireless microphone system, the Rode Wireless Go is renowned for its portability, ease of use, and excellent audio quality. Whether you work as a vlogger, filmmaker, or content creator, this tutorial will show you how to connect and use your Rode Wireless Go system efficiently. With the Rode Wireless GO Wireless Microphone, a very small wireless microphone system that offers safe Series III 2.4 GHz transmission and simple operation for mobile journalists, videographers, and vloggers of all skill levels, you can confidently enter the world of wireless audio. The Rode Wireless GO Wireless Microphone can produce broadcast-quality audio up to 230 feet away, so you can concentrate on getting the picture.
BENEFITS OF RODE WIRELESS GO
The system is ready to go at the touch of a button. The following are required: a camera or recording device with a 3.5mm microphone input; a TRS cable (which comes with the Rode Wireless Go); a Lavalier microphone (if wanted); and a Rode Wireless Go transmitter (TX) or receiver (RX).
Step-by-Step Guide
1. Let the gadgets charge

Make sure the transmitter and receiver are fully charged before you start. Connect them to a power source using the USB-C cables that come with them. Usually, it takes two hours to fully charge.
2. Turn the gadgets on

To get the LED screens to light up, press and hold the power button on the transmitter (TX) and receiver (RX). The gadgets ought to associate with one another automatically after turning on. The receiver’s screen will display the connection status.
3. Attaching the Receiver to Your Recording Device or Camera
• Take the TRS cable that comes with it; it has two black rings on either end. • Insert one end of the TRS cable into the receiver’s “OUT” output jack.
Attach the TRS cable’s other end to your camera’s or recording device’s microphone input. A microphone icon is typically used to indicate this.
4. Put the transmitter in place
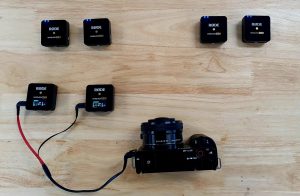
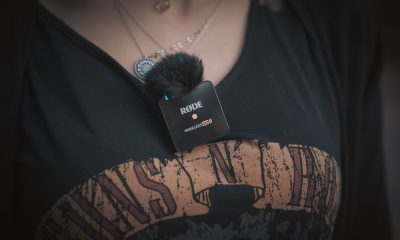
• To get the best audio recording when utilizing the transmitter’s built-in microphone, just attach it to your garment near your mouth. • If you would rather use an external lavalier microphone, connect it to the transmitter’s microphone input. After that, fasten the lavalier microphone to your garments and put the transmitter in a safe location, such as your waistline or pocket.
5. Modify Levels and Settings level, or your recording device’s input settings
The dB button on the receiver allows you to change the output gain. Based on your recording situation and device needs, you can choose between three levels: 0dB, -6dB, and -12dB. • Verify that the audio input levels on your camera or recording device are not peaking. To match the output from the Rode Wireless Go, you may need to change the input levels on your camera or recording device.
6. Record an Experiment

• To verify audio levels and quality, do a quick test recording. To make sure there is no distortion or extraneous noise, play it back. • Modify the position of the transmitter and the output of the receiver as needed.
7. Safe Connections
• Make sure every cable is firmly attached to avoid any unintentional disconnections when recording. • For best results, make sure the transmitter and receiver are in clear line of sight and within range (up to 70 meters or 230 feet). Advice for Maximum Efficiency Steer clear of obstacles: To reduce interference, keep the transmitter and receiver in a direct line of sight. Reduce Interference: Keep the gadgets away from big metal objects or other wireless devices that can interfere with the transmission.
8. Track Battery Levels

To prevent unplanned shutdowns during recording sessions, periodically check the LED screens’ battery condition. • Use Windshields: To cut down on wind noise, use microphone windshields when recording outside.
Summary
The Rode Wireless Go is easy to connect and enables wireless, high-quality audio recording. You can guarantee a flawless setup and produce recordings with professional-caliber audio by adhering to these guidelines. The Rode Wireless Go offers a dependable and easy-to use solution for filming interviews, vlogs, and other kinds of material.


Relevance of citrine. Named for its lemon-like hue, citrine is a common yellow to brownish-orange form of quartz that is used as a sturdy and reasonably priced gemstone in jewelry. It is prized for its bright appearance and alleged qualities of joy, prosperity, and energy. Since natural citrine is somewhat uncommon, the majority of commercially available citrine is produced by heat-treating amethyst or smokey quartz. In addition, it is the gem for the thirteenth anniversary and the birthstone for November.
RELEVANCE OF CITRINE
Known as the “merchant’s stone” or “success stone,” citrine is a yellow-to-orange quartz variation that is very relevant because to its alleged capacity to draw prosperity, wealth, and success. Its good energy, which is thought to drive out negativity, promote joy, and increase self-confidence, is the main reason it is prized in crystal healing.
Citrine, often called the “stone of success,” is a vibrant yellow gemstone known for its powerful energy and association with prosperity. Its radiant color reflects warmth and joy, making it a popular choice for those seeking positivity and motivation in their lives.
Citrine value;

Relevance of citrine
Citrine is an inexpensive yellow-to-golden gemstone that typically costs between $5 and $50 per carat. However, high-quality, large, intensely colored stones (such as Madeira or fire citrine) can fetch higher prices, sometimes surpassing $100 per carat or more. Color saturation (deep orange/reddish-brown being prized), clarity (eye-clean preferred), and cut all affect value. The majority of citrine on the market is heat-treated amethyst, which makes it easily accessible. However, natural, colorful stones are more costly and rare, providing “flash for the cash” in comparison to sapphires or diamonds.

Relevance of citrine
This stone has been valued throughout history for its ability to attract wealth and abundance. Often referred to as the “merchant’s stone,” citrine is believed to help manifest success in business, creativity, and personal endeavors. People who carry citrines or place it in their workspace hope to invite opportunities, boost confidence, and maintain a positive outlook.
Citrine’s exceptional relevance;

Relevance of citrine
Beyond its connection to financial success, citrine is also known for promoting emotional well-being. Its bright, sunny energy is said to dispel negativity, reduce stress, and encourage a cheerful, optimistic attitude. Whether you’re looking to enhance your career or bring more happiness into your life, citrine offers a powerful reminder to stay focused, confident, and positive. A symbol of joy, clarity, and success, citrines are not only beautiful but also a source of inspiration and motivation for those who believe in its energetic properties.
Summary
Citrine’s remarkable significance extends from its historical use as a “merchant’s stone” and protective amulet to its current status as a well-liked, long-lasting, and reasonably priced gemstone that represents wealth, happiness, and vitality. This type of quartz, which has warm, yellow-to-orange colors, is prized for both its visual attractiveness in jewelry and its alleged metaphysical qualities that increase self-assurance, inventiveness, and financial success.
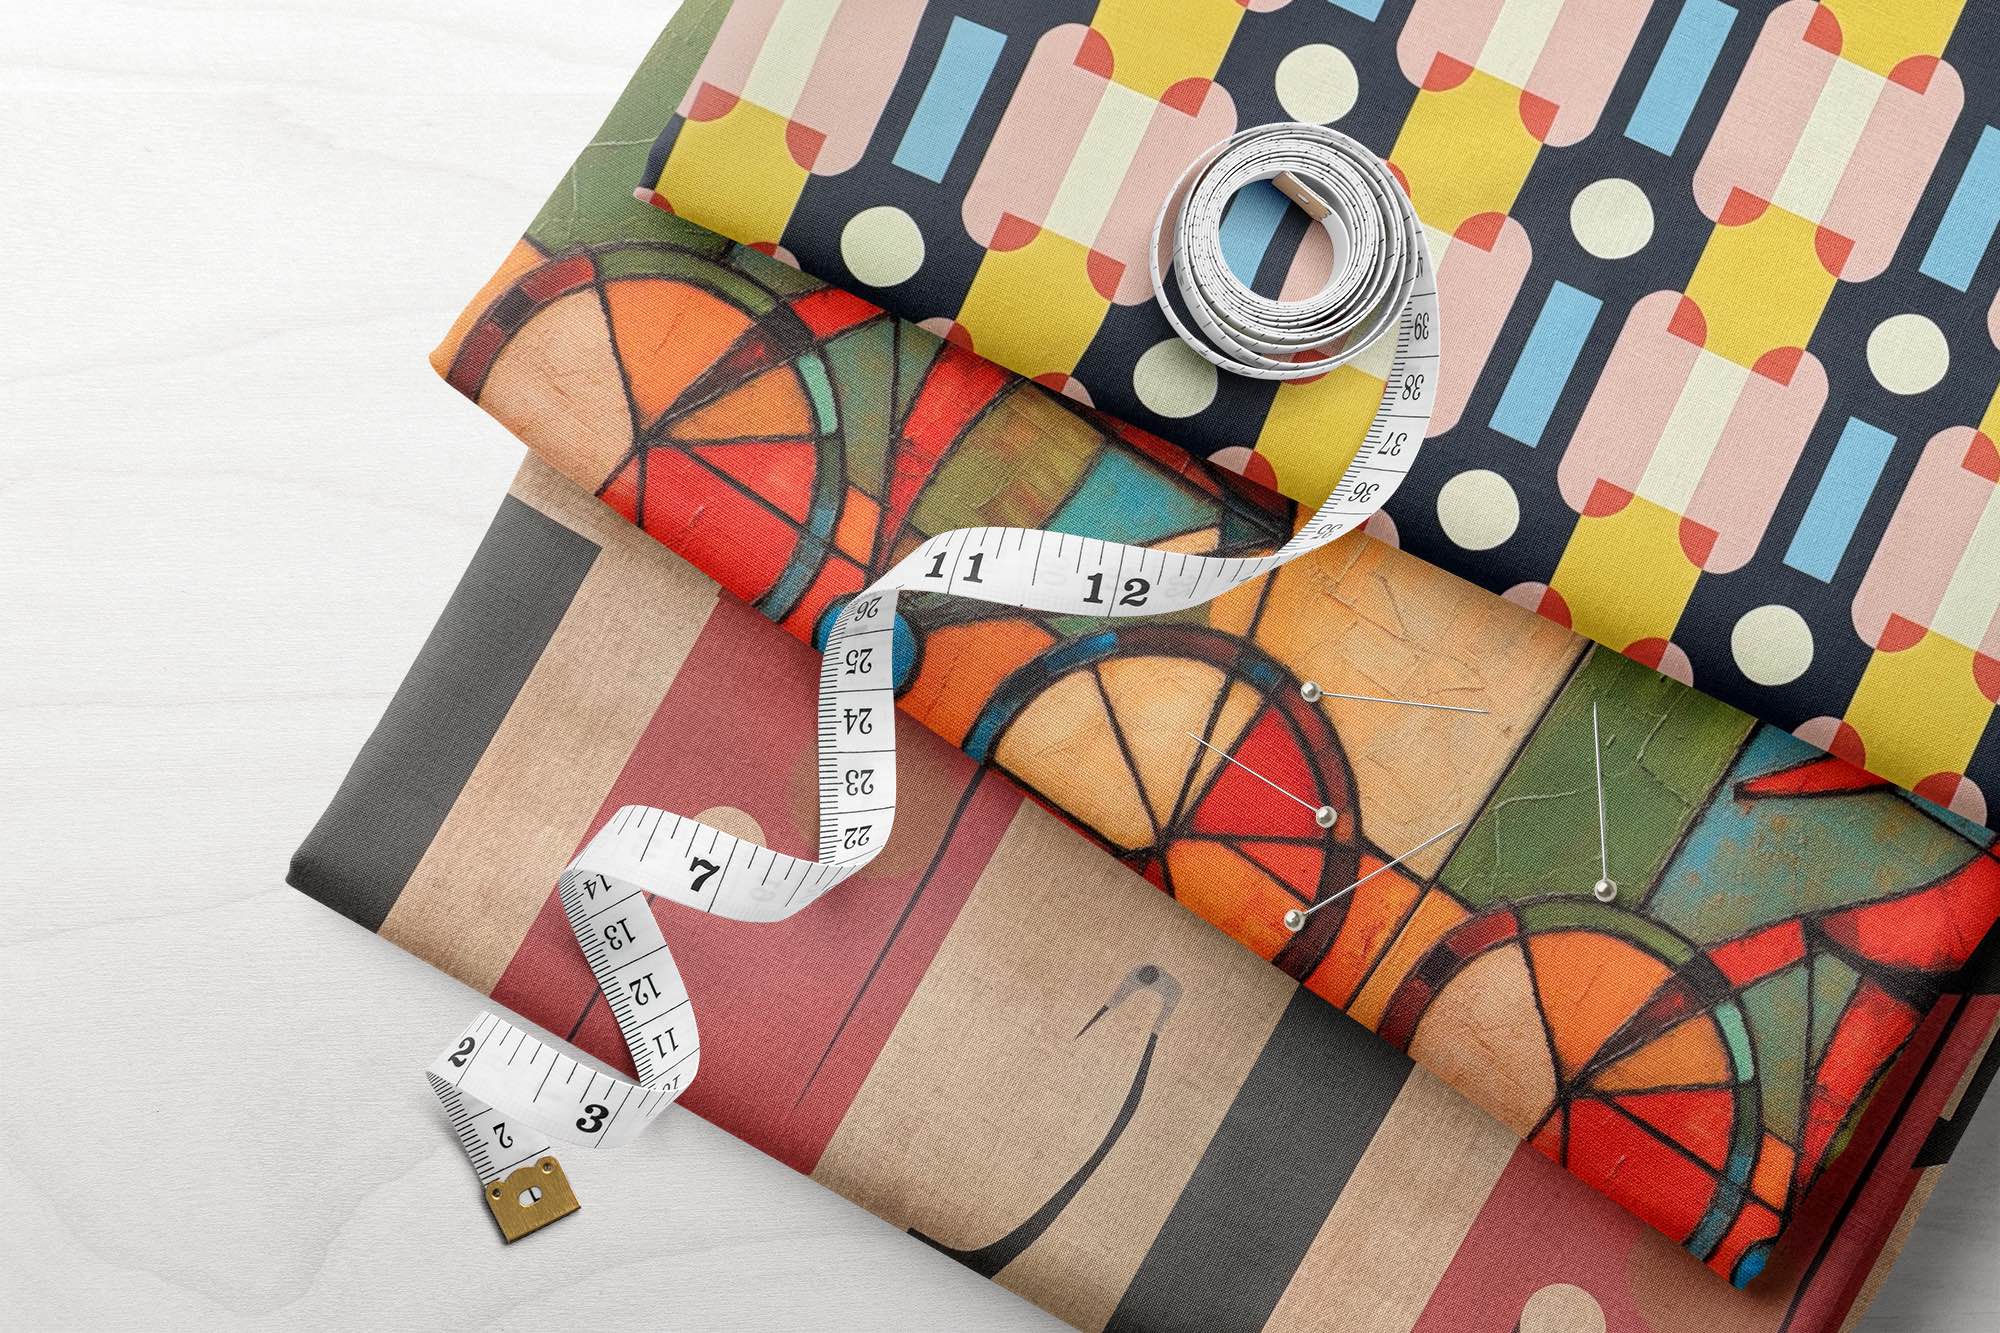

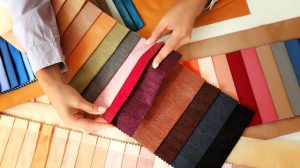
Drapes and upholstery measurements. Precise window and furniture sizing, adding fullness (1.5x-2.5x width for drapes), accounting for style (puddling/breaking), and taking pattern repeats into account for fabric quantity are all part of the measurements for draperies and upholstery. For complex projects, always consult a professional. General upholstery estimates are 1-1.5 yards for chair cushions or 6-8 yards for a small sofa. For draperies, it’s important to measure the hardware width and height (rod to floor/sill). For upholstery, it’s important to check pattern alignment, add hem/puddle allowance, and use the width x fullness ratio for width.
DRAPES AND UPHOLSTERY MEASUREMENTS
dimensions for upholstery include the width, height, and depth of each piece of furniture (seat, armrests, back, and skirts), plus additional dimensions for seams, piping, and pattern matching (such as 3–6 inches per edge or more for big repeats). Important procedures include measuring each section separately, taking curves into consideration, eliminating cushions, and adding a safety margin (typically 10–20%) to standard yardage estimates (e.g., 12–18 yards for a sofa, 6–9 yards for an armchair) to cover potential errors or pattern matching, particularly for large or patterned fabrics.
How Much Fabric is Needed?

DRAPES AND UPHOLSTERY MEASUREMENTS
Start an upholstery project, run out of fabric, more of the exact same fabric, there are few things worse than that. For this reason, it is essential to be able to anticipate how much material you will require. There are a few fundamental guidelines to go by, though there will be a lot of variety based on the kind of furniture you are covering:

DRAPES AND UPHOLSTERY MEASUREMENTS
1.Measure each cushion’s length and width starting at the seam and working your way outward. Make sure you measure the side panels as well, and remember to give one inch for seam allowances. Covering one sofa cushion typically requires two yards of cloth.
2.Proceed to measure the sofa’s back from seam to seam. Once more, add one inch to the length and breadth of the couch for seam allowances. Take measurements of the sofa’s front width and length.
DRAPES AND UPHOLSTERY MEASUREMENTS
3.After that, measure the seating area’s exterior and inside after removing the cushions.
4.To calculate the yardage, take your figures and divide them by 3
5.Remember that upholstery fabric typically measures 54 inches in width.
Calculate The Amount Of Fabric;
Will Need The method for calculating fabric yardage for sofas and chairs is similar. Measure the piece’s length and width first. Measure the sides, back, and front, and don’t forget to account for seam allowances by adding one inch. After that, measure the frame, taking into consideration any places that have cloth covering them. Determine the overall length and width of the couch.
Summary
The width (rod length x fullness ratio, typically 2x for rich effect) and length (from rod to desired floor-kiss or puddle, frequently 1/2 inch above floor or more for pooling) of curtains are measured. Measuring rod width, selecting coverage (extending past window), selecting fullness (e.g., 2x), measuring rod to floor for the drop, and taking header type (grommet vs. pleat) into consideration for final length are important procedures.
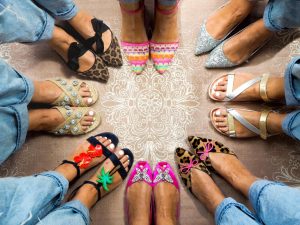
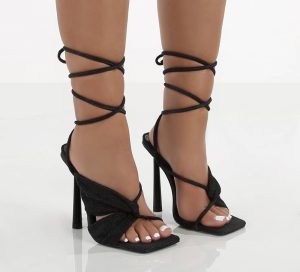
A Guide for women shoes. Your shoes stand out more than most other items when it comes to fashion choices. However, it can be difficult to select the ideal combo. There are numerous ways one can choose shoes for women, each with a unique personality and background. They are all renowned for being equally attractive, useful, and desirable.
A GUIDE FOR WOMEN SHOES
Choosing what shoes to wear is a daily dilemma that many of us encounter. Whether it’s a night out or the office, some styles are better suited for particular settings than others. In order to assist you in determining which women’s shoe styles are essential to your wardrobe, we examine the extensive assortment of women’s dress and casual shoes in this guide.
1. Wedges
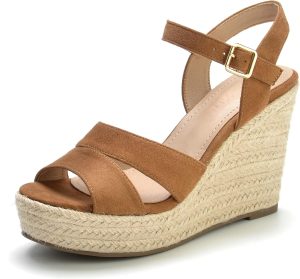
An ensemble might seem more put together with a wedge heel without compromising comfort. They may be worn with a range of outfits and are far more comfortable than typical heels, especially a lower wedge.
2. Pumps for ballerinas
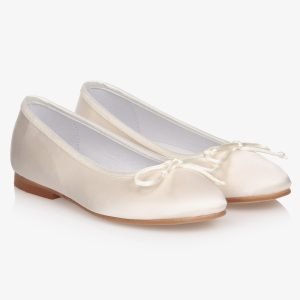
A stylish and useful alternative to everyday, casual shoes. For women who desire a shoe that they can wear anyplace, Ballet pumps are a great option. From traditional nude to wild animal designs, these multipurpose shoes are available in every conceivable print, color, and pattern. When deciding on an office outfit, match your colored chinos with a timeless pair of ballerina heels. By choosing various hues, textures, and accents, you can change up your appearance every day.
3. Lace-ups
This is a general phrase for any type of shoe that has laces. They can be ballerina pumps, heels, loafers, brogues, or a variety of other women’s shoe styles. Shoes with laces are typically a little more durable and can give your feet more support. Pair your boyfriend jeans with Lace ups canvas shoes for hectic weekends spent with the kids.
4. Canvas
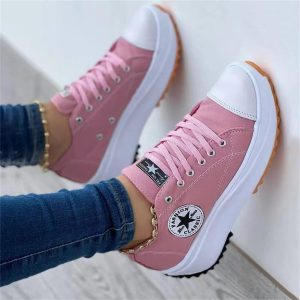
Although lightweight women’s canvas shoes have a little sportier appearance than ballerina shoes, they’re still a fantastic choice for ladies seeking a more laid-back appeal. They are comfortable, useful, and available in a variety of hues and designs. For a quick and easy weekend ensemble, they look fantastic with jeans and a T shirt. For those bright weekends at the park, printed canvas shoes can also be worn with shorts.
5. Wellington boots
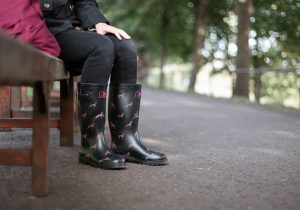
A reliable pair of women’s wellies, also known as Wellington Boots, are fashionable and functional. Ideal for preventing mud at a summer music festival or for staying dry in the winter. Wellies usually have a hefty sole and thick, rubber boot so you can jump in puddles and go through muddy fields without getting your feet wet.
6. Women’s flip flops
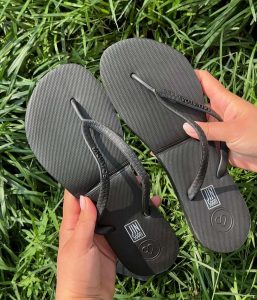
The perfect summertime sneaker Flip flops are the ideal shoes to pack in your beach bag whether you’re going to the beach or pool. Typically, women’s flip flops have a foam sole and a plastic toe support in the center. You should use leather shoes for a more durable look.
Summary
You can feel like the finest version of yourself when your shoes and attire match. You can begin trying on several women’s shoes to discover the ideal one once you have a clearer notion of the look you want.

Holidays and Vacations

Bilingual Education Impacts

Career Tips

A Step-by-Step Guide to Deleting Reels on Instagram

How to Create a WhatsApp Group


Pingback: A Comprehensive Guide to Connecting the Rode Wireless Go - SimplExplainer