
Videography
Unveiling the Best Bridge Cameras
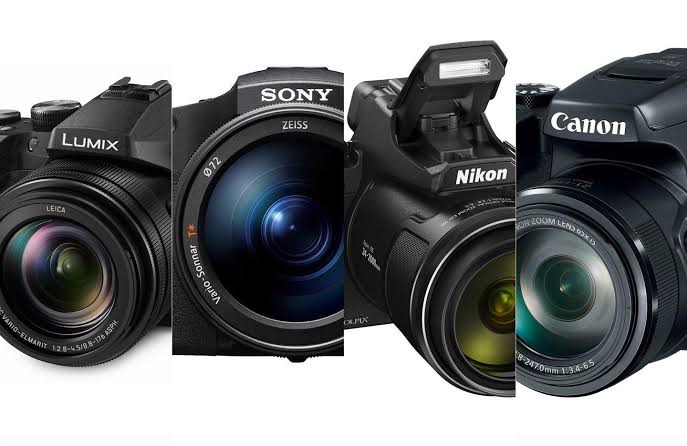
Bridge cameras occupy a unique space in the world of photography. Offering a versatile all-in-one solution that bridges the gap between compact point-and-shoot cameras and advanced interchangeable lens systems. With their impressive zoom capabilities, ergonomic designs, and user-friendly features. Bridge cameras are favored by photographers seeking convenience, versatility, and excellent image quality. If you’re in the market for a bridge camera, let’s explore some of the best options available to help you make an informed decision:
1. Sony Cyber-shot RX10 IV
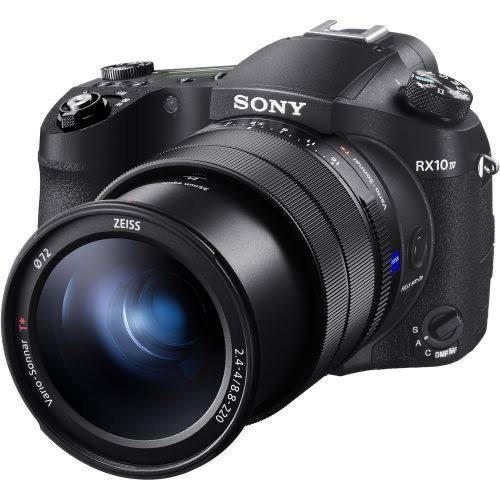
– Widely regarded as one of the best bridge cameras on the market, the Sony RX10 IV boasts a powerful 24-600mm equivalent zoom lens with a fast f/2.4-4 aperture.
– It features a 20.1-megapixel 1-inch Exmor RS stacked CMOS sensor, BIONZ X image processor, and advanced autofocus system with 315 phase-detection points for lightning-fast focusing.
– The RX10 IV offers 4K video recording, 24 frames per second continuous shooting, built-in Wi-Fi and NFC connectivity, and a tilting touchscreen LCD for easy composition and navigation.
2. Panasonic Lumix FZ1000 II
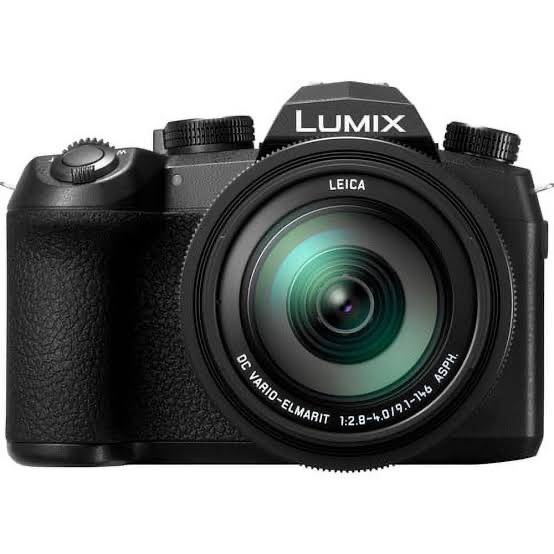
– The Panasonic FZ1000 II combines a versatile 16x zoom lens (25-400mm equivalent) with a 20.1-megapixel 1-inch MOS sensor and Venus Engine image processor for stunning image quality.
– It features 4K video recording at 30 frames per second, 5-axis Hybrid Optical Image Stabilization (OIS), and a high-resolution electronic viewfinder (EVF) with 0.39-inch OLED display.
– The FZ1000 II offers intuitive manual controls, customizable function buttons, built-in Wi-Fi and Bluetooth connectivity, and a 3-inch free-angle LCD touchscreen for flexible shooting angles.
3. Nikon Coolpix P1000
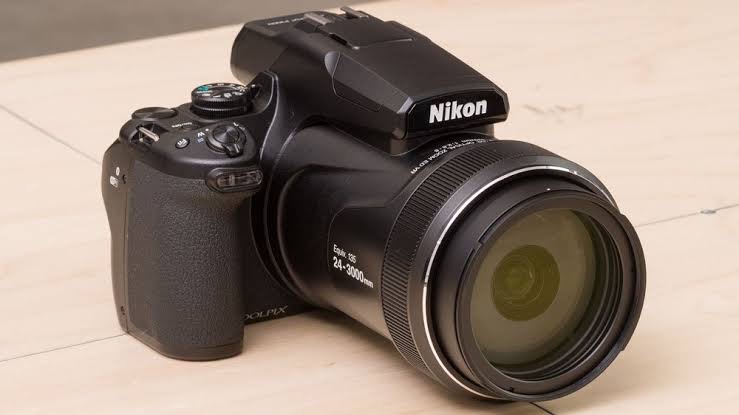
– The Nikon P1000 stands out for its impressive 125x optical zoom lens, equivalent to 24-3000mm in 35mm terms. Making it the ultimate superzoom bridge camera for capturing distant subjects.
– It features a 16-megapixel back-illuminated CMOS sensor, EXPEED image processor. And Dual Detect Optical VR (Vibration Reduction) for sharp, blur-free images and videos.
– The P1000 offers 4K UHD video recording, RAW file support, built-in GPS and Wi-Fi connectivity, and a high-resolution electronic viewfinder (EVF) with 0.39-inch OLED display.
4. Canon PowerShot SX70 HS
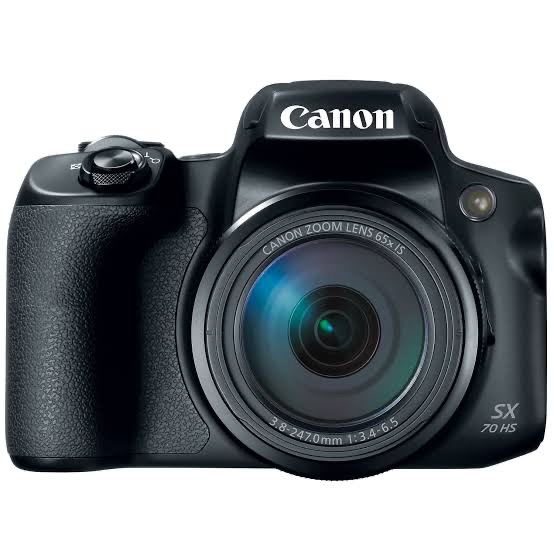
– The Canon SX70 HS combines a versatile 65x optical zoom lens (21-1365mm equivalent) with a 20.3-megapixel CMOS sensor and DIGIC 8 image processor for excellent image quality.
– It features 4K UHD video recording at 30 frames per second, 10 frames per second continuous shooting, and Dual Sensing IS for steady handheld shooting.
– The SX70 HS offers built-in Wi-Fi and Bluetooth connectivity, a 3-inch vari-angle LCD touchscreen. And a high-resolution electronic viewfinder (EVF) with 0.39-inch OLED display.
5. Fujifilm FinePix HS50EXR
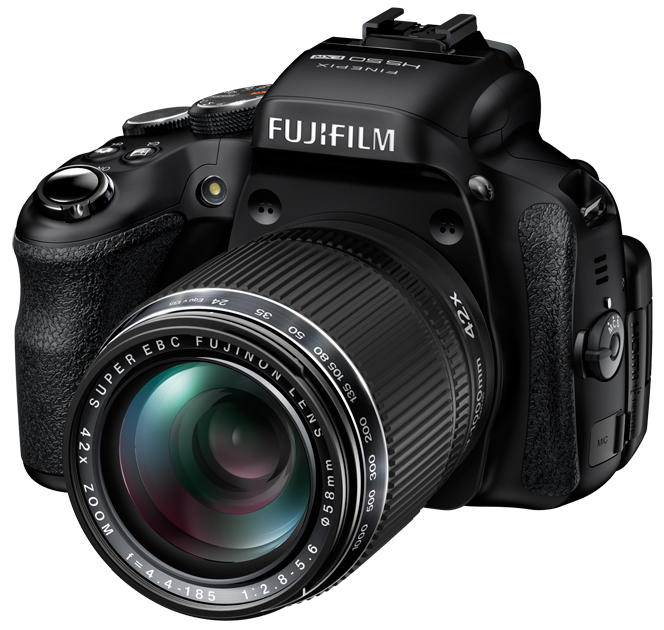
– The Fujifilm HS50EXR features a 42x optical zoom lens (24-1000mm equivalent) with optical image stabilization and a 16-megapixel 1/2-inch EXR CMOS II sensor for impressive image quality.
– It offers full manual control, RAW file support, high-speed autofocus, and a high-resolution electronic viewfinder (EVF) with 0.26-inch OLED display.
– The HS50EXR features Full HD video recording, 11 frames per second continuous shooting, and a 3-inch vari-angle LCD screen for flexible shooting angles.
When choosing the best bridge camera for your needs, consider factors such as zoom range, image quality, performance, features, and budget. Whether you’re a seasoned photographer looking for a versatile travel companion or a beginner seeking an easy-to-use all-in-one solution, there’s a bridge camera out there to suit your preferences and help you capture stunning images and videos with ease.


GUIDELINES FOR EDITING VIDEOS
Guidelines for editing videos. increased people can now create content, but there is increased rivalry as a result. These nine tips and tactics can help you edit videos like a pro, regardless of your level of experience. Even while big firms and studios have specialized editing teams, everyone must start somewhere. You’ll probably need to get your hands dirty and master the fundamentals of video editing if you’re producing your own material. But let’s say you are only interested in editing.
GUIDELINES FOR EDITING VIDEOS
In that situation, it’s usually worthwhile to get in touch with aspiring filmmaker friends; they may require assistance, and viewing the work you’re editing objectively can prepare you for any subsequent professional editing! Video editing is the enchanting process of transforming raw footage into a captivating visual story. It’s a craft that combines technical skills with artistic flair, allowing editors to weave together images, sound, and effects to evoke emotions, convey messages, and immerse audiences in the world of the story being told.
1. The Canvas of Creativity

At its core, video editing is about storytelling. Editors are the architects of narrative, sculpting raw footage into a seamless, engaging experience. Like painters with a blank canvas, editors begin with nothing but raw footage and a vision, ready to bring their creation to life.
2. Crafting a Symphony of Sight and Sound

Video editing isn’t just about visuals; it’s also about sound. Sound design, music, and dialogue all play crucial roles in shaping the viewer’s experience. Just as a conductor guides an orchestra, editors orchestrate a symphony of audio and visuals, ensuring harmony and rhythm throughout the piece.
3. The Tools of the Trade
In today’s digital age, video editing is done primarily using sophisticated software programs like Adobe Premiere Pro, Final Cut Pro, or DaVinci Resolve. These tools provide editors with an array of features and capabilities, from basic cutting and trimming to advanced effects and color grading.
4. Mastering the Art of Montage

Guidelines for Editing Videos
Montage, the art of assembling disparate shots into a cohesive sequence, is a cornerstone of video editing. Whether it’s a fast-paced action sequence or a poignant montage depicting the passage of time, editors use this technique to create emotional impact and propel the narrative forward.
5. The Power of Post-Production Magic
Post-production is where the magic truly happens. Through techniques like color grading, visual effects, and motion graphics. Editors can enhance the visual appeal of their work and transport viewers to fantastical realms beyond imagination. From subtle adjustments to breathtaking transformations, post-production is where the vision truly comes to life.
6. The Evolution of Editing

Guidelines for Editing Videos
Video editing has come a long way since the days of cutting and splicing film reels. Advances in technology have revolutionized the editing process. Making it more accessible and versatile than ever before. From the advent of non-linear editing systems to the rise of cloud-based collaboration tools. The evolution of editing has empowered storytellers to push the boundaries of creativity.
Summary
Video editing is both an art and a science, a delicate balance of technical skill and creative vision. It’s a craft that requires patience, dedication, and a keen eye for detail. But above all, it’s a journey of discovery and expression. Where each edit is a brushstroke on the canvas of imagination. So whether you’re a seasoned editor or just starting out. Remember that the power to create lies within you. Embrace it, experiment with it, and let your creativity soar.

Tools for professional videos. You cannot afford to overlook the revolution in internet video marketing, since it is anticipated that by 2022, video traffic will make up 80% of all online consumer traffic. However, particularly for small firms, the numerous processes involved in creating, releasing, and evaluating videos as well as the reactions of viewers can be costly and time-consuming. The solution is to develop, implement, and evaluate your video marketing campaign using the best technologies available.
TOLS FOR PROFESSIONAL VIDEOS
Creating a professional video requires a combination of technical expertise, creativity, and the right tools. Here are some essential tools needed for making a professional video:
1. Camera

A high-quality camera is essential for capturing crisp, clear footage. Whether it’s a DSLR, mirrorless camera, or cinema camera, choose one that meets your needs in terms of resolution, frame rate, and low-light performance.
2. Lenses
Invest in a selection of lenses to achieve different focal lengths and perspectives. Wide-angle lenses are great for capturing expansive scenes, while telephoto lenses are ideal for close-ups and detail shots.
3. Tripod

A sturdy tripod is essential for keeping your camera stable and ensuring smooth, shake-free shots. Look for one with adjustable legs and a fluid head for precise positioning and panning.
4. Microphone
Good audio is just as important as good video quality. Invest in a high-quality microphone to capture clear, professional sound. Options include shotgun microphones for on-camera use, lavalier microphones for interviews, and boom microphones for capturing dialogue on set.
5. Lighting
![]()
Proper lighting can make or break a video. Invest in a lighting kit with adjustable lights, softboxes, and diffusers to control the intensity and direction of light. Consider using natural light or LED panels for a soft, flattering look.
6. Editing Software
Choose a professional video editing software like Adobe Premiere Pro, Final Cut Pro, or DaVinci Resolve to edit and enhance your footage. These programs offer a wide range of editing tools, effects, and color grading capabilities to bring your vision to life.
7. Computer

Tools for Professional Videos
A powerful computer with ample processing power and storage is essential for editing high-resolution video files. Make sure your computer meets the system requirements of your chosen editing software to ensure smooth performance.
8. External Hard Drive

Tools for Professional Videos
Invest in an external hard drive to store and backup your video files. This will not only free up space on your computer but also provide a safe and secure way to archive your footage.
9. Graphics and Animation Software
Depending on your project, you may need graphics and animation software to create titles, lower thirds, and visual effects. Adobe After Effects is a popular choice for motion graphics and compositing.
10. Color Calibration Tools

Tools for Professional Videos
Ensure color accuracy by using color calibration tools to calibrate your monitor and maintain consistent color throughout the editing process. This will help ensure that your video looks its best across different devices and platforms.
Summary
By investing in these essential tools and honing your skills, you’ll be well-equipped to create professional-quality videos that captivate and engage your audience.

Tools for colour calibration. For professionals in fields such as photography and video production, color accuracy is paramount. Inaccurate colors can lead to misinterpretation of images, inconsistencies in print or digital output, and ultimately, dissatisfaction among clients or viewers. By calibrating monitors and other display devices, professionals can trust that the colors they see accurately represent the colors in their images or videos, leading to more consistent and reliable results.
TOOLS FOR COLOUR CALIBRATION
Color calibration is the cornerstone of ensuring accurate and consistent colors in visual media, whether it’s photography, filmmaking, graphic design, or any other creative endeavor. In this comprehensive guide, we’ll delve into the importance of color calibration and explore the essential tools needed to achieve precise color accuracy.
The Importance of Color Calibration
Color calibration is the process of adjusting and standardizing the colors displayed on a monitor or other display device to ensure accuracy and consistency. The integrity of colors must be preserved from creation to consumption in an increasingly digital environment where visual content is created and seen on a variety of devices. This requires color calibration.
Tools
1. Hardware Colorimeter

A tool for measuring and evaluating the colors shown on a monitor is a hardware colorimeter. In order to test color accuracy, it usually consists of a sensor that is mounted on the monitor screen and software that talks to the sensor. Popular brands include X-Rite and Datacolor, which offer a range of colorimeters suitable for different budgets and needs.
2. Calibration Software
Calibration software is used in conjunction with a hardware colorimeter to perform the calibration process. This software guides users through the calibration process, taking measurements of various color patches displayed on the screen and adjusting monitor settings accordingly. Examples of calibration software include X-Rite i1Profiler and Datacolor SpyderX software.
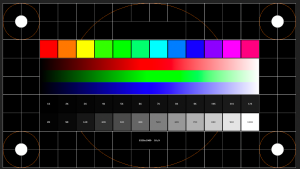
3. Reference Images

TOOLS FOR COLOUR CALIBRATION
When assessing color accuracy throughout the calibration process, reference images—standardized photos with known color values are utilized. These images typically include a range of colors, gradients. And patterns designed to test various aspects of color reproduction, such as hue, saturation, and brightness. Calibration software often includes built-in reference images for this purpose.
4. Monitor Hood
A monitor hood is a shield that attaches to the monitor to reduce glare and ambient light. Ensuring more accurate color perception during the calibration process. By minimizing external light sources, a monitor hood helps create a controlled environment for color calibration, leading to more reliable results.
5. Color Calibration Targets
TOOLS FOR COLOUR CALIBRATION
Color is measured and calibrated using it targets, like grayscale and color patches. During the calibration procedure, these goals are shown on the monitor. Allowing the colorimeter to measure and analyze the displayed colors. Calibration software provides instructions for positioning and displaying these targets correctly.
Summary
Color accuracy is a fundamental aspect of maintaining color accuracy and consistency in visual media. By investing in the essential tools for color and following best practices. Professionals can ensure that their creative vision is accurately represented across different devices and platforms. Whether you’re a photographer, filmmaker, or graphic designer. Mastering it is essential for producing high-quality and visually compelling work.
Multiple System Atrophy

Key Relevance of Monounsaturated Fats

Best Proteinous Fruits

A Step-by-Step Guide to Deleting Reels on Instagram

How to Create a WhatsApp Group


Pingback: A Review of the Canon PowerShot G7 X Mark III Camera - SimplExplainer