TECHNOLOGY
Cameras: Types and Uses
CAMERAS: TYPES AND USES

Cameras: types and uses. Modern technology has not only made taking pictures a commonplace daily activity (unlike in previous generations when film cameras were the only option), but an increasing number of camera models are being created to accommodate the needs and artistic preferences of every aspiring photographer and photography enthusiast. You are probably already familiar with a few of them. Read on if you are still unsure about which one to purchase. To choose the best camera and camera brand for you, you must first learn about the most common types of cameras used for photography.
Camera: Types and its Uses
Cameras are available in a wide variety these days. These camera kinds include DSLRs, action cameras, new and improved film cameras, your favorite little digital cameras, and even the newest mirrorless cameras. Selecting a camera type might be challenging, but if you learn more about each one, including its advantages and disadvantages, you can quickly determine which one will be best for you.
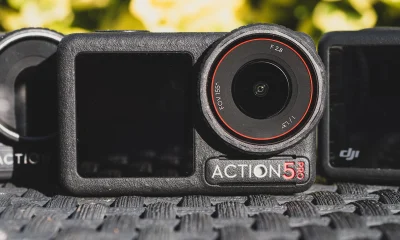
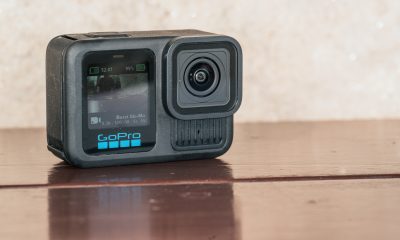
1. Action cameras
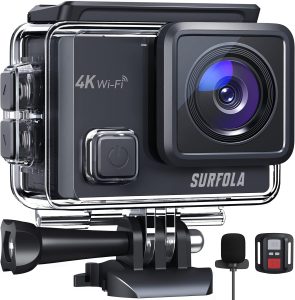
often called action cams, are small, shockproof cameras that record high-definition video and take digital pictures while in an action-packed setting. Action cameras can be mounted on bicycle handlebars, helmets, and even drones to capture amazing wide-angle photos and videos.
2. Bridge cameras
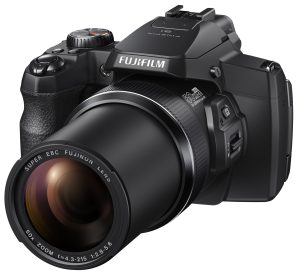
These devices are easy to use and versatile for novices who prefer the simplicity of small digital cameras but also desire more control over camera settings. They have a smaller sensor than compact digital cameras, an electronic viewfinder, and a slower autofocus.
3. Compact digital cameras
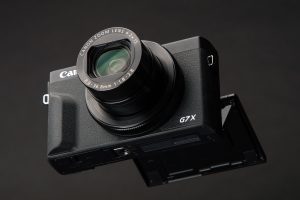
Also referred to as point-and-shoot cameras, these devices are small, lightweight, robust, and simple to operate. Compact digital cameras are always in automatic mode, which continuously modifies all of its settings to produce high-quality photographs.
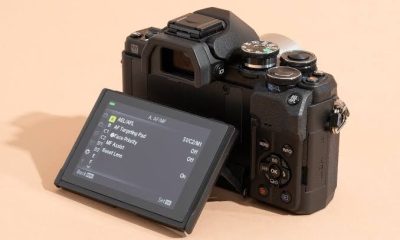
4. DSLRs
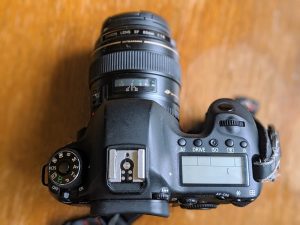
The majority of professional photographers use DSLRs, which combine a digital sensor with the mirror and prism mechanism of SLRs, or single-lens reflex cameras, which reflect light onto the sensor. With a DSLR camera, the photographer has maximum control and versatility, allowing them to switch lenses and take a variety of pictures.
5. Instant cameras

The price and the tactile experience of seeing a picture develop in your hand more than make up for any image quality issues. These vintage-looking full-frame cameras are incredibly simple to use—just point and shoot. Additionally, you don’t require any photo editing software or applications.
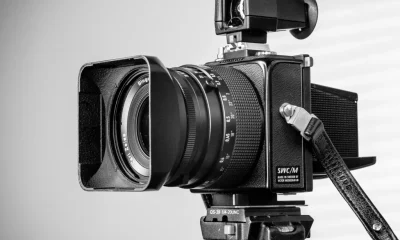
6. Medium-format cameras

These cameras provide remarkable film and digital images with a wider dynamic range and more accurate color reproduction because of their sensor size, which is somewhat larger than the 35mm film frame. For professional photographers, particularly those creating images for print or advertising, this is the best camera available.
7. Mirrorless cameras

These cameras do away with the mirror and prism entirely and use an electronic viewfinder in place of their optical viewfinder. Mirrorless cameras, which use interchangeable lenses and provide a variety of customized camera settings, are smaller than digital cameras.
Summary
Purchasing a camera system requires careful consideration of a number of criteria. You intend to do What type of photography ? Take cameras used for portraiture versus tennis photography, for example. What is your spending limit? To what extent do you think it is feasible to travel with a lot of equipment? Are you able to edit your photos with a powerful computer and software program? In addition to your photos, how much video do you want to record? Before diving into a system, all of these are crucial questions to think about.


Students and laptops. Laptops, sometimes known as note books, are portable computers that are rather sturdy and weigh around two kilograms. In 1983, the term “laptop” was coined. Schools and universities today use computers in the age of technology to enable students to learn through multimedia learning modules that imaginatively use all of the senses to teach courses. Students can increase their technology literacy and obtain real-world experience by using computers for instruction. A knowledge highway is the World Wide Web. A laptop or notebook can aid in learning in a variety of ways. Because of their portability and the technological tools they offer, laptops are very popular.
STUDENTS AND LAPTOPS
The use of computers has fundamentally changed how students learn and engage with the outside world. Computers have drastically changed how students access, analyze, and engage with knowledge. With internet access, students may interact with individuals around the globe, quickly access and evaluate information, and even create their own digital material. Computers will most likely remain a crucial part of contemporary education in the future.
Advantages;

Not only are they growing in popularity for usage at home, but many schools are also beginning to use them in the classroom. There are many benefits for students who use laptops, such as easier group work and study, quicker writing and editing, and more thorough and effective note keeping. All pupils, regardless of age or grade level, can benefit from laptops.
1. The laptop is constantly with you, along with your notes and references, and online libraries and other websites offer tools to assist students in formatting their assignments and references.

2. Students can type assignments, Digital Note-Taking share notes, collaborate on projects in groups, and take notes in class using a laptop.
3. Without paying exorbitant phone fees, students can converse and interact with friends and family over the internet.
4. Students can download music from the internet and see movies and video clips on laptops.
More Advantages;

STUDENTS AND LAPTOPS
5. In order to make some extra cash, students can use laptops to design and develop software. Freelance writing is an option for people who are skilled in research or writing.
6. Students can download entire books from internet libraries and other websites. In addition to saving time and money, students can read texts from the 18th century to the present.
7. Laptops help kids become self-sufficient, teach them to type, help them manage their schedules, teach them how to budget using online planners, and help them become global citizens.

STUDENTS AND LAPTOPS
8. Students who have a laptop with an internet connection are more likely to learn and stay up to date on current events. The world is covered by online news sources, not simply a state or nation.
9. Students are encouraged by laptops to be IT experts. They stay up to date on the latest developments in the world.

STUDENTS AND LAPTOPS
10. Also, Convenience This portability is one of the biggest benefits of laptops. In contrast to desktop computers, which need a certain location and are immovable, laptops let you work, play, or access entertainment from almost anyplace.
Summary
Student laptops, which are necessary for modern schooling, must balance strong performance (16GB RAM is advised), long battery life, and mobility for everyday usage. The Apple MacBook Air M4, Microsoft Surface Laptop, and Lenovo IdeaPad 1 are among the top budget options for 2025–2026 that support study, note-taking, and teamwork. By enabling a “flipped classroom” style, these gadgets improve flexibility and student involvement.

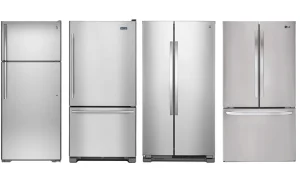
Relevance of refrigerators. The home benefits from having a refrigerator. The refrigerator has been one of the most widely used home appliances over the years. You hardly ever discover a house without it. There are many different types of refrigerators available nowadays. Refrigerators are a necessary appliance in modern kitchens because they preserve food and offer convenience. Whether you want to keep your purchases fresh or store leftovers, a refrigerator is necessary to maintain the quality of food. However, refrigerators have their own set of benefits and drawbacks, just like any other device
RELEVANCE OF REFRIGERATORS
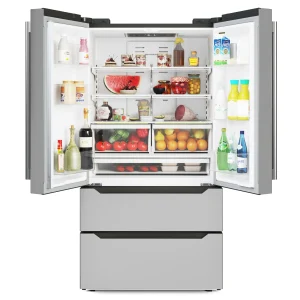
Also, Keeping food cold is the primary purpose of a refrigerator. Food keeps better in colder climates. All food contains germs, and the basic principle behind refrigeration is to slow down their activity so that it takes longer for the bacteria to ruin the food. This page explores the advantages, possible disadvantages, and crucial advice for maintaining your refrigerator’s cleanliness and ideal performance for many years to come.
1. Food preservation;

Meanwhile, This is among the most prominent advantages that freezers of all types provide. They help ensure that your food and other delicacies are safe so that you can utilize them later. They keep the food from becoming bad and being wasted.
2. Offer cooling;
Also, which is essential for maintaining the safety and freshness of your food. In the summer, refrigerators also keep your water and other beverages cold so you can get the most out of them.
3. Economical;

Relevance of refrigerators
Meanwhile, One example of a very affordable home appliance is a refrigerator. A refrigerator is something you may purchase without giving it any thought. This purchase is one that you won’t regret at all. Purchasing a refrigerator is well worth the money.
4. Diversity;
Although, There is a huge selection available, with variations in capacity, forms, sizes, look, design, and pricing. Customers can purchase refrigerators with no limitations because they offer a plethora of possibilities.
5. Adjustable;

Relevance of refrigerators
However, This is the refrigerator’s most fascinating feature. You heard it correctly, yes. You can customize refrigerators. You can have it tailored to your needs and other preferences. It is even possible to have it painted in the colors of your choosing.
6. Convenience;
Relevance of refrigerators
Also, When it comes to meal planning and food preparation, a refrigerator is convenient. Busy households can save time by cooking less frequently thanks to the capacity to preserve leftovers and prepared meals.
7. Energy Efficiency;
However, Newer refrigerators use less electricity because of their energy-efficient design. Reducing the environmental effect and utility expenditures are two benefits of energy-efficient refrigerators.
8. Benefits to Health;
Relevance of refrigerators
Meanwhile, It’s essential to keep food fresh and clear of microorganisms for good health. Refrigerators keep food at a safe temperature, reducing the chance of foodborne infections.
Summary
However, refrigerators are an essential part of any home because they provide convenience, efficiency, and food preservation safety. By knowing the advantages and disadvantages of different types and keeping your food fresh and safe for many years to come, you can maintain its quality.
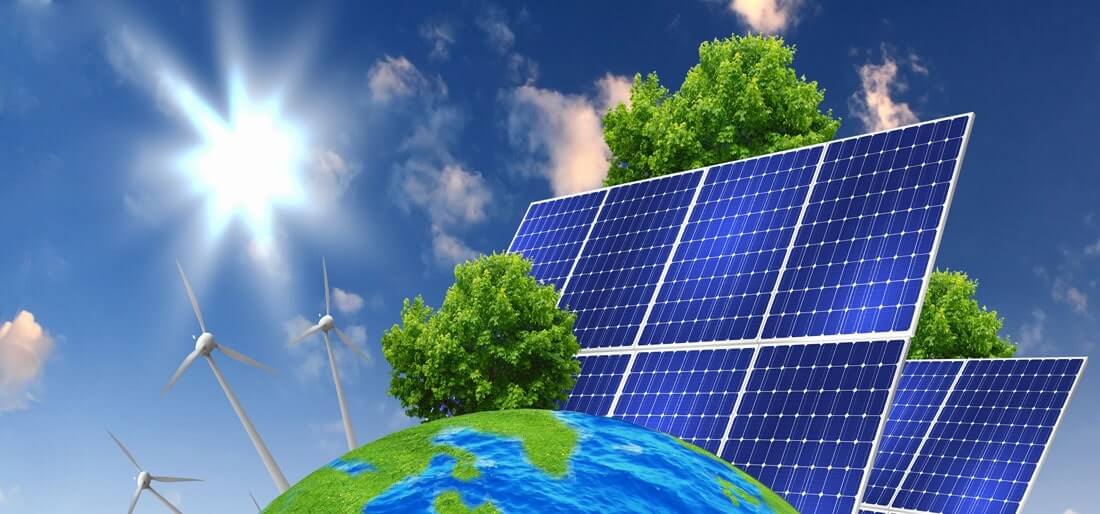
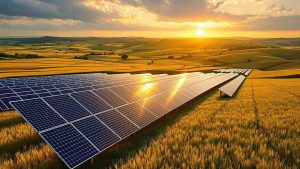
Solar energy usage and benefits. Solar energy is a plentiful, sustainable, and renewable power source that drastically lowers carbon emissions, electricity costs, and dependency on fossil fuels. With a 20–25 year lifespan and little maintenance, photovoltaic panels or solar thermal collectors provide renewable energy for commercial, industrial, and residential uses.
SOLAR ENERGY USAGE AND BENEFITS
The sun is an amazing renewable resource that can sustain life on Earth and provide clean, sustainable energy to all people. The truth is that the world’s population utilizes more solar energy in a year than our planet receives in an hour. It is possible to convert solar energy into electrical power using solar photovoltaics.
Because of the continuous advancements in solar technology, we can utilize solar energy more abundantly. A study claims that the use of solar energy has grown significantly and is outpacing all other fuels in terms of growth. Some advantages of solar energy use are listed below.
1. Clean and green energy;

The production of electricity and other energy sources involves some pollution, which harms the ecosystem. The source of solar energy, however, does not provide this challenge.
2. Unradiant on external energy sources;
However, It is encouraging for the ecosystem and the environment that the strain on other energy sources has decreased with the advent of solar energy and its growing use.
3. Easy to maintain;

Meanwhile, Solar power systems don’t need much upkeep. It just requires twice-yearly cleaning, but it should be remembered that professionals who are knowledgeable about this task should always perform the cleaning.
4. Less dangerous;
alternative solar energy is safer for usage as well as upkeep and repairs.
5. Sustainable Energy;
SOLAR ENERGY USAGE AND BENEFITS
One type of renewable energy is solar energy. It is constantly accessible and can be utilized anywhere in the world. One endless energy source is solar power.
6. Reduction of Electricity Bills;
However, The high expense of your electricity bill will be alleviated since you will be able to cover all of your energy needs with electricity produced by solar energy. Based on your needs, you can save a certain amount on your payment.
7. Highest Usage;

SOLAR ENERGY USAGE AND BENEFITS
Meanwhile, Numerous uses exist for solar energy. Solar energy can be used by anything to produce heat or power. capable of supplying clean water, delivering electricity to places without it, powering space satellites, factories, and domestic tasks.
8. The Development of Technology;
Also, Due to the growing use of solar energy, industrial growth has grown and is predicted to continue growing quickly.
9. climatic;

SOLAR ENERGY USAGE AND BENEFITS
Also, in any climate, electricity may be produced from solar energy. Electricity may be produced by solar energy systems in every climate. Solar energy’s vulnerability to brief weather disruptions is one of its drawbacks. You generate less electricity on overcast days. However, cold has little effect on productivity. Rainfall actually benefits your solar system since it cleans the panels as it melts and improves the quantity of light that reaches your panels through the reflection of the sun. Consequently, more electricity is produced.
Summary
However, solar energy and other renewable energy sources have a number of advantages in common. The ability to protect the planet from climate change is the most important of these; by using solar energy, we can use fewer fossil fuels and produce fewer greenhouse gas emissions, increasing our energy self-sufficiency.

Kids and Reading Loud

Lips Breakage Remedies

Healthy Tips for Chapped Lips

A Step-by-Step Guide to Deleting Reels on Instagram

How to Create a WhatsApp Group