
Videography
Exporting Videos from Camera to System

Exporting Videos from Camera to System
Exporting videos from camera to system. If your house or place of business has security cameras installed, you understand how crucial it is to be able to see and export the footage as needed. It is essential to be able to export video from your security cameras, whether you are doing so for legal reasons or simply to monitor your property. This post will walk you through the steps of exporting your security camera system’s video.
EXPORTING VIDEOS FROM CAMERA TO SYSTEM
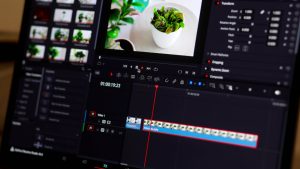
In the digital age, cameras have become powerful tools for capturing life’s moments in vivid detail. Whether you’re a professional filmmaker or an amateur enthusiast. To export videos from your camera to your computer is a fundamental skill that opens the door to editing, sharing, and preserving your precious footage. In this guide. We’ll walk you through the process of exporting videos from your camera to your computer, step by step.
Step 1
Connect Your Camera to Your Computer

The first step in transferring videos from your camera to your computer is establishing a physical connection between the two devices. Depending on your camera and computer, you may use a USB cable, memory card reader, or wireless transfer method. Ensure that your camera is powered on and in the appropriate mode for data transfer.
Step 2
Locate Your Videos
Once your camera is connected to your computer, navigate to the folder or storage location where your videos are stored on the camera’s memory card or internal storage. This may vary depending on your camera model and settings. Look for a folder labeled “DCIM” (Digital Camera Images) or “Videos” to find your video files.
Step 3
Select and Copy Your Videos
With your videos located, you can now select and copy the files you wish to transfer to your computer. You can typically do this by clicking and dragging the video files from the camera’s storage folder to a folder on your computer’s hard drive. Alternatively, you can use the copy and paste commands or the import function in your computer’s file management software.
Step 4
Monitor the Transfer Process

While your camera copies the video files to your PC. Keep an eye on the transfer process to make sure that every file is moved correctly and without any problems. Depending on the size and number of files, this process may take some time. Be patient and allow the transfer to complete before disconnecting your camera from your computer.
Step 5
Verify and Organize Your Videos
After the file process, pause to make sure all of the video files were successfully moved to your computer. Check the folder where you copied the files to make sure nothing was overlooked. This is also a good time to organize your videos into folders or directories based on date, event, or other criteria for easier access and management.
Step 6
Safely Eject Your Camera

Exporting Videos from Camera to System
Before disconnecting your camera from your computer. It’s important to safely eject the device to avoid data corruption or loss. Depending on your operating system, you can typically do this by clicking on the eject. Or safely remove hardware icon in the taskbar or file explorer window. Once your camera is safely ejected, you can disconnect it from your computer.
Summary
To export videos from your camera to your computer is a straightforward process. That allows you to access, edit, and share your footage with ease. By following these steps and best practices, you can ensure a smooth and hassle-free transfer experience. Allowing you to focus on unleashing your creativity and bringing your video projects to life.
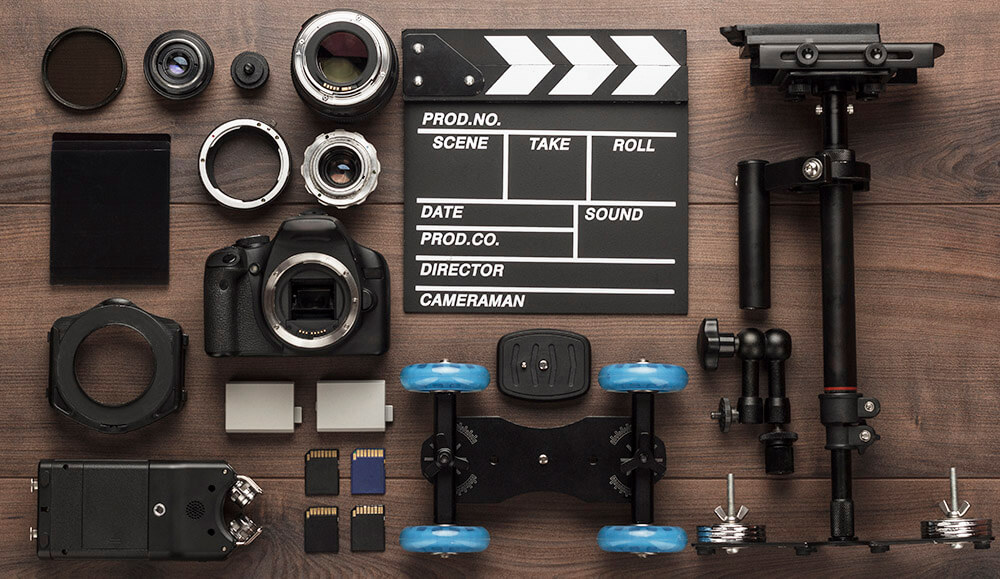
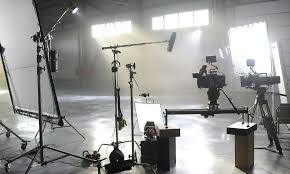
Professional video tools. You can produce high-caliber videos that enthrall and involve your viewers by investing in these necessary instruments and developing your abilities. It takes a combination of technical know-how, imagination, and the appropriate equipment to produce a quality video. The following are some necessary equipment for producing a high-quality video:
PROFESSIONAL VIDEO TOOLS
Industry standards for professional video editing include Final Cut Pro for high-performance Mac workflows, DaVinci Resolve for sophisticated color grading, and Adobe Premiere Pro for flexible editing. Other essential tools are Avid Media Composer for intricate, long-form, professional projects, CyberLink PowerDirector for quick, AI-driven editing, and After Effects for motion graphics.
1. Camera:
A high-quality camera is essential for capturing crisp, clear footage. Whether it’s a DSLR, mirrorless camera, or cinema camera, choose one that meets your needs in terms of resolution, frame rate, and low-light performance.
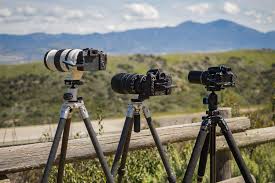
2. Lenses:
Invest in selection of lenses to achieve different focal lengths and perspectives. Wide-angle lenses are great for capturing expansive scenes, while telephoto lenses are ideal for close-ups and detail shots.
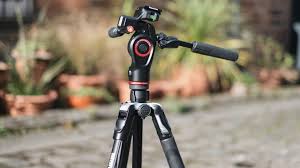
3. Tripod;
PROFESSIONAL VIDEO TOOLS
A sturdy tripod is essential for keeping your camera stable and ensuring smooth, shake-free shots. Look for one with adjustable legs and a fluid head for precise positioning and panning.
4. Microphone:
Good audio is just as important as good video quality. Invest in a high-quality microphone to capture clear, professional sound. Options include shotgun microphones for on-camera use, lavalier microphones for interviews, and boom microphones for capturing dialogue on set.
5. Lighting:
PROFESSIONAL VIDEO TOOLS
Proper lighting can make or break a video. Invest in a lighting kit with adjustable lights, softboxes, and diffusers to control the intensity and direction of light. Consider using natural light or LED panels for a soft, flattering look.
6. Editing Software:
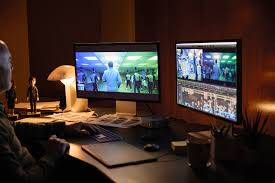
Choose a professional video editing software like Adobe Premiere Pro, Final Cut Pro, or DaVinci Resolve to edit and enhance your footage. These programs offer a wide range of editing tools, effects, and color grading capabilities to bring your vision to life.
7. Computer:
PROFESSIONAL VIDEO TOOLS
A powerful computer with ample processing power and storage is essential for editing high-resolution video files. Make sure your computer meets the system requirements of your chosen editing software to ensure smooth performance.
8. External Hard Drive:
Invest in an external hard drive to store and backup your video files. This will not only free up space on your computer but also provide a safe and secure way to archive your footage.
9. Graphics and Animation Software:
Depending on your project, you may need graphics and animation software to create titles, lower thirds, and visual effects. Adobe After Effects is a popular choice for motion graphics and compositing.
10. Color Calibration Tools:
PROFESSIONAL VIDEO TOOLS
Ensure color accuracy by using color calibration tools to calibrate your monitor and maintain consistent color throughout the editing process. This will help ensure that your video looks its best across different devices and platforms.
Summary
Make professional videos by using 4K resolution with steady camera movement, emphasizing high-quality lighting (key and backlighting), and making sure the audio is clear and directed. Using natural light or ring lights, planning with a structured screenplay, recording with a tripod for stability, and shooting on the shadow side for depth are important pointers.
Color grading and calibrating. In visual media, color grading and color calibration are crucial steps in the creative process. Color grading lets artists express their creativity and flair while improving the visual impact of their work, whereas color calibration guarantees the precision and consistency of colors shown on monitors. Professionals can successfully balance the scientific and artistic parts of color modification by comprehending the distinctions between these two processes, ultimately creating visually appealing and emotionally impactful content.
COLOR GRADING AND CALIBRATING
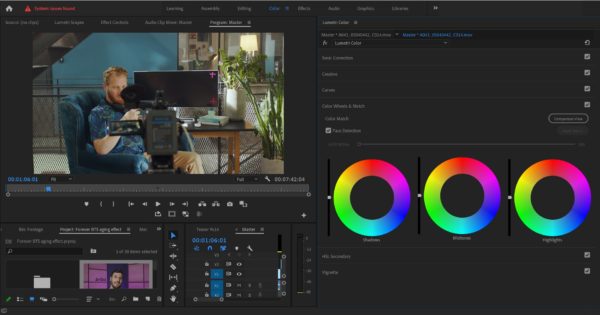
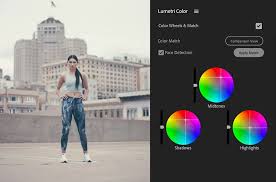
Color grading and calibration are two different post-production procedures. Color grading is the creative, artistic styling of colors to create a mood, whereas calibration guarantees technical accuracy by normalizing video (Log to Rec.709) and aligning display displays for consistency. Exposure correction, white balance, contrast, saturation, and creative LUT application are the five steps that are often included in grading.
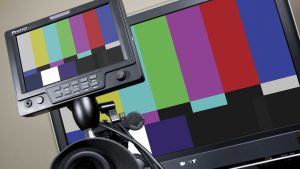
Color Calibration: Ensuring Accuracy and Consistency;
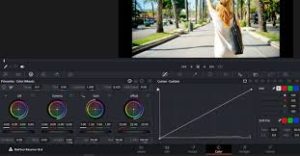
Color calibration is the technical process of adjusting and standardizing the colors displayed on a monitor or other display device to ensure accuracy and consistency. It involves using specialized hardware and software to measure and adjust various color settings such as brightness, contrast, gamma, and color temperature. The objective of color calibration is to ensure that the colors displayed on the monitor match the colors as they appear in real life or as intended by the content creator.

In practical terms, color calibration is crucial for tasks such as photo and video editing, where color accuracy is paramount. By calibrating monitors, professionals can trust that the colors they see on screen accurately represent the colors in their images or videos. This ensures that their creative decisions are based on reliable visual feedback, leading to more consistent and accurate results across different devices and platforms.
Color Grading: Unleashing Creativity and Style
COLOR GRADING AND CALIBRATING
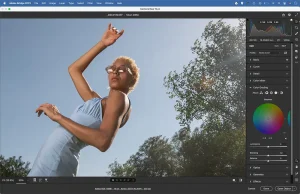
Color grading, on the other hand, is the creative process of manipulating and enhancing the colors of a video or image to achieve a desired aesthetic or mood. Unlike color calibration, which focuses on technical accuracy, color grading is an artistic endeavor that involves adjusting parameters such as exposure, contrast, saturation, hue, and color balance to create a cohesive and visually appealing look.
COLOR GRADING AND CALIBRATING
Color grading can serve multiple purposes, including correcting technical issues in footage, such as white balance or exposure problems, as well as stylizing and enhancing the overall visual presentation. It is a highly subjective process that often requires a deep understanding of color theory, storytelling techniques, and the intended emotional impact of the visual content.
Summary
A key component of visual media, color affects how we see and understand pictures and movies. Color calibration and color grading are words that are commonly used in the fields of photography, filmmaking, and graphic design. Despite the fact that they both entail color manipulation, they have different functions and roles in the creative process.
Blurring techniques for filming/editing. For visual storytellers who want to manage focus and direct the viewer’s attention, understanding the art of object blurring is crucial, whether it is accomplished through painstaking editing in post-production or careful preparation during filming. Filmmakers and editors can improve their art and produce captivating stories that enthrall and engage people by comprehending the various approaches and their benefits.
BLURRING TECHNIQUES FOR FILMING/EDITING
Managing focus and attention is crucial in the field of visual storytelling. It’s sometimes important to highlight some topics while discreetly hiding others. This can be accomplished by skillfully using blurring methods in both the editing room and during filming. We’ll examine several techniques for accomplishing selective object blurring in this post, along with the benefits of each.
1. Blurring During Filming:
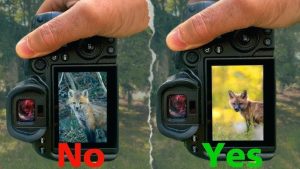
• Depth of Field: Utilizing a shallow depth of field by adjusting aperture settings on the camera can naturally blur objects in the foreground or background while keeping the main subject sharp.
• Physical Obstructions: Strategically placing objects, such as foliage or furniture, between the camera and unwanted elements can create a natural blur effect, adding depth and interest to the composition.
2. Blurring During Editing:

BLURRING TECHNIQUES FOR FILMING/EDITING
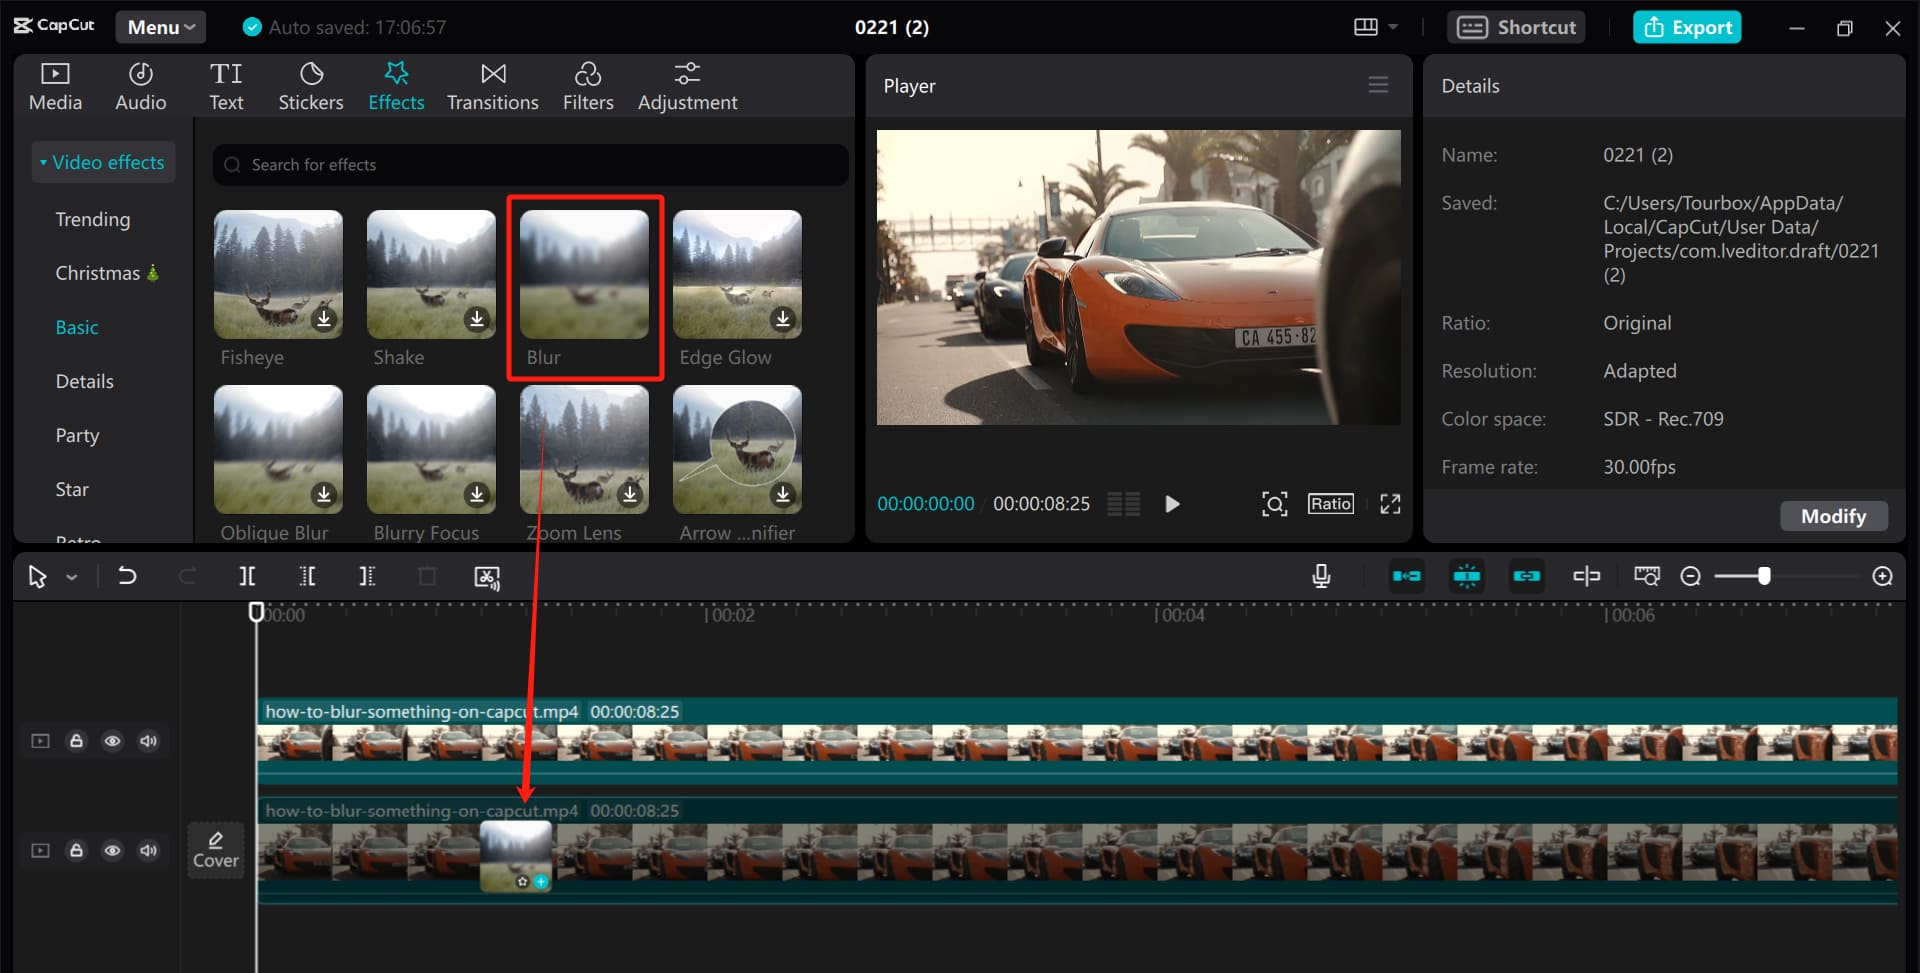
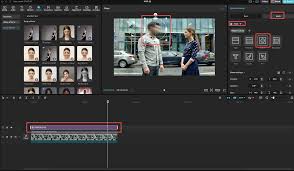
• Software Tools: Video editing software offers a myriad of tools for applying blur effects. Gaussian blur, lens blur, and radial blur filters can be precisely applied to specific areas of the frame to achieve the desired effect.
• Masking and Rotoscoping: Advanced editing techniques involve masking or rotoscoping to isolate objects or areas within the frame. Once isolated, blur effects can be applied selectively, allowing for precise control over which elements are blurred and to what extent.
3. Advantages of Each Approach:
BLURRING TECHNIQUES FOR FILMING/EDITING
• Filming: Blurring during filming can provide a more organic and authentic look, as it captures the blur effect in-camera. It also saves time in post-production, as less editing is required.
• Editing: Post-production blurring offers greater flexibility and control over the final result. Editors can fine-tune the blur effect, adjust its intensity, and even animate blurs for dynamic storytelling.
4. Considerations for Choosing the Right Method:
• Creative Vision: Consider the desired aesthetic and narrative impact of the blur effect. Sometimes, a natural, in-camera blur may be more appropriate, while other situations may call for the precision and control of post-production editing.
BLURRING TECHNIQUES FOR FILMING/EDITING
• Time and Resources: Evaluate the time constraints and resources available for the project. Blurring during filming may be more efficient for quick turnaround projects, while editing offers greater flexibility for more intricate effects.
Summary
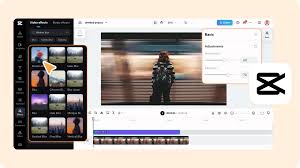
When filming, a narrow depth of field, a subject-background distance of five to six feet, and wide apertures for soft backgrounds are all necessary for effective video blurring. Use Gaussian, Directional, or Channel blurs in editing programs like CapCut or Premiere Pro to increase cinematic emphasis, improve motion, or conceal important information.

Chatgpt side effects

Causes of nasal swelling

Lyrics for i will be here

A Step-by-Step Guide to Deleting Reels on Instagram

A Comprehensive Guide to Setting Up a YouTube Premiere

How to Create a WhatsApp Group
-

 Flight4 weeks ago
Plane Tickets Relevance
-

 Social media2 weeks ago
How to Delete Reels on IG
-

 Flight4 weeks ago
Airline Travellers and Baggage Allowances
-

 Social media1 week ago
Tips for likes and Followers on Facebook
-

 Music4 weeks ago
Lyrics for wetin you no fit do
-

 Social media1 week ago
Guidelines for Creating a Facebook Page