TECHNOLOGY
Flash Drive Connection with TV

Flash drive connection with TV. Using the remote’s “Input” or “Home” menu, choose the USB input source after connecting a USB flash drive to a TV by plugging it into an accessible USB port, which is typically found on the side or back. A request to browse media is frequently triggered by smart TVs, enabling you to view images or videos straight from the disk.
FLASH DRIVE CONNECTION WITH TV
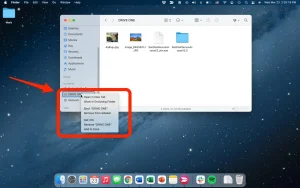
Put a flash drive into a Type-A or Type-C USB port on your computer, smartphone, or tablet to connect it. The majority of gadgets allow “plug-and-play,” which installs drivers and shows a message automatically. It can be accessed in File Explorer under “This PC” on Windows; on a Mac, it shows up on the desktop.
1. Check TV Compatibility:


Before connecting your flash drive, ensure that your smart TV supports USB connectivity. Most modern smart TVs come equipped with USB ports, typically located on the side or back of the TV. Consult your TV’s user manual or specifications to confirm the availability of USB ports.
2. Prepare Your Flash Drive:
Insert your flash drive into an available USB port on your smart TV. Ensure that the flash drive is formatted correctly and contains the media files you wish to access. Supported file formats may vary depending on your TV model, but common formats include MP4, AVI, MKV for video, and MP3 for audio.
3. Access the Media Player:

FLASH DRIVE CONNECTION WITH TV
Once the flash drive is inserted, use your TV remote to navigate to the media player or file explorer application. This may be labeled differently depending on your TV’s manufacturer, but it is typically found in the main menu or home screen.
4. Locate and Play Media Files:
Within the media player or file explorer, navigate to the USB drive or external storage option. You should see a list of available media files on your flash drive. Use the remote to select the desired file and press the play button to begin playback. Depending on your TV’s capabilities, you may also have the option to organize files by category or create playlists for easy access.
5. Adjust Playback Settings (Optional): Depending on your preferences, you may want to adjust the playback settings such as audio language, subtitles, or aspect ratio. Use the on-screen menu or remote control to access these settings and make any necessary adjustments.
6. Eject Flash Drive Safely:

FLASH DRIVE CONNECTION WITH TV
Once you’re finished using the flash drive, it’s essential to eject it safely to avoid data corruption or loss. Navigate to the USB settings or storage options on your TV. And select the option to safely remove the flash drive. Wait for the TV to indicate that it’s safe to remove the flash drive before physically unplugging it from the USB port.
Summary
With these simple steps, you can easily connect a flash drive to your smart TV. Enjoy your favorite media content directly on the big screen. Whether you’re watching movies, viewing photos, or listening to music. The ability to access external storage devices adds versatility and convenience to your smart TV viewing experience.