TECHNOLOGY
Gear Pieces

Gear pieces. Embarking on the journey as swimmers is an exciting and rewarding endeavor that offers a multitude of physical, mental, and emotional benefits. Whether you’re drawn to the tranquility of gliding through the water, the exhilaration of competition, or the pursuit of personal fitness goals, swimming is a versatile and accessible sport that caters to individuals of all ages, abilities, and backgrounds.
GEAR PIECES
In this introduction, we’ll explore the transformative power of swimming, the fundamental skills and techniques involved, and the pathway to unlocking your full potential as a swimmer. So grab your swimsuit, goggles, and cap, and get ready to dive into the world of aquatic excellence.
To become a professional swimmer, having the right gear is essential for optimal performance and comfort in the water.
Important pieces of gear
1. Swimsuit
A high-quality swimsuit designed specifically for competitive swimming is essential for optimal hydrodynamics and performance. Professional swimmers often wear tight-fitting, low-drag suits made from advanced materials such as nylon, spandex, or polyester. These suits provide compression, reduce water resistance, and enhance speed and efficiency in the water.

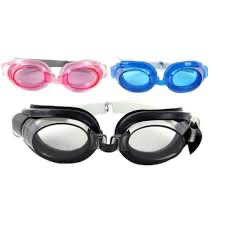
2. Swim Goggles
Swim goggles are essential for maintaining clear vision and protecting your eyes while swimming. Professional swimmers rely on goggles with a comfortable and secure fit, anti-fog lenses, and UV protection to ensure optimal visibility and eye safety during training and competition. Choosing goggles with adjustable straps and interchangeable nose bridges allows for a customized fit and maximum comfort.
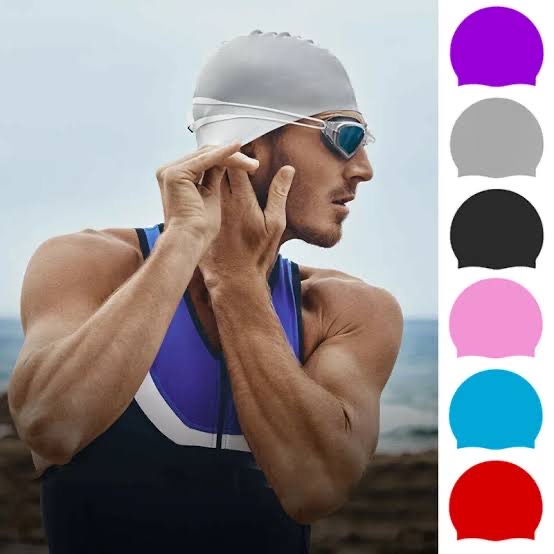
3. Swim Cap
A swim cap helps streamline the swimmer’s head and reduce drag in the water, enhancing speed and efficiency. Professional swimmers often wear silicone or latex swim caps that provide a snug fit and minimize resistance while swimming. Additionally, swim caps help protect the hair from chlorine damage and keep it out of the swimmer’s face during races.
4. Training Fins
Training fins are a valuable tool for building leg strength, improving technique, and enhancing propulsion in the water. Professional swimmers use swim fins made from lightweight materials such as silicone or rubber, which provide resistance and propulsion while swimming. Fins can be worn during various drills and training exercises to target specific muscle groups and improve overall performance.

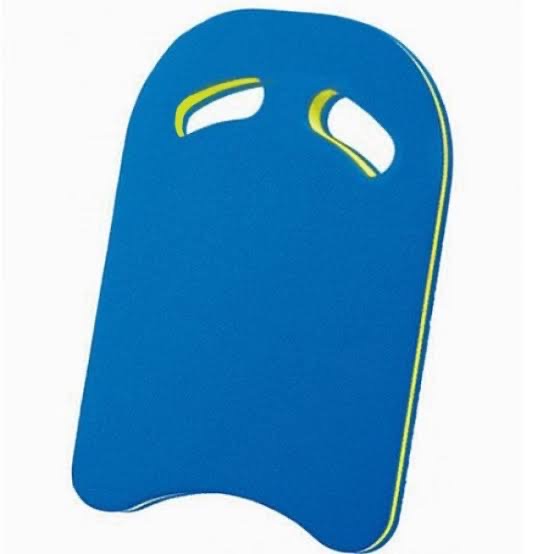
5. Kickboard
A kickboard is a versatile training aid that helps swimmers isolate and strengthen their leg muscles while focusing on kicking technique. Professional swimmers use kickboards made from buoyant materials such as foam or plastic, which provide support and stability in the water. Kickboards can be used for a variety of drills, including flutter kick, dolphin kick, and breaststroke kick, to improve leg strength and endurance.
By investing in high-quality swim gear and incorporating it into your training regimen, you can maximize your performance potential and progress towards becoming a professional swimmer. Additionally, proper care and maintenance of your gear, such as rinsing it with fresh water after each use and allowing it to air dry, will help prolong its lifespan and ensure continued performance benefits.
Summary
Because they can transfer motion, force, and torque between various components, gears are an essential component of any device. Depending on the function they serve, gears can change the axis of rotation, change the speed or force of rotation, transfer power between a motor and other moving parts, and much more.
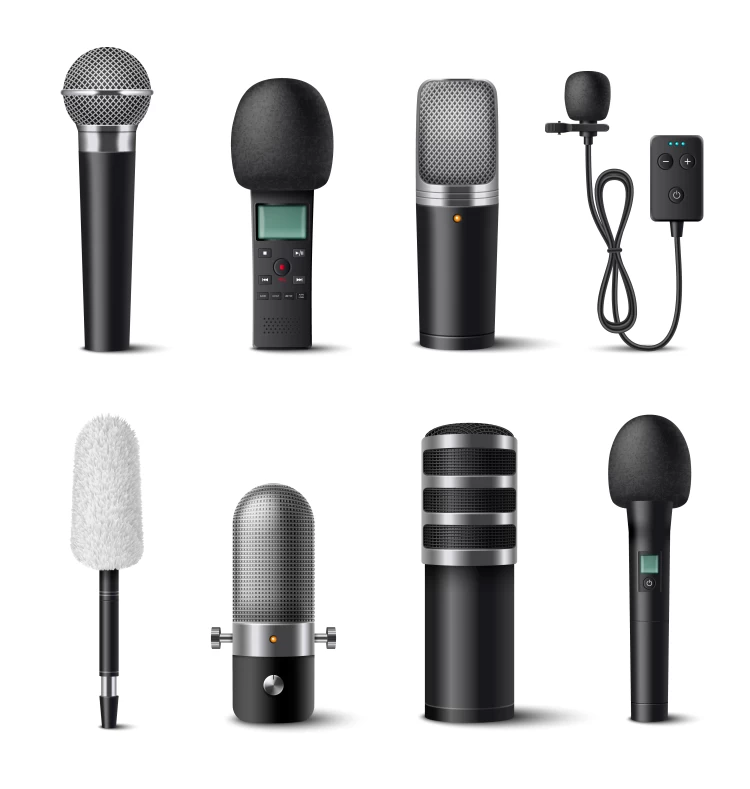
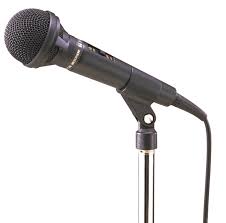
Examples of Microphones. Transducers that transform sound waves into electrical impulses, microphones are crucial parts of consumer electronics, broadcasting, recording, and telecommunication. They are utilized in many different applications, such as consumer electronics, phone calls, and professional studio recording. Dynamic, condenser, and ribbon are common varieties that are frequently grouped according to their pickup patterns (e.g., cardioid, omnidirectional).
EXAMPLES OF MICROPHONES
Microphones come in a wide range of designs and applications and transform sound waves into electrical signals. Dynamic microphones (rugged for live vocals), Condenser microphones (sensitive for studio recording), Ribbon microphones (warm tones), USB microphones (plug-and-play for streaming), and Lavaliers (clip-on microphones for video) are the most popular examples.
What is a Microphone?
Emile Berliner created the microphone, an input device, in 1877. It is employed to either enter audio into computers or transform sound waves into electric waves. By transforming sound waves into an electrical signal—which could be digital or analog—it is able to record audio.
Either a computer or other digital audio equipment can carry out this technique. Based on a liquid mechanism, the first electronic microphone employed a diaphragm coupled to a current-charged needle in a diluted sulfuric acid solution.

In addition to device type, microphones are frequently constructed with directionality in mind. For example, omnidirectional microphones may pick up all noises in the vicinity but are difficult to concentrate on a specific subject when there is background noise.Shotgun, directional, and bidirectional microphones are useful equipment for interviews. On the other hand, two unidirectional devices—such as cardioid microphones—can produce the same result.
Types of microphone
Below are the types of microphone:
1. Omnidirectional microphone:
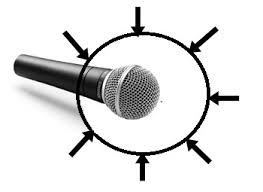
Due to the circular polar layout on its outside, an omnidirectional microphone is one that can record sound from all directions. For instance, the microphone will record signals equally from all sides if someone speaks into it from the left, right, front, or back. These microphones are mostly utilized in recording studios to capture several vocalists or musical instruments. In contrast, unidirectional microphones only pick up sound coming from one direction.
2) Unidirectional mircophone;
Examples of Microphones
unidirectional micro-phone is one that is only capable of picking up sound in one direction. As a result, when you talk in the appropriate direction, it can record your voice. If a user wishes to record their voice for a podcast or voiceover, this kind of microphone is useful. Its polar plot indicates that when the user speaks in front of it, it picks up the most sound.
3) Close Talk mircophone;

Examples of Microphones
This is an additional kind of microphone that requires you to speak directly into it without creating any noise or sound, unlike other microphones. These microphones are utilized by voice recognition software, headsets, and phones. For applications involving fixed stations, it offers exceptional voice quality.
How does data enter into a computer using a micro-phone?
An input device is a micro-phone that transmits data to a computer.
Summary
In order to transform sound waves into electrical impulses, microphones are crucial acoustic transducers. They power our capacity to communicate, create music, broadcast to audiences around the world, and seamlessly interface with contemporary computers and smart devices by acting as the vital first link in the audio chain.
Macbook laptop tips.Using Spotlight (Cmd + Space) for fast searching, learning trackpad motions, personalizing the Dock, and using Cmd + Shift + 5 for screen management are all crucial MacBook tips for 2026. Key shortcuts that optimize workflow for both novice and expert users are Cmd + C/V for copy/paste, Cmd + W to shut windows, and Cmd + Q to quit applications.
MACBOOK LAPTOP TIPS
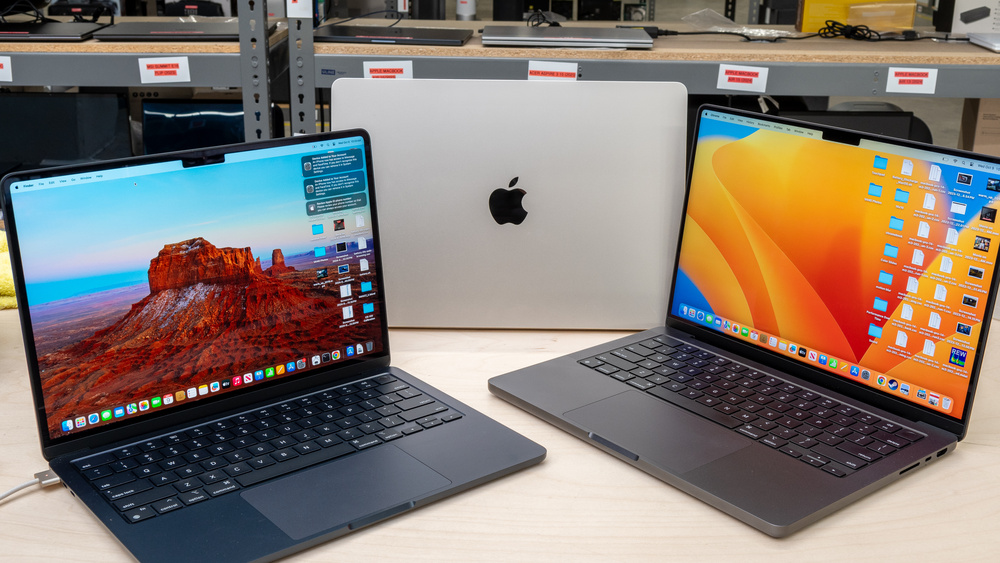
So, you’ve just got your hands on a shiny new MacBook laptop, and now it’s time to dive into the world of Apple computing. But before you can start exploring all the features and possibilities, you need to know how to turn on your MacBook. Don’t worry; it’s a simple process, and we’re here to guide you through it step by step.
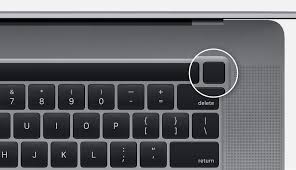
1. Locate the Power Button:
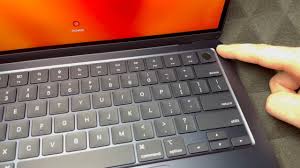
The power button on a McBook is typically located at the top-right corner of the keyboard, above the delete key. It’s a small circular button that may have the power symbol (⏻) engraved on it.
2. Open the Lid:
If your MacBook’s lid isclosed, open it gently to reveal the screen and keyboard
3. Press the Power Button:
With the lid open, locate the power button and press it once. You should feel a slight click as you press the button.
4. Wait for Startup:
After pressing the power button, your MacBook will begin the startup process. This may take a few moments, depending on your MacBook model and configuration. During startup, you’ll see the Apple logo appear on the screen, along with a progress bar indicating the startup progress.
5. Enter Your Password:

Macbook laptop tips
If you’ve set up a password for your MacBook, you may be prompted to enter it after the startup process is complete. Simply type your password using the keyboard and press the Enter key (⏎) to log in.
6. Explore Your MacBook:
Congratulations! Your laptop is now powered on and ready to use. Take some time to familiarize yourself with the macOS operating system and explore the various built-in apps and features.
7. Adjust Settings:

Macbook laptop tips
Depending on your preferences, you may want to adjust some settings on your MacBook, such as display brightness, keyboard backlighting, or sound volume. You can do this by clicking on the Apple menu () in the top-left corner of the screen and selecting “System Preferences.”
8. Shut Down Your MacBook:
When you’re done using your laptop, you can shut it down by clicking on the Apple menu () and selecting “Shut Down.” This will safely power off your MacBook until the next time you’re ready to use it.
Summary
To fully utilize your MacBook and unleash your creativity and productivity, you must first turn it on. You can maximize your new Apple device and access a world of possibilities with only a button push. So turn on your MacBook and begin exploring the fascinating world of macOS computing!
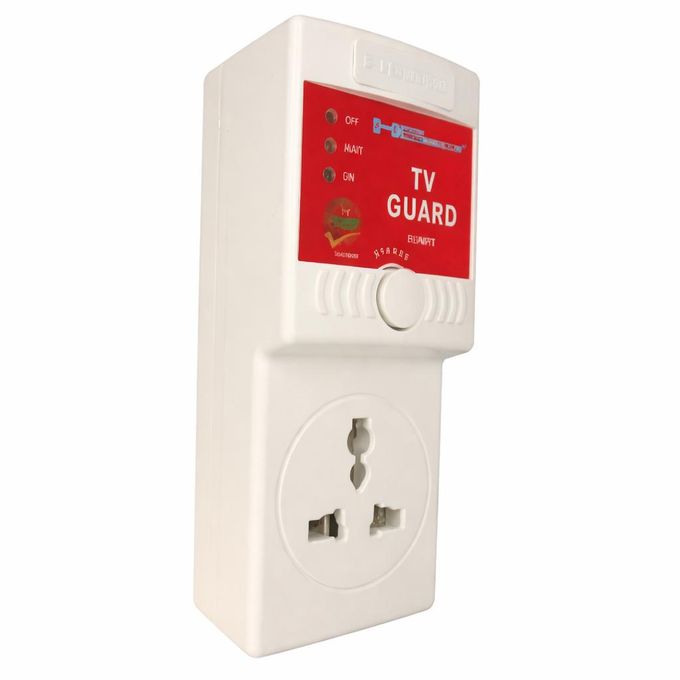
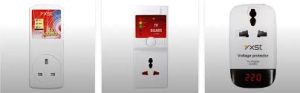
TV guard connection. You may attach your TV guard with confidence by following these easy instructions, knowing that your TV is well-protected against electrical risks. You may save future expensive repairs or replacements by putting in a little time and work today.
TV GUARD CONNECTION
In today’s world, protecting your electronic devices, especially expensive ones like televisions, is essential. TV guards are a popular choice for safeguarding your TV against power surges, voltage fluctuations, and other electrical hazards. Connecting a TV guard might seem like a daunting task, but with the right guidance, it’s a straightforward process. In this article, we’ll provide you with a step-by-step guide on how to connect your TV guard safely and effectively.
1. Choose the Right TV Guard:
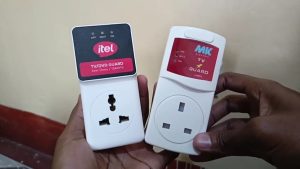
Before you begin, make sure you have the correct TV guard for your television. There are various types of TV guards available, including surge protectors, voltage stabilizers, and voltage regulators. Select one that meets your TV’s power requirements and offers adequate protection.
2. Gather Your Tools:
You’ll need a few tools to connect your TV guard properly. These may include a screwdriver, electrical tape, and possibly a power strip if your TV guard doesn’t have built-in outlets.
3. Turn Off Your TV and Unplug It:
Safety first! Before connecting the TV guard, turn off your television and unplug it from the power outlet. This precaution ensures that you won’t encounter any electrical shocks while working.
4. Locate the Power Outlet:
Identify the power outlet where your TV is currently plugged in. This will be the same outlet where you’ll connect your TV guard.
5. Position the TV Guard:
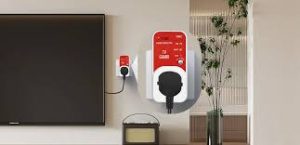
TV guard connection
Decide where you want to place your TV guard. It’s best to position it close to the power outlet for easy access. Ensure that there’s enough space around the TV guard for proper ventilation.
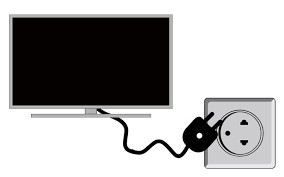
6. Connect the TV Guard:
If your TV guard comes with a power cord, plug it into the power outlet. Then, plug your TV’s power cord into the designated outlet on the TV guard. If your TV guard is a surge protector or voltage stabilizer with multiple outlets, you can also plug other electronic devices into it for added protection.
7. Secure the Connections:
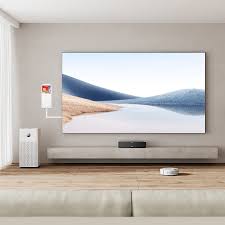
TV guard connection
Once everything is plugged in, double-check the connections to ensure they are secure. Use electrical tape to fasten any loose connections and prevent them from coming undone.
8. Turn On Your TV:
With the TV guard properly connected, it’s time to turn on your television. Check for any warning lights or indicators on the TV guard to ensure that it’s functioning correctly.
9. Test the TV Guard:
To confirm that your TV guard is providing protection, you can test it by intentionally unplugging and replugging your TV while it’s turned on. The TV guard should prevent any power surges or fluctuations from damaging your television.
10. Regular Maintenance:
TV guard connection
Lastly, remember to perform regular maintenance on your TV guard to ensure its continued effectiveness. Check for any signs of wear or damage, and replace the TV guard if necessary.
Summary
The TV (or an extension strip) is plugged into the TV guard after the gadget is plugged straight into a power outlet. It keeps an eye on voltage, cutting off electricity during dangerous swings and postponing reconnection (often 30 to 3 minutes) to maintain stability. It guards against spikes, surges, and excessive voltage.

Teenage girls fashion guide

Review for La Vie Est Belle

Reviewing Dior J’adore

A Step-by-Step Guide to Deleting Reels on Instagram

A Comprehensive Guide to Setting Up a YouTube Premiere