Social media
How to post reels on Facebook

With the rise of short-form video content, platforms like Facebook have embraced the trend by introducing features like Reels, offering users an exciting way to share their creativity and engage with their audience. If you’re eager to hop on the Reels bandwagon on Facebook, here’s a step-by-step guide to help you navigate the process:
1. Update Your Facebook App:


Ensure that you have the latest version of the Facebook app installed on your device. Reels may not be available on older versions, so updating the app is crucial to accessing this feature.
2. Access the Reels Feature:
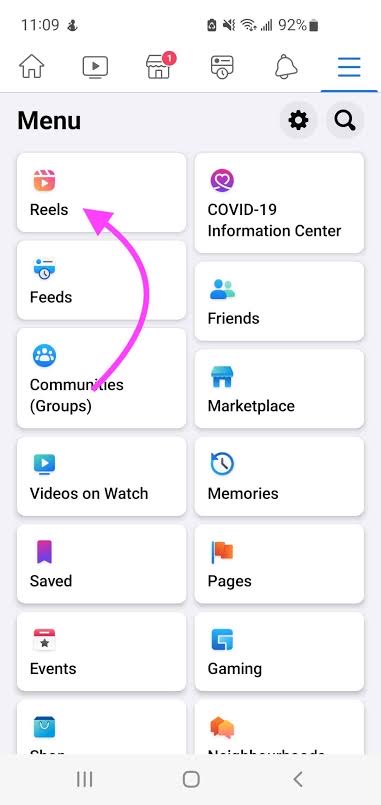

Open the Facebook app on your smartphone and navigate to the “Create” tab located at the top of your News Feed. Within the Create menu, you’ll find various options for creating different types of content, including Reels. Tap on the Reels icon to begin the uploading process.
3. Record Your Reel:


Before you start recording, familiarize yourself with the various tools available within the Reels camera. You can adjust the speed of your video, add music or audio, apply filters and effects, and set a timer to record hands-free. Once you’re ready, press and hold the capture button to start recording. You can record multiple clips up to 30 seconds in total length.
4. Edit Your Reel:


After recording your clips, you can enhance your Reel with additional edits. Tap on the editing tools to trim, rearrange, and delete clips as needed. You can also add text, stickers, drawings, and other creative elements to personalize your Reel and make it more engaging.
5. Add Music or Audio:
One of the key features of Reels is the ability to add music or audio to your videos. Tap on the music icon to browse through Facebook’s extensive library of songs and audio clips. Select the desired track and adjust the volume as needed to enhance your Reel.
6. Finalize Your Reel:
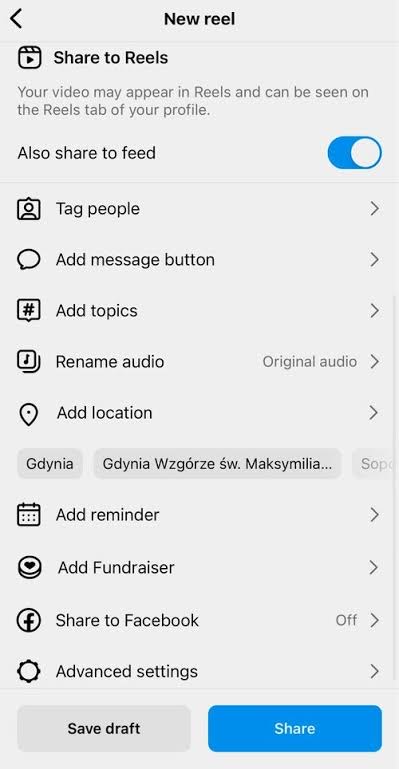

Once you’re satisfied with your Reel, it’s time to finalize and share it with your audience. Add a caption, hashtags, and tags to increase the visibility of your Reel and attract more viewers. You also have the option to share your Reel to your News Feed, Stories, or both.
7. Post Your Reel:
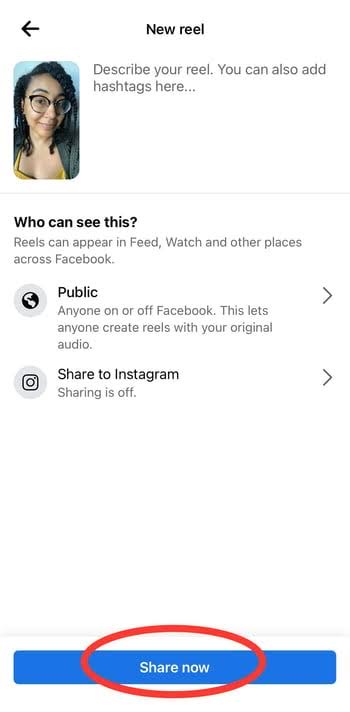

After adding all the necessary details, tap on the “Post” button to upload your Reel to Facebook. Depending on your privacy settings, your Reel will be visible to your friends, followers, or the public. You can also choose to share your Reel to specific groups or events to reach a targeted audience.
8. Engage with Your Audience:
Once your Reel is live, don’t forget to engage with your audience by responding to comments, likes, and shares. Encourage viewers to interact with your content by asking questions, inviting them to share their thoughts, and promoting user-generated content.
By following these simple steps, you can create and upload captivating Reels on Facebook to showcase your creativity, connect with your audience, and stay ahead in the ever-evolving world of social media. So, grab your smartphone, unleash your creativity, and start sharing your Reels with the world!