
DIY
Onions Juice: Benefits and Uses for Hair Growth

Onions juice is a natural remedy known for promoting hair growth and reducing hair loss. Rich in sulfur, antioxidants, and antibacterial properties, it helps strengthen hair, nourish the scalp, and stimulate hair follicles.
Benefits of Onions Juice for Hair
1. Promotes Hair Growth
Onions juice boosts blood circulation to the scalp, stimulating hair follicles and encouraging hair regrowth.
2. Reduces Hair Loss
The sulfur content in onions strengthens hair strands, reducing breakage and hair fall.
3. Fights Dandruff and Scalp Infections
Onions juice has antibacterial and antifungal properties that help eliminate dandruff and scalp infections.
4. Strengthens Hair and Prevents Thinning
It nourishes hair roots, making hair stronger, thicker, and healthier.
5. Delays Premature Graying
Antioxidants in onions juice help prevent premature graying by reducing oxidative stress on hair cells.
How to Use Onion Juice for Hair Growth
1. Pure Onion Juice
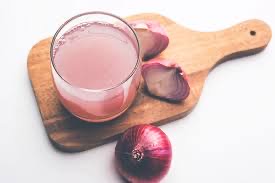
– Extract juice from one onion.
– Apply directly to the scalp using a cotton ball.
– Leave it on for 15–30 minutes.
– Rinse with a mild shampoo to remove the smell.
2. Onion Juice and Coconut Oil
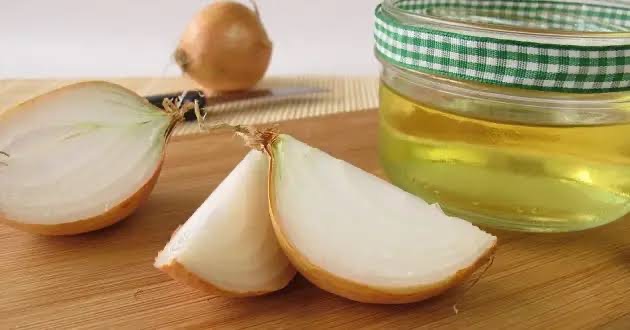
– Mix 2 tablespoons of onion juice with 1 tablespoon of coconut oil.
– Massage into the scalp and leave for 30 minutes.
– Wash with a gentle shampoo.
3. Onion Juice and Aloe Vera

– Combine onion juice with aloe vera gel for a soothing effect.
– Apply to the scalp and rinse after 30 minutes.
4. Onion Juice and Honey
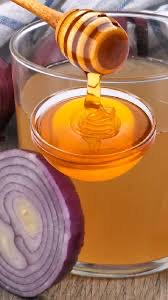
– Mix 1 tablespoon of onion juice with 1 teaspoon of honey.
– Apply to the scalp and rinse after 20 minutes.
Precautions
– Always do a patch test before applying onion juice to check for allergies.
– Avoid using onion juice on an irritated or sensitive scalp.
– Use 2–3 times a week for best results.
Onion juice is a powerful, natural solution for hair growth, helping to strengthen and nourish the scalp while reducing hair loss.


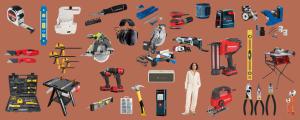
DIY projects guidelines. Advice on DIY projects. You are aware of how costly it may be to hire someone to do a basic household task. For instance, hiring a roofer to fix your house is a great idea because they are experts, but as soon as they are done, they will send you an invoice. Do-it-yourself projects enable you do some tasks while saving money. The only tools you’ll need are supplies, your hands, and a workstation. We wanted to honor the do-it-yourself out there today by offering them some tips to help them finish a variety of projects.
DIY PROJECTS GUIDELINES
The guidelines for a do-it-yourself project include planning (selecting an appropriate project, establishing a budget, listing materials/tools), preparation (organizing your space, prioritizing safety gear like goggles/gloves), execution (working methodically, taking your time, measuring accurately, pre-drilling for wood), and finishing (sanding, painting/staining for protection), all while learning from mistakes and knowing when to ask for help, especially for complex tasks like major electrical work.
What are DIY Projects?
You see and hear the abbreviation “DIY” everywhere, and you presumably already know what it means: “Do it Yourself.” It appears to be an easy concept. However, the term “DIY” may conjure up quite diverse visions for various people because it can refer to so many things.
Guidelines;
DIY projects guidelines
1. Always Be Safe. Of course, you should not be careless. You’re doing this project alone to save money. Nonetheless, it would be foolish to preserve some funds just to pay a hospital cost.
2. Get a clear picture. Before starting any project, The good thing about DIY is that it is addictive; once you start, you can’t stop. As a result, you will most likely be switching between projects.

DIY projects guidelines
3. Ensure adequate working space to prevent fatalities. Begin by having your own personal place.
4. Focus on a project until it is completed. Regardless of how difficult or easy a project is, make sure you complete it. You may be quite motivated when you first start a career, but it may be difficult to leave.

DIY projects guidelines
5. Keep Your Tools Clean. Always get high-quality tools. This can help you avoid problems like broken brushes within the first month of use or shattered hammers, especially if you hit a sturdy platform.
Summary
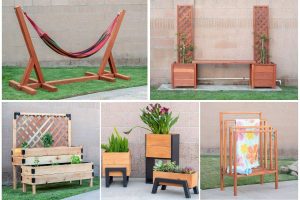
DIY projects include crafts (jewelry, candles, paper mache), useful goods (organizers, garden seats, air pumps), and home décor (painting, gallery walls, furniture upcycling). Numerous ideas are available on well-known websites like YouTube, Pinterest, and Instructables, ranging from simple weekend projects like creating abstract art to more ambitious undertakings like constructing a clubhouse or garden furniture.

DIY craft kits. Craft can refer to a vessel (boat, aircraft) or a digital workspace app, emphasizing its broad meaning from traditional artistry to contemporary tech tools. It can also refer to a skilled activity, usually manual, producing functional or decorative objects (like pottery, weaving, or carpentry) or the skill/cunning itself. Whether it’s producing intricate digital documents or exquisite textiles, it requires skill, attention to detail, and inventiveness in creation, setting it apart from mass-produced goods with its distinct human touch.
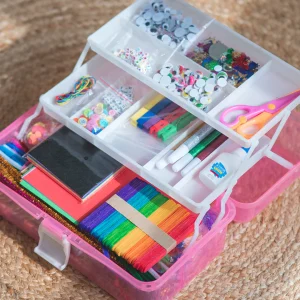
DIY CRAFT KITS
DIY craft kits are pre-packaged sets that include all the materials, tools, and instructions needed to finish a particular creative project. These kits are popular for people of all ages and skill levels, and they offer enjoyable, guided experiences for home décor, gifts, or personal hobbies. They range from beginner basics like painting, crocheting, and candle or jewelry making to more advanced options like leatherwork or resin art. This Year, DIY kits and crafts continue to thrive as people look for fun, hands-on projects they can do at home. Here are some of the most popular and profitable DIY kits trending this year:
1. Candle-Making;
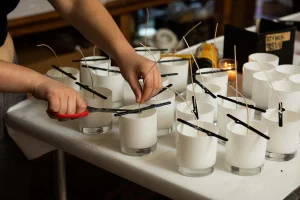
Candle-making kits are increasingly popular, allowing people to create personalized, aromatic candles at home. Many kits offer eco-friendly materials, such as soy wax and essential oils, catering to a growing demand for sustainable products.
2. Home Décor Craft;
With a focus on creating unique home spaces, decor kits like macrame wall hanging kits, painting-by-numbers kits, and clay pottery kits are trending. These kits enable customers to make customized decor pieces, adding a personal touch to their homes.
3. Jewelry-Making;

Jewelry kits featuring beading, metal stamping, or resin crafting are hot sellers. These kits allow hobbyists to craft custom jewelry pieces, from earrings to bracelets, tapping into the desire for unique, handmade accessories.
4. Gardening DIY;
Indoor gardening kits, including mini herb gardens, bonsai starter kits, and succulent arrangements, are perfect for people wanting to add greenery to small spaces. These kits typically come with seeds, soil, and containers, making them beginner-friendly and popular among urban dwellers.
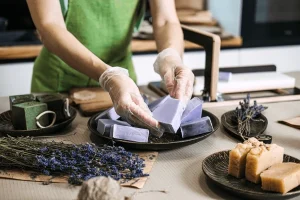
5. Soap and Skincare DIY;
diy craft kits
DIY soap and skincare kits are on the rise as people embrace natural and organic products. These kits let users create custom soaps, lotions, or scrubs, often including organic ingredients like shea butter, essential oils, and exfoliants.
6. Embroidery and Sewing;

diy craft kits
With the renewed interest in fiber arts, embroidery, cross-stitch, and sewing kits are making a comeback. Beginner-friendly options with pre-printed fabric and easy instructions allow users to create art or even clothing items.
7. Painting and Drawing;

diy craft kits
Art kits, including watercolor and acrylic painting sets, continue to be popular. Paint-by-numbers kits appeal to those who want a relaxing, structured project, while freestyle kits attract budding artists exploring their creativity. DIY kits cater to diverse interests, making them ideal for e-commerce. As people increasingly prioritize personalized and sustainable products, these kits provide a creative, rewarding experience that meets that demand, making them a top choice for this year.
Summary
DIY crafts, or do-it-yourself crafts, provide a creative outlet for gifts, home décor, and personal items. Popular projects include upcycled furniture, paper flowers, painted rocks, macramé, and personalized candles. These projects frequently use easily accessible materials and online tutorials for inspiration and guidance.

Exam success tips for waec

Tips for jamb success

Plastic water bottle hazards

A Step-by-Step Guide to Deleting Reels on Instagram

A Comprehensive Guide to Setting Up a YouTube Premiere

How to Create a WhatsApp Group
-

 Social media2 weeks ago
How to Delete Reels on IG
-

 Social media1 week ago
Tips for likes and Followers on Facebook
-

 Social media1 week ago
Guidelines for Creating a Facebook Page
-

 Photography1 week ago
Photography and Outdoors
-

 Social media1 week ago
Tips on how to Archive Instagram Post
-

 Social media2 weeks ago
Guidelines for Uploading Videos on Youtube