
WRITING
How to Delete Articles on WordPress

How to delete articles on wordpress. Go to your dashboard, select “Posts” > “All Posts,” mouse over the article you wish to delete, and then click the “Trash” link to remove it. This places the article in the trash. To permanently delete it, select “Delete Permanently” for the individual item or “Empty Trash” to get rid of everything at once from the “Trash” area.
HOW TO DELETE ARTICLES ON WORDPRESS
WordPress makes it simple to delete an article, but you must be careful to make sure you’re getting rid of the correct information and preventing any unexpected repercussions. This detailed tutorial will show you how to remove an article from WordPress, regardless of whether it contains mistakes, out-of-date material, or you have just decided it is no longer relevant.
Step 1;
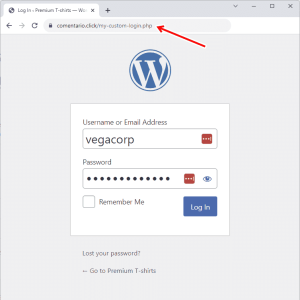
Log in to Your WordPress Dashboard,
Begin by logging in to your WordPress dashboard using your username and password. Once logged in, you’ll be taken to the WordPress admin area where you can manage your website’s content, settings, and users.
Step 2;
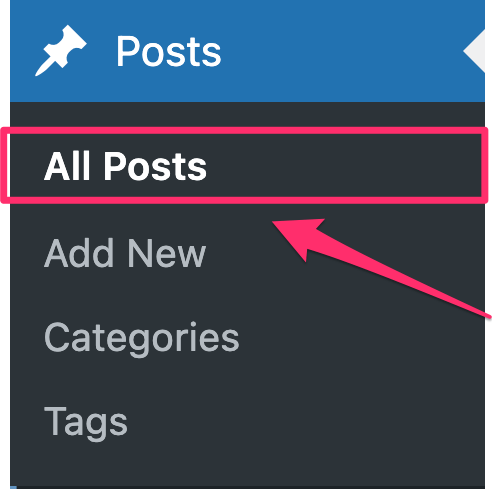
Navigate to the Posts or Pages Section, Depending on whether your article is a blog post or a static page, navigate to the appropriate section in the WordPress dashboard. To delete a blog post, click on “Posts” in the left-hand menu. To delete a static page, click on “Pages” instead.
Step 3;
HOW TO DELETE ARTICLES ON WORDPRESS
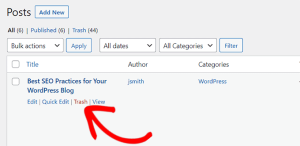
Locate the Article You Want to Delete, Once you’re in the Posts or Pages section, locate the specific article you want to delete from your WordPress website. You can use the search bar or browse through the list of published articles to find the one you’re looking for.
Step 4;
Edit the Article Hover your mouse over the title of the article you want to delete, and several options will appear beneath it. Click on the “Edit” option to open the article editor and make changes to the content if necessary. This step is optional but can be useful if you want to review the article before deleting it.
Step 5;
HOW TO DELETE ARTICLES ON WORDPRESS
Move the Article to Trash, After reviewing the article (if desired), click on the “Move to Trash” link located in the right-hand sidebar of the article editor. Confirm the action when prompted to move the article to the trash. Alternatively, you can also click on the “Trash” link directly from the list of articles in the Posts or Pages section and select the article you want to delete.
Step 6;
HOW TO DELETE ARTICLES ON WORDPRESS
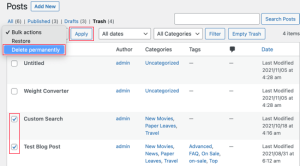
Empty the Trash (Optional), Once you’ve moved the article to the trash, it will remain there until you permanently delete it. To permanently remove the article from your WordPress website, click on the “Trash” link in the Posts or Pages section, select the article, and click on the “Empty Trash” button. Confirm the action when prompted, and the article will be permanently deleted from your site.
Summary
These easy steps will help you keep your WordPress website current and relevant by removing any unnecessary or out-of-date information. To prevent unintentionally deleting important content, always double-check the article you’re deleting. If at all possible, archive or update articles rather than completely deleting them.


Chatgpt side effects. Even while ChatGPT’s efficiency and convenience are indisputable, it’s important to be aware of and take precautions against any potential negative consequences. Users can optimize the advantages of interacting with ChatGPT while reducing its possible disadvantages by being mindful of the risks of dependency, misinformation, privacy concerns, impact on human connection, and algorithmic prejudice. In the end, navigating the complicated world of AI-powered technology like ChatGPT requires careful use and critical thought.
CHATGPT SIDE EFFECTS
In the realm of artificial intelligence, ChatGPT stands as a powerful tool, capable of assisting users in various tasks and conversations. However, like any technology, its usage comes with potential side effects that users should be aware of. In this article, we’ll explore five key side effects of using ChatGPT and discuss strategies to mitigate their impact.
1. Dependency:

Users may become overly reliant on ChatGPT for information or decision-making, potentially diminishing critical thinking skills and self-reliance.
2. Misinformation:
ChatGPT generates responses based on the input it receives, which may include inaccuracies or biased information. Users must critically evaluate and verify the information provided.
3. Privacy Concerns:

Chatgpt side effects
Interacting with ChatGPT often involves sharing personal or sensitive information. Users should be mindful of privacy implications and avoid disclosing confidential details.
4. Loss of Human Connection:
Excessive reliance on ChatGPT for communication may lead to a reduction in meaningful human interactions, potentially impacting social skills and emotional well-being.
5. Algorithmic Bias:

Chatgpt side effects
ChatGPT’s responses can reflect underlying biases present in the training data, leading to unintended reinforcement or propagation of societal biases and stereotypes. It’s essential to be aware of these biases and actively work to mitigate their impact.
Summary
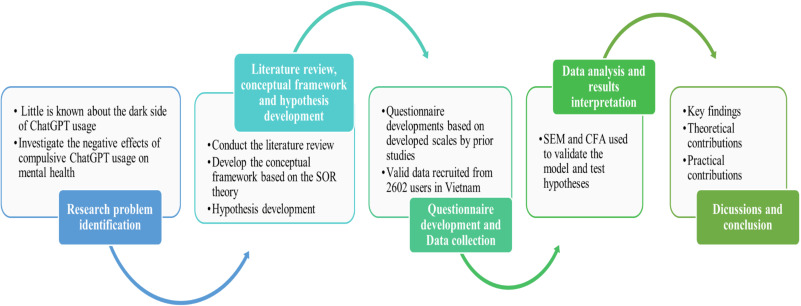
The negative effects of using ChatGPT can be divided into three categories based on new research, studies, and user reports: cognitive, psychological, and professional/academic implications. The most noteworthy results indicate that over reliance on the technology may result in social isolation, cognitive deterioration, and the spread of false information.
Tips for creating online google forms. Start with a clear title and description to direct replies when creating an efficient Google Form. To break up lengthy surveys, use section breaks and a variety of question kinds, such as multiple choice, checkbox, and dropdown. Use Google Forms to examine real-time results via Google Sheets, enable “Required” for important questions, and personalize themes for branding.
TIPS FOR CREATING ONLINE GOOGLE FORMS
The process of creating a Google Form is simple and enables you to collect data quickly and easily. Google Forms offers an easy-to-use platform for customisation, whether you’re planning an event, conducting a survey, or gathering feedback. Here’s how to make a Google Form step-by-step:
1. Access Google Forms:
• Open your web browser and navigate to Google Forms by visiting “forms.google.com” or accessing it through Google Drive.
2. Sign in to your Google Account:
• If you’re not already signed in, sign in to your Google Account. If you don’t have one, you can create a Google Account for free.
3. Click on “+ Blank” or Choose a Template:
• On the Google Forms homepage, click on the “+ Blank” button to start a new form. Alternatively, you can choose a template that suits your needs.
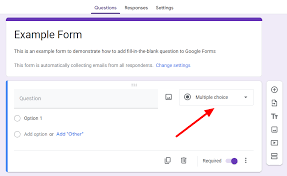
4. Create Your Form:
• Title your form by clicking on “Untitled Form” at the top. Enter a descriptive title that reflects the purpose of your for
• Add questions to your form by clicking on the “+” button. Choose from various question types, including multiple-choice, short answer, or paragraph text.
• Customize each question by adding options, setting required responses, and adjusting the question type as needed.
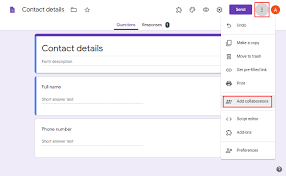
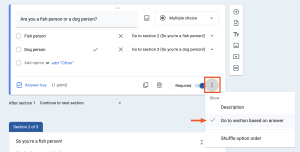
5. Organize Sections:

Tips for creating online google forms
• Organize your form into sections if it involves different topics or categories. Click on the three lines icon in the bottom-left corner to access the form settings, then click “Add section.”
6. Personalize Your Form:
• Customize the theme of your form by clicking on the color palette icon. Select a color scheme or add a background image to give your form a personalized touch.
7. Add Media:
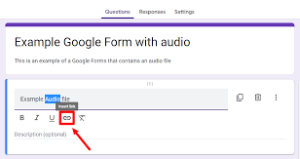
• Enhance your form by inserting images or videos. Click on the image or video icon to upload media from your computer or provide a URL.
8. Preview Your Form:
• Before sharing your form, click on the eye icon to preview how it will appear to respondents. Ensure that the questions, layout, and design meet your expectations.
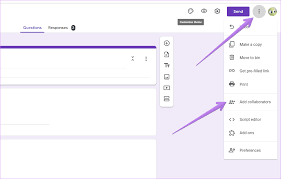
9. Adjust Settings:
Tips for creating online google forms
• Access the form settings by clicking on the gear icon. Customize settings such as collecting email addresses, limiting responses, or turning on/off accepting responses.
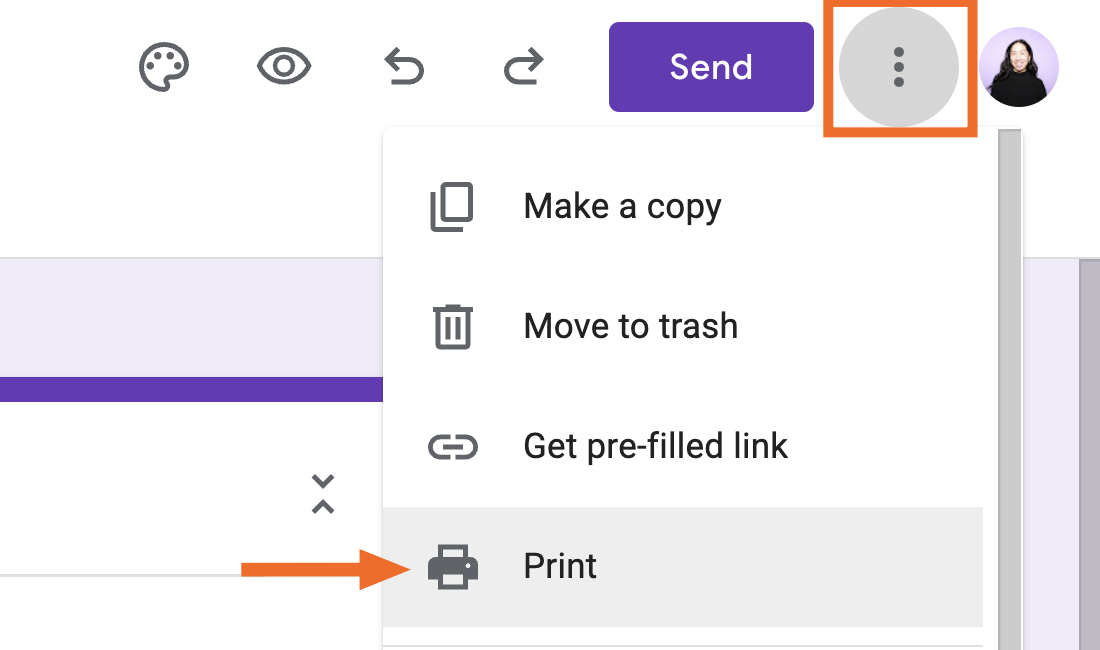
10. Share Your Form:
Tips for creating online google forms
– Click on the “Send” button in the upper-right corner to share your form. You can share it via email, generate a link, or embed it on a website. Google Forms also provides options to share on social media or through Google Classroom.
Summary
You may easily customize surveys and questionnaires to meet your unique requirements by creating a Google Form. Try with various question formats, topics, and layouts to create a form that works for you and successfully engages your respondents.

Tips for massive growth on wordpress. It takes a calculated approach, commitment, and constant work to achieve significant growth on WordPress. You can maximize the potential of your WordPress website and achieve new levels of success by setting clear objectives, producing excellent content, optimizing for search engines, utilizing social media and email marketing, networking and working with others, and evaluating and refining your tactics. Accept the path of personal development, persevere, and acknowledge your accomplishments as you go.
TIPS FOR MASSIVE GROWTH ON WORDPRESS
For bloggers, companies, and content producers looking to build a strong online presence, WordPress has become a powerful platform. WordPress provides countless opportunities for individuals seeking to increase their audience and reach thanks to its intuitive interface, adaptable themes, and powerful functionality. In order to help you realize the full potential of your website or blog and achieve enormous growth on WordPress, we’ll go over key tactics and methods in this post.
1. Define Your Goals and Audience:

Tips for massive growth on wordpress
Before embarking on your journey to massive growth, take the time to define clear goals and identify your target audience. What are you hoping to achieve with your WordPress site? Who is your ideal audience, and what are their interests, needs, and preferences? Understanding your objectives and audience will guide your content creation and marketing efforts.
2. Create High-Quality, Engaging Content:
Content is king in the world of WordPress, so focus on creating high-quality, engaging content that resonates with your audience. Whether it’s blog posts, articles, videos, podcasts, or infographics, aim to provide valuable, informative, and entertaining content that keeps visitors coming back for more. Use compelling headlines, captivating visuals, and storytelling techniques to capture attention and encourage engagement.
3. Optimize for Search Engines (SEO):
Improve your site’s visibility and attract organic traffic by optimizing your content for search engines. Conduct keyword research to identify relevant keywords and phrases for your niche, and incorporate them naturally into your content, titles, headings, and meta descriptions. Optimize your site’s performance, loading speed, and mobile responsiveness to enhance user experience and boost search rankings.
4. Utilize Social Media and Email Marketing:
Leverage the power of social media and email marketing to promote your WordPress site and engage with your audience. Share your content across popular social media platforms such as Facebook, Twitter, Instagram, and LinkedIn to reach a broader audience and drive traffic to your site. Build an email list and send regular newsletters, updates, and promotions to nurture relationships with your subscribers and encourage repeat visits.
5. Network and Collaborate with Others:

Tips for massive growth on wordpress
Collaborate with other bloggers, influencers, and businesses within your niche to expand your reach and attract new audiences. Guest posting, cross-promotions, and collaborative projects. Can help you tap into new networks, gain exposure, and build credibility in your industry. Participate in online communities, forums, and events to connect with like-minded individuals and grow your network organically.
6. Analyze and Iterate:
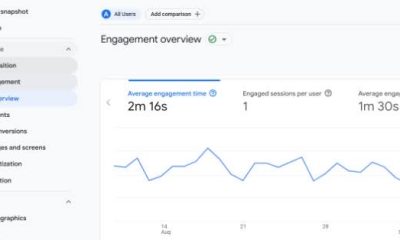
Monitor your site’s performance and track key metrics such as traffic, engagement. And conversion rates using analytics tools such as Google Analytics. Analyze the data to identify trends, patterns, and areas for improvement, and use the insights to refine your content strategy. Optimize your marketing efforts, and iterate on your approach. Continuously test new ideas, experiment with different tactics, and adapt to evolving trends to stay ahead of the curve.
Summary
It takes a combination of high-performance infrastructure, speed optimization, intelligent content marketing, and user experience improvements to achieve significant growth on WordPress. Many experts believe that since fast websites rank higher and convert better, the emphasis should be on developing a scalable foundation that can manage rising traffic without sacrificing performance.

Chatgpt side effects

Causes of nasal swelling

Lyrics for i will be here

A Step-by-Step Guide to Deleting Reels on Instagram

A Comprehensive Guide to Setting Up a YouTube Premiere

How to Create a WhatsApp Group
-

 Culture4 weeks ago
Germany Rosenmontag Celebration
-

 Flight4 weeks ago
Plane Tickets Relevance
-

 Flight4 weeks ago
Luxury in Business Class Flight
-

 Flight4 weeks ago
Airline Travellers and Baggage Allowances
-

 Music4 weeks ago
Lyrics for wetin you no fit do
-

 Social media2 weeks ago
How to Delete Reels on IG