Social media
How to Set Your Post Privacy to Only Friends
In today’s digital age, maintaining privacy on social media platforms like Facebook is paramount. With the ever-evolving landscape of online security concerns, it’s essential to understand and utilize the privacy settings provided by these platforms. One such crucial setting on Facebook is controlling who can see your posts. In this article, we’ll delve into the steps to set your Facebook post privacy to only friends, ensuring that your updates are shared only with those you trust.
Why Privacy Matters
Privacy is not just about keeping personal information safe; it’s also about controlling who can access and interact with your content. By setting your Facebook post privacy to only friends, you can maintain a level of intimacy and security within your social circle. This ensures that your updates, photos, and thoughts are shared only with people you’ve approved, minimizing the risk of unauthorized access or misuse of your information.
Steps to Set Post Privacy to Only Friends
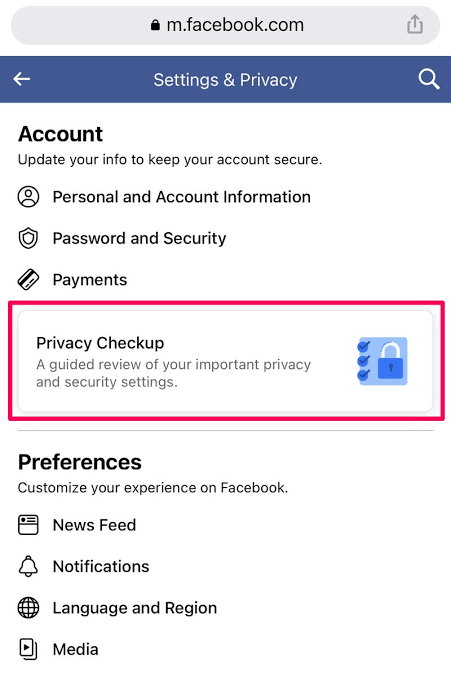
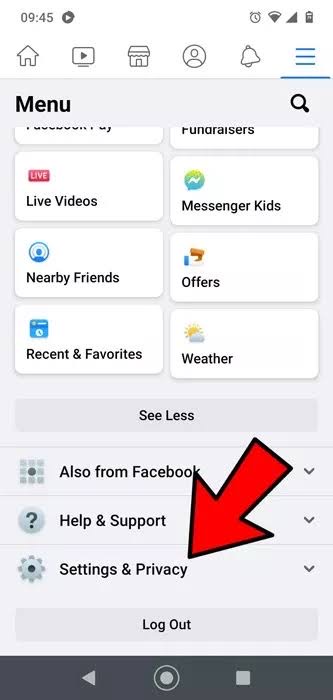
1. Accessing Privacy Settings: Log in to your Facebook account and navigate to your profile page. Click on the “Settings” option located at the top right corner of the screen. From the dropdown menu, select “Privacy Settings & Tools.”
2. Choosing Your Audience: Under the “Who can see your future posts?” section, click on the “Edit” option. A dropdown menu will appear, presenting different audience options. Select “Friends” to ensure that only your approved friends can view your future posts.

3. Reviewing Past Posts: While adjusting your post privacy settings, it’s essential to review who can see your past posts. To do this, click on the “Limit Past Posts” option located below the audience selector. This will change the audience for all your past posts to “Friends” only.
4. Additional Considerations: Facebook also provides the option to customize the audience for individual posts. When creating a new post, click on the audience selector dropdown located next to your name. Choose “Friends” to limit the visibility of that specific post to only your friends.
Maintaining Privacy Best Practices
Setting your Facebook post privacy to only friends is a proactive step towards safeguarding your online presence. However, there are additional best practices to keep in mind:
• Regularly review your friend list and remove any individuals you no longer wish to share your content with.
• Be cautious when accepting friend requests from unfamiliar or unknown users.
In an era where digital privacy is of utmost importance, taking control of your Facebook post privacy settings is crucial. By setting your posts to be visible only to friends, you can maintain a sense of security and control over your online interactions. Remember to regularly review and update your privacy settings to align with your preferences and comfort level. With these steps, you can enjoy the benefits of social networking while prioritizing your privacy and security.
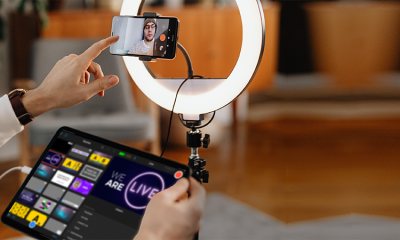


YouTube live streaming gears. Organizations in almost every industry now rely heavily on video content to grow. By 2025, 82% of all consumer internet traffic will consist of video content, according to research. Additionally, according to 85% of marketers, video is a powerful internet marketing tool. Therefore, it should come as no surprise that companies are using live streaming more and more as their go-to strategy for audience engagement and event delivery.
YOUTUBE LIVE STREAMING GEARS
For influencers, companies, and content producers that want to interact with their audience in real time, YouTube live streaming has become a vital tool. Having the proper equipment may significantly improve the quality of your broadcast, whether you’re streaming gaming sessions, hosting live Q&A sessions, or doing product demos. This post will discuss the necessary equipment you’ll need to take your YouTube live streams to the next level, from cameras and microphones to lighting and accessories.
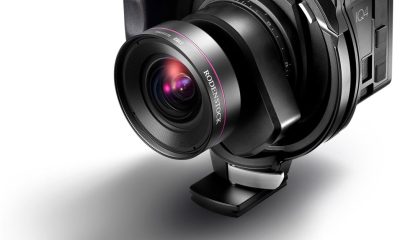
1. Camera:
YOUTUBE LIVE STREAMING GEARS
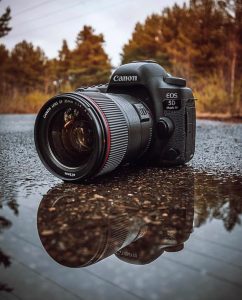
A high-quality camera is the foundation of any successful live stream. While many content creators opt for webcams or smartphone cameras for their broadcasts, investing in a dedicated camera can significantly improve the quality of your video. Look for a camera with features such as 4K resolution, clean HDMI output, and autofocus capabilities for crisp, clear footage. Popular options include the Sony A7 III, Canon EOS M50, and Panasonic Lumix GH5.
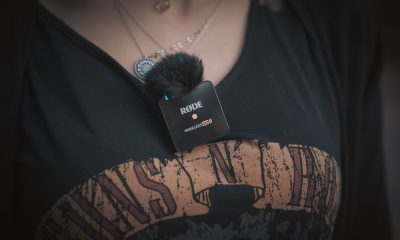
2. Microphone:
YOUTUBE LIVE STREAMING GEARS
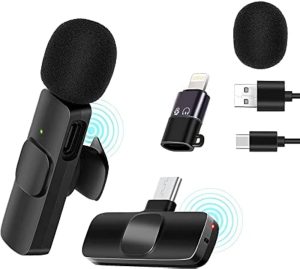
Good audio quality is just as important as video quality when it comes to live streaming. Investing in a high-quality microphone can make your voice sound clear and professional, enhancing the overall viewer experience. Consider using a lavalier microphone for hands-free operation, a shotgun microphone for directional audio capture, or a USB microphone for simplicity and ease of use. Popular choices include the Rode Wireless Go, Blue Yeti, and Audio-Technica AT2020.
3. Lighting:
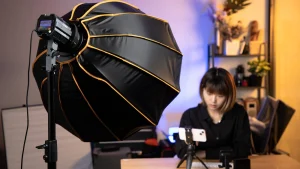
YOUTUBE LIVE STREAMING GEARS
Proper lighting can dramatically improve the look of your live stream, making your video appear more polished and professional. Invest in a set of LED lights or softbox lights to illuminate your set evenly and reduce harsh shadows. You can also use accessories like reflectors and diffusers to control the intensity and direction of light for a flattering effect. Popular lighting kits include the Neewer 660 LED Video Light, Godox SL-60W, and Elgato Key Light.4. Tripod or Mount:
A stable camera mount is essential for keeping your camera steady and secure during your live streams. Invest in a sturdy tripod or camera mount that can support the weight of your camera and accessories while allowing for flexible positioning and angle adjustments. Look for features such as height adjustment, pan and tilt functionality, and compatibility with your camera model. Popular options include the Manfrotto PIXI Mini Tripod, Joby GorillaPod, and Neewer Heavy Duty Video Tripod.
5. Internet Connection:

A reliable internet connection is crucial for streaming high-quality video without buffering or interruptions. Make sure you have access to a fast and stable internet connection with sufficient bandwidth for your live stream. Consider using a wired Ethernet connection for the most reliable performance, or invest in a high-quality Wi-Fi router with advanced features like MU-MIMO and beamforming for improved coverage and speed.
Summary
You may improve the caliber of your YouTube live streams and produce captivating, polished material that appeals to your audience by making the appropriate equipment purchases. Having the necessary equipment listed in this post will help you create exceptional live broadcasts that stand out from the competition and entice viewers to return for more, regardless of your level of experience as a content creator.
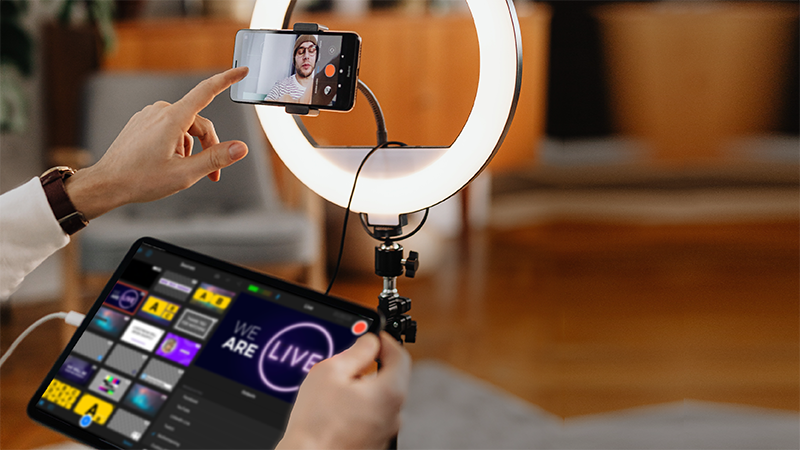

Gears for Facebook live streaming. You can improve the caliber and professionalism of your Facebook Live streams by making the appropriate equipment purchases. Additionally, produce captivating material that appeals to your readers. Whether you’re an individual trying to establish a connection with your followers, a business owner, or a content provider. Possessing the necessary equipment outlined in this post will enable you to create engaging Facebook Live broadcasts that stand out and draw in visitors.
GEARS FOR FACEBOOK LIVE STREAMING
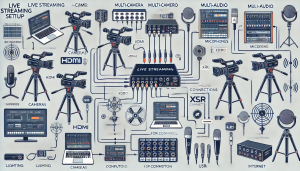
Facebook Live has grown in popularity as a real-time audience connection tool for companies, content producers, and individuals. Whether you’re providing behind-the-scenes footage, holding interviews, or presenting a live event, having the proper equipment may greatly enhance the caliber and professionalism of your live streams. This post will discuss the necessary equipment, such as cameras, microphones, lighting, and accessories, to improve your Facebook Live broadcasts.
1. Camera:

A high-quality camera is the cornerstone of any successful Facebook Live stream. While smartphones and webcams can be used for basic broadcasts, investing in a dedicated camera can elevate the quality of your video. Look for a camera with features such as 1080p or 4K resolution, clean HDMI output, and autofocus capabilities for crisp, clear footage. Popular options include the Sony Alpha series, Canon EOS series, and Panasonic Lumix series.
2. Microphone:
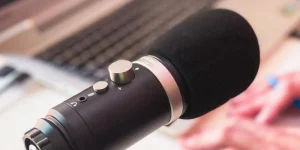
GEARS FOR FACEBOOK LIVE STREAMING
Clear and professional audio is essential for engaging Facebook Live streams. Invest in a high-quality microphone to ensure that your voice comes through loud and clear to your viewers. Options include lavalier microphones for hands-free operation, shotgun microphones for directional audio capture, and USB microphones for simplicity and ease of use. Popular choices include the Rode Wireless Go, Blue Yeti, and Audio-Technica AT2020.
3. Lighting:
Good lighting can make a significant difference in the look and feel of your Facebook Live stream. Invest in LED lights or softbox lights to illuminate your set evenly and reduce harsh shadows. You can also use accessories like reflectors and diffusers to control the intensity and direction of light for a more flattering effect. Popular lighting kits include the Neewer 660 LED Video Light, Godox SL-60W, and Elgato Key Light.
4. Tripod:

GEARS FOR FACEBOOK LIVE STREAMING
A stable camera mount is essential for keeping your camera steady and secure during your Facebook Live broadcasts. Invest in a sturdy tripod or camera mount that can support the weight of your camera and accessories while allowing for flexible positioning and angle adjustments. Look for features such as height adjustment, pan and tilt functionality, and compatibility with your camera model. Popular options include the Manfrotto PIXI Mini Tripod, Joby GorillaPod, and Neewer Heavy Duty Video Tripod.
5. Internet Connection:
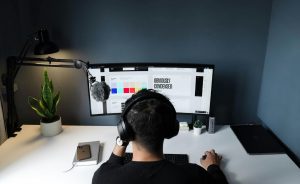
GEARS FOR FACEBOOK LIVE STREAMING
A reliable internet connection is crucial for streaming high-quality video without buffering or interruptions. Make sure you have access to a fast and stable internet connection with sufficient bandwidth for your Facebook Live streams. Consider using a wired Ethernet connection for the most reliable performance, or invest in a high-quality Wi-Fi router with advanced features like MU-MIMO and beamforming for improved coverage and speed.
Summary
For Facebook Live broadcasting, you’ll need a camera (a smartphone or dedicated webcam), a microphone for crystal-clear audio, and a sturdy tripod or rig for a polished appearance. Additionally important is a dependable internet connection. Editing software and a video encoder can be required for more complex configurations.
 Tips to incorporate media into articles. Enhancing engagement, increasing share ability and virality, improving understanding and retention, and improving SEO performance all depend on the inclusion of media in your articles. Whether you’re writing news pieces, blog posts, instructional materials, or marketing collateral, adding pertinent and excellent images can improve your writing and meaningfully engage your readers. You may write articles that connect with your readers, increase website traffic, and eventually accomplish your content marketing objectives by utilizing the power of multimedia content.
TIPS TO INCORPORATE MEDIA INTO ARTICLES
Incorporating media into your articles can be a game-changer for grabbing and holding your audience’s attention in the digital age we live in, where attention spans are short and competition for online visibility is intense. Multimedia content from pictures and videos to infographics and interactive components improves the reading experience and effectively reaffirms your point. The following are four compelling arguments for including media in your articles:
1. Enhances Engagement;

Visual media, such as images and videos, have the ability to grab the attention of your audience and make your content more engaging and memorable. Research has shown that articles with relevant images receive significantly more views and shares than those without visuals. By incorporating media into your articles, you can break up large blocks of text, create visual interest, and keep readers engaged from start to finish.
2. Improves Comprehension and Retention;

TIPS TO INCORPORATE MEDIA INTO ARTICLES
Multimedia content has been shown to improve comprehension and retention of information compared to text-only articles. Visuals help to illustrate complex concepts, reinforce key points, and provide context for the written content. Incorporating charts, graphs, and infographics can make data more digestible and easier to understand for readers. Additionally, videos allow you to demonstrate processes, showcase products, or tell stories in a dynamic and engaging way, enhancing the reader’s overall understanding and retention of the content.
3. Increases Shareability and Virality;

TIPS TO INCORPORATE MEDIA INTO ARTICLES
Articles with compelling visuals are more likely to be shared on social media platforms, leading to increased exposure and virality. Visual content is inherently more shareable and eye-catching in social media feeds, making it easier for readers to engage with and amplify your message to their networks. By including shareable media in your articles, you can extend the reach of your content and attract new audiences who may not have discovered your articles otherwise.
4. Boosts SEO Performance;

TIPS TO INCORPORATE MEDIA INTO ARTICLES
Search engines prioritize content that is rich in multimedia elements, as they enhance the user experience and increase dwell time on your website. Articles with relevant images, videos, and other media are more likely to rank higher in search engine results pages (SERPs) and attract organic traffic. Additionally, alt text, captions, and descriptive filenames associated with media elements provide valuable metadata that search engines use to index and rank your content more effectively.
Summary
Add multimedia components to stories, such as pictures and videos, and start with a compelling introduction that includes a pertinent statistic or anecdote. Use quotes and examples to back up your points, keep your writing clear and succinct for a wide readership, and organize your piece into short, targeted paragraphs.

Key Relevance of Avocado Oil

Key Relevance of Almond Oil

Key Relevance Argan Oil

A Step-by-Step Guide to Deleting Reels on Instagram

A Comprehensive Guide to Setting Up a YouTube Premiere