
Uncategorized
Key Benefits of Sodium Chloride


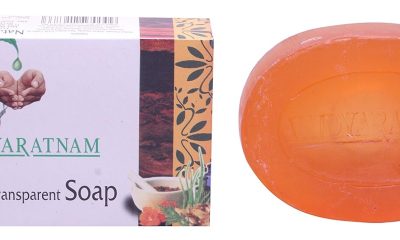
Key benefits of sodium chloride. Despite being frequently disregarded, sodium chloride’s exfoliating, antibacterial, and detoxifying qualities make it an important component of skincare. By encouraging cell turnover, combating germs, and preserving hydration, it can improve the health and appearance of skin when used properly. But it’s important to be aware that it may irritate and dry out skin, particularly those with sensitive skin.
KEY BENEFITS OF SODIUM CHLORIDE
Table salt, or sodium chloride, is a popular household item and an essential component of many industries, such as food, medicine, and cosmetics. Sodium chloride has important effects on the skin in addition to its well-known culinary use. This article explores the advantages and possible disadvantages of sodium chloride in skincare, looking at how this common mineral affects the skin.
Composition and Properties;
effects on the skin.is a crystalline compound composed of sodium and chloride ions. It is naturally occurring and abundant in seawater and mineral deposits. Its properties, including its ability to dissolve in water and act as a preservative, make it a versatile ingredient in numerous products.
Benefits;
Exfoliation;

One of the primary benefits of sodium chlorides in skincare is its exfoliating properties. When used in scrubs and cleansers, the coarse texture of salt crystals helps to physically remove dead skin cells, revealing smoother, brighter skin underneath. Regular exfoliation can improve skin texture, enhance absorption of other skincare products, and promote a more even skin tone.
Antimicrobial Properties;
Sodium chloride has natural antimicrobial properties, making it effective in inhibiting the growth of bacteria and fungi. This is particularly beneficial for acne-prone skin, as it can help reduce the incidence of breakouts and infections. Salt solutions are often used in treatments for minor wounds and infections due to their ability to cleanse and disinfect.
Hydration and Mineral Balance;

Key benefits of sodium chloride
While it may seem counterintuitive, sodium chloride can aid in skin hydration when used in appropriate concentrations. In products like bath salts and saline solutions, it helps to draw moisture to the skin’s surface and maintain the skin’s natural moisture balance. Additionally, salts derived from mineral-rich sources, such as sea salt or Himalayan salt, contain trace minerals like magnesium, calcium, and potassium, which can nourish and rejuvenate the skin.
Detoxification;

Key benefits of sodium chloride
Salt baths and salt-based skincare treatments are known for their detoxifying effects. Soaking in a salt bath can help to draw out impurities and toxins from the skin, reduce inflammation, and promote relaxation. This detoxification process can also aid in soothing conditions like eczema and psoriasis, providing relief from itching and irritation.
Potential Drawbacks and Considerations;
Skin Irritation and Sensitivity
While sodium chlorides can be beneficial, it can also cause irritation and dryness, particularly for individuals with sensitive or dry skin. High concentrations of salt can disrupt the skin’s natural barrier, leading to dehydration and irritation.
Uses of Sodium Chloride in Skincare Products;

Key benefits of sodium chloride
Sodium chlorides are found in a variety of skincare products, each leveraging its unique properties:
– Exfoliating Scrubs: Combined with oils or creams, salt crystals provide effective physical exfoliation.
– Cleansers: Sodium chloride is used to enhance the cleansing action and to add a mild abrasive quality.
– Bath Salts: Used for their relaxing, detoxifying, and mineral-replenishing effects.
–
Summary
Maintaining adequate hydration, fluid balance, and nerve and muscle function are among the main advantages of sodium chloride. Additionally, it transports nutrients into cells, helps control blood pressure, and is used medicinally in saline solutions to avoid dehydration. It is also an essential food spice, preservative, and part of many industrial processes, including de-icing.


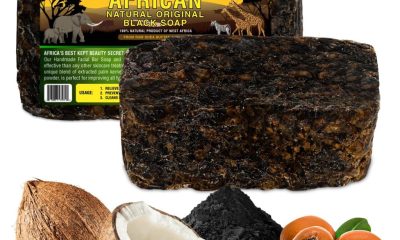


Effects of Sodium Laureth Sulfate. An efficient and popular surfactant with great cleaning and lathering qualities is sodium laureth sulfate. However, careful thought must be given to its propensity to irritate skin, damage the skin barrier, and contribute to environmental issues. People can choose personal care products wisely and adopt behaviors that safeguard their skin and the environment by being aware of the advantages and disadvantages of SLES. Investigating sulfate-free substitutes might be a good option for people with sensitive skin or trying to reduce any irritation.
EFFECTS OF SODIUM LAURETH SULFATE
A common surfactant in many personal care products, including shampoos, cleansers, and toothpastes, is sodium laureth sulfate (SLES). SLES has become a standard ingredient in the beauty and hygiene sector due to its reputation for producing a rich lather and efficiently removing oils and grime. However, worries concerning its effects on the skin have been raised by its extensive use. The advantages, possible dangers, and factors related to sodium laureth sulfate are examined in this article.
Benefits of Sodium Laureth Sulfate
Effective Cleansing

SLES is highly effective at removing dirt, oil, and impurities from the skin and hair. Its ability to produce a rich lather makes it a popular choice in products like shampoos and body washes, ensuring thorough cleansing and leaving the skin and hair feeling clean and refreshed.
Lathering Properties
One of the main reasons SLES is favored in personal care products is its ability to create a thick, foamy lather. This characteristic not only enhances the sensory experience of using these products but also aids in distributing the product evenly across the skin and hair.
Cost-Effective

SLES is relatively inexpensive to produce, making it a cost-effective ingredient for manufacturers. This helps keep the price of consumer products lower while still delivering effective cleaning performance.
Potential Risks and Drawbacks
Skin Irritation
One of the primary concerns with SLES is its potential to cause skin irritation, particularly with prolonged or frequent use. While it is generally considered milder than SLS, SLES can still strip the skin of its natural oils, leading to dryness, redness, and irritation. Individuals with sensitive skin, eczema, or other dermatological conditions may be particularly susceptible to these effects.
Disruption of the Skin Barrier

Effects of Sodium Laureth Sulfate
The skin’s natural barrier is essential for retaining moisture and protecting against environmental aggressors. Frequent use of products containing SLES can disrupt this barrier, leading to increased transepidermal water loss (TEWL) and making the skin more prone to dryness and irritation.
Allergic Reactions
Some individuals may experience allergic reactions to SLES, characterized by symptoms such as itching, swelling, and hives. Although such reactions are relatively rare, it is important to be aware of this potential risk and discontinue use if symptoms occur.
How to Use Products Containing it Safely;
Patch Testing
Before using a new product containing SLES, perform a patch test. Apply a small amount of the product to a discreet area of skin and wait 24-48 hours to see if any adverse reactions occur. This can help identify any potential sensitivity to the ingredient.
Moderation

Effects of Sodium Laureth Sulfate
Limit the use of SLES-containing products, especially if you have sensitive or dry skin. Opt for milder, sulfate-free alternatives for everyday use, and reserve SLES products for occasional deep cleaning.
Summary
Ethoxylated lauryl alcohol is the source of sodium laureth sulfate, a detergent and surfactant. Because of its capacity to emulsify oils and create foam, it is utilized in a wide range of cleaning and personal care products. Although SLES and another popular surfactant, sodium lauryl sulfate (SLS), are similarly related, SLES is typically thought to be less irritating and milder.
.
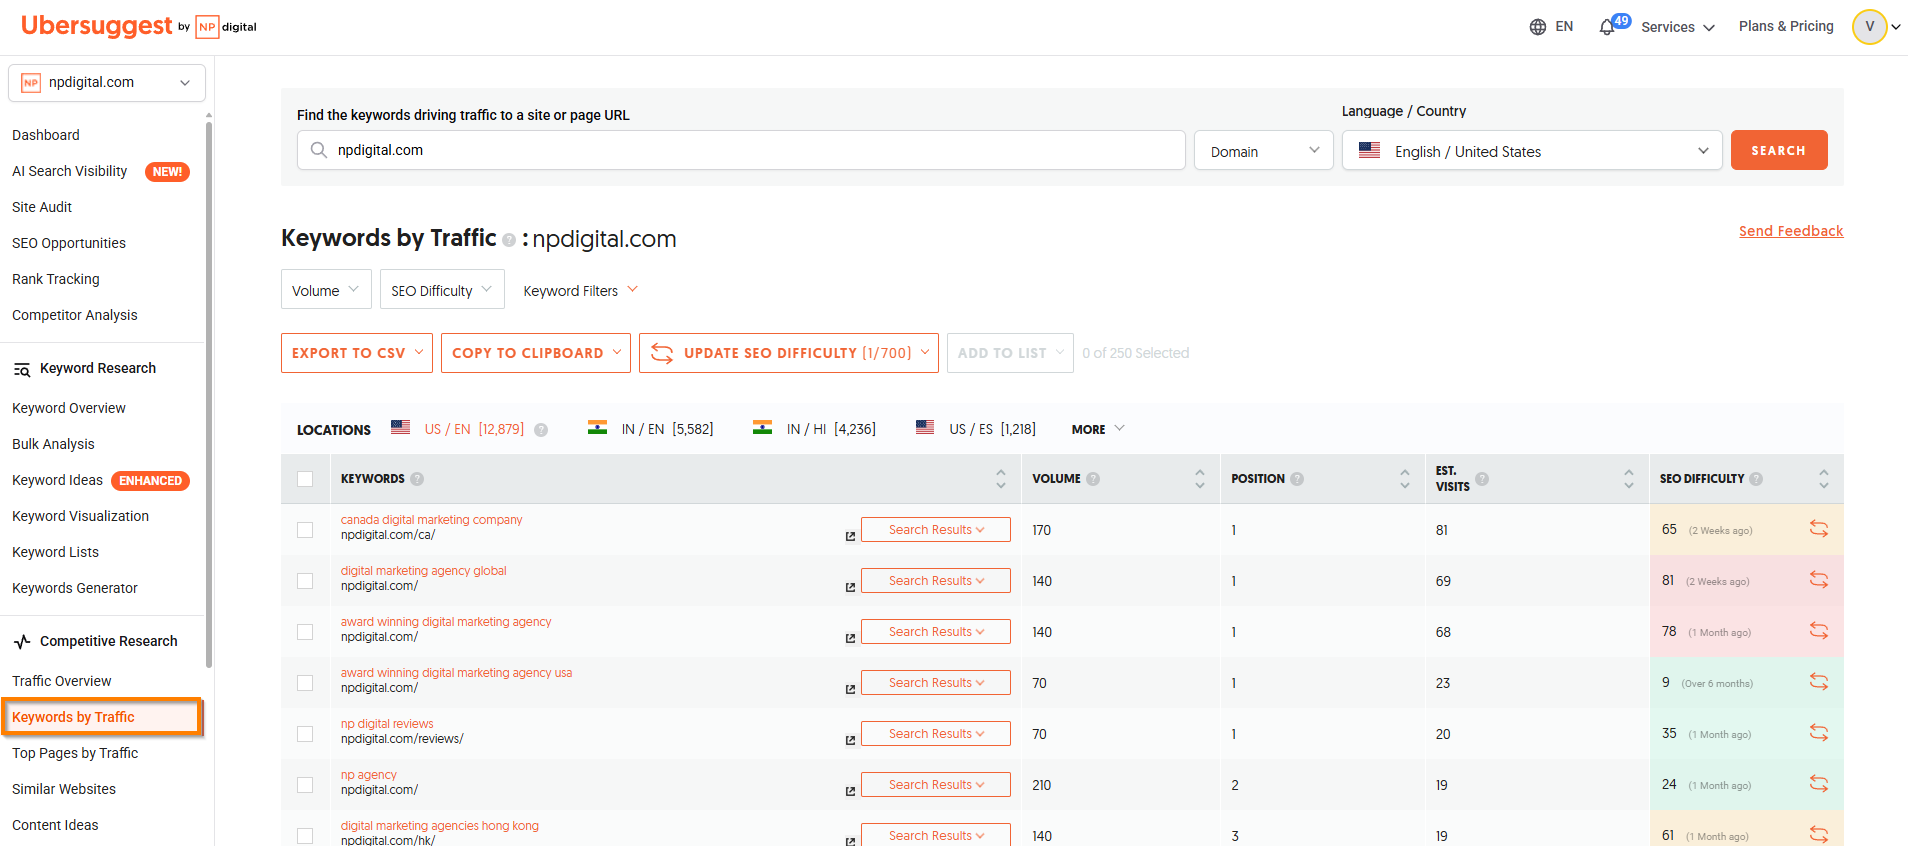
Ranking keywords and traffic site. When someone searches for a specific term, a webpage’s precise location on a Search Engine Results Page (SERP) or AI answer engine is referred to as keyword ranking. The main objective of SEO is to achieve high ranks (positions 1–10 on page one) in order to generate organic traffic.
RANKING KEYWORDS AND TRAFFIC SITE
Use sophisticated SEO and digital intelligence tools to find out which keywords your website ranks for and how much traffic they generate. Your precise ranking positions, search volumes, and anticipated visitor traffic are all revealed by these platforms’ analysis of search engine results.
Here are some effective methods to find high-ranking key phrases:
1. Keyword Research Tools;

Utilize keyword research tools such as Google Keyword Planner, SEMrush, Ahrefs, Moz Keyword Explorer, and Ubersuggest to identify relevant keyword with high search volumes and low competition. These tools provide insights into keyword trends, search volume, competition level, and related keywords, helping you discover valuable opportunities to target.
2. Analyze Competitors;
Conduct competitive analysis by identifying your competitors’ websites and analyzing their keyword strategies. Tools like SEMrush and Ahrefs allow you to view the keywords that your competitors are ranking for, providing valuable insights into the keywords driving traffic to their sites. Analyze their content and identify gaps or opportunities where you can create better, more targeted content.
3. Long-Tail Keywords;

Ranking keywords and traffic site
Target long-tail keywords, which are longer and more specific keyword phrases that typically have lower competition and higher conversion rates. Long-tail keywords can help you attract highly targeted traffic and capture users who are closer to making a purchasing decision. Use keyword research tools to identify relevant long-tail keyword that align with your content and target audience.
4. Google Search Console;
Use Google Search Console to monitor your website’s performance in search results and identify keyword that are driving traffic to your site. Review the search queries report to see which keywords users are using to find your site. And optimize your content to capitalize on these keywords further.
5. Social Media and Forums;

Ranking keywords and traffic site
Monitor social media platforms, online forums, and Q&A websites in your industry to identify trending topics. Questions, and discussions relevant to your target audience. Pay attention to the language and keywords used by your audience. And incorporate them into your content strategy to attract more traffic from these channels.
6. Analyze Search Intent;
Consider the search intent behind specific keyword and tailor your content to meet users’ needs and expectations. Are users looking for information, products, or solutions to a problem? By understanding search intent, you can optimize your content to provide value and address users’ queries effectively, increasing your chances of ranking higher in search results.
Summary
It takes a combination of competitive analysis, target audience knowledge, and keyword research tools to obtain high-ranking keywords to boost site traffic.

Tips for creating Youtube channel. Google owns YouTube, an American website where users can share videos. On February 14, 2005, Chad Hurley, Jawed Karim, and Steve Chen—all former PayPal employees founded YouTube. With its headquarters located in San Bruno, California, it is the second most popular website worldwide, after Google.
TIPS FOR CREATING YOUTUBE CHANNEL
A watermark is a small image that shows up in the lower-right corner of every video. When people click or hover over the image, they will be prompted to subscribe to your YouTube channel. This image can be used as the logo for your channel or for any other branding reason you think would be appropriate for your content.
1. Create a Google Account;
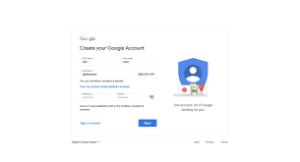
Here’s where it all starts. It’s really easy to create a Google account if you haven’t already. All you have to do is fill in your nam
You next need to submit a few additional basic details about yourself.
2. Create a YouTube Channel in 4 Steps;
Setting up your YouTube channel won’t require much time. Simply adhere to the instructions below!
2. From the menu that appears, click your profile photo in the upper right corner and choose Create a Channel
3. Enter the name of your channel and upload a profile image.
4. In the lower right corner, select “Create Channel.”
Verify Your Phone Number with YouTube;
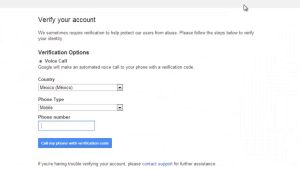
Verifying your phone number is the next step after creating your channel. You can now upload custom thumbnails, live stream, make films longer than fifteen minutes, and contest Content ID claims.
1. Click your profile image once more, then choose YouTube Studio from the menu to confirm your phone numbe
2. From the navigation bar on the left, select Settings
3. Click the Channel tab, then select Feature Eligibility
4. Select Verify Phone Number under Intermediate Features, then adhere to the on-screen instructions.
3. Find Your YouTube Niche;
The primary subject you’ll cover on your YouTube channel is your niche. The majority of viewers will watch your content for this reason as well, since certain viewers are drawn to particular subjects.
4. Identify Your Target Audience;
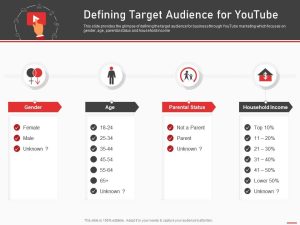
Tips for creating Youtube channel
Identifying your target audience for your videos becomes lot simpler once you’ve located your niche. You should take action on that as soon as possible.
5. Create a Value Proposition for Your Viewers;
You now know the subject matter of your channel and who your audience is. It’s time to promise everyone who views your material what you intend to do now.
6. Find Your Competitors on YouTube;
It’s critical for YouTube video creators to be aware of their rivals. It’s not like you have to fight with them constantly. Alternatively, attempt to outshine their films so that your channel receives more views than theirs.
7. Create a List of Video Ideas;
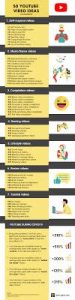
Tips for creating Youtube channel
After compiling a list of potential videos, it’s time to see how popular each one is on YouTube. Researching potential keywords is one approach to achieve this. This is how you find out what terms people use to look for videos on YouTube.
8. Test Your Video Ideas with Keyword Research;
Having compiled a list of potential videos, it’s time to see how well-liked they are on YouTube. Researching keywords is one method you can accomplish this. This is the procedure for identifying the terms that users use to look for videos on YouTube.
Summary
A channel banner is an extended, horizontal image that appears at the top of your YouTube channel’s website. It will immediately communicate the subject of your videos if it is well-designed.

Healthy benefits of Apple Cider

Honey mask application tips

Effective home remedies for skin acne

A Step-by-Step Guide to Deleting Reels on Instagram

A Comprehensive Guide to Setting Up a YouTube Premiere

How to Create a WhatsApp Group
-

 Health3 weeks ago
Harmful side effects of earphones
-

 Fashion4 weeks ago
Teenage girls fashion guide
-

 Self esteem3 weeks ago
Tips for self esteem improvement
-

 Fingernails4 weeks ago
Fingernails common diseases
-

 Exercise3 weeks ago
Regular physical activities importance
-

 Fashion4 weeks ago
Teenage guys fashion tips