WRITING
Pictures and WordPress Content


PICTURES AND WORDPRESS CONTENT
In WordPress, you have two options for adding content: either add a picture to your media library first, or use the picture block (or the Add Media button in the traditional editor) to upload it straight into a post. Click the “Add Media” button or the plus icon to add a photo. Then, upload a file from your computer or choose an already-existing image from your media library and add it to the content.
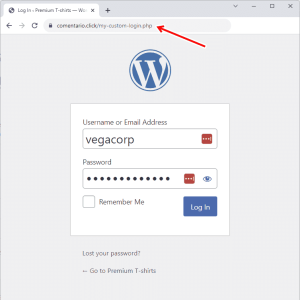
Step 1: Log in to Your WordPress Dashboard;

PICTURES AND WORDPRESS CONTENT
To get started, log in to your WordPress dashboard by entering your username and password. Once logged in, you’ll be taken to the WordPress admin area where you can manage your website’s content, settings, and media.
Step 2: Navigate to the Post or Page Editor;
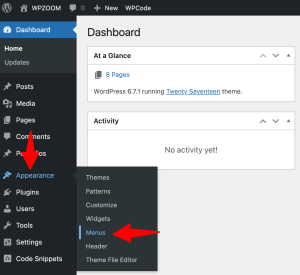

Next, navigate to the post or page editor where you want to add images. You can do this by selecting “Posts” or “Pages” from the left-hand menu and then clicking on the “Add New” button to create a new post or page. Alternatively, you can edit an existing post or page by selecting it from the list of published content.
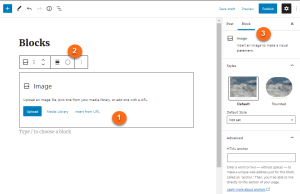
Step 3: insert the image block;

PICTURES AND WORDPRESS CONTENT
Once you’re in the post or page editor, place your cursor where you want to insert the image and click on the (+) icon to add a new block. In the block inserter menu, select the “Image” block option. This will create a new image block where you can upload or select an existing image from your media library.
Step 4: Upload or Select an Image;
After inserting the image block, you’ll have the option to upload a new image or select an existing image from your media library. To upload a new image, click on the “Upload” button and select the image file from your computer. To select an existing image from your media library, click on the “Media Library” tab and choose the desired image.
Step 5: Customize Image Settings;

Once you’ve uploaded or selected an image, you can customize its settings to fit your needs. You can adjust the image alignment, size, and caption by clicking on the image block and using the toolbar options that appear above it. Additionally, you can add alternative text (alt text) for accessibility purposes by clicking on the image block and entering a description in the “Alt Text” field.
Step 6: Preview and Publish Your Content;

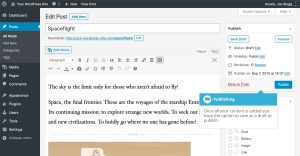
PICTURES AND WORDPRESS CONTENT
After adding and customizing your image, preview your content to see how it looks on the frontend of your website. If everything looks good, you can go ahead and publish your post or page by clicking on the “Publish” button. Your image will now be visible to your website visitors when they view your published content.
Summary
You may improve your website’s visual attractiveness and produce captivating content that draws in visitors by following these easy steps. Whether you’re publishing articles, sharing blog entries, or presenting products, using pertinent and excellent photographs is essential to leaving a lasting impact on your audience.