Social media
Tips for Posting Reels on Facebook
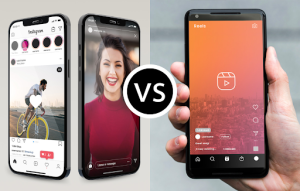
Tips for posting reels on Facebook. We all know that Facebook reels are different from Instagram reels, but we also thought that Facebook stories were different, didn’t we? In the end, people and brands started posting short-form video content on Facebook as well (or at least cross-posting from Instagram), so it wasn’t that bad, was it? However, to be fair, Meta is experimenting with all kinds of content on Facebook these days, so your business can too, and there’s at least one good reason for that: When Meta promotes a type of content to its users mostly short-form videos these days it makes it much easier for non-followers to find it.
TIPS FOR POSTING REELS ON FACEBOOK
With the rise of short-form video content, platforms like Facebook have embraced the trend by introducing features like Reels, offering users an exciting way to share their creativity and engage with their audience. If you’re eager to hop on the Reels bandwagon on Facebook, here’s a step-by-step guide to help you navigate the process:
1. Update Your Facebook App

Ensure that you have the latest version of the Facebook app installed on your device. Reels may not be available on older versions, so updating the app is crucial to accessing this feature.
2. Access the Reels Feature
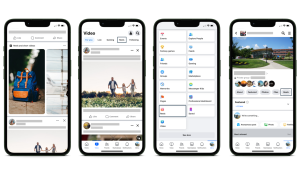
Open the Facebook app on your smartphone and navigate to the “Create” tab located at the top of your News Feed. Within the Create menu, you’ll find various options for creating different types of content, including Reels. Tap on the Reels icon to begin the uploading process.
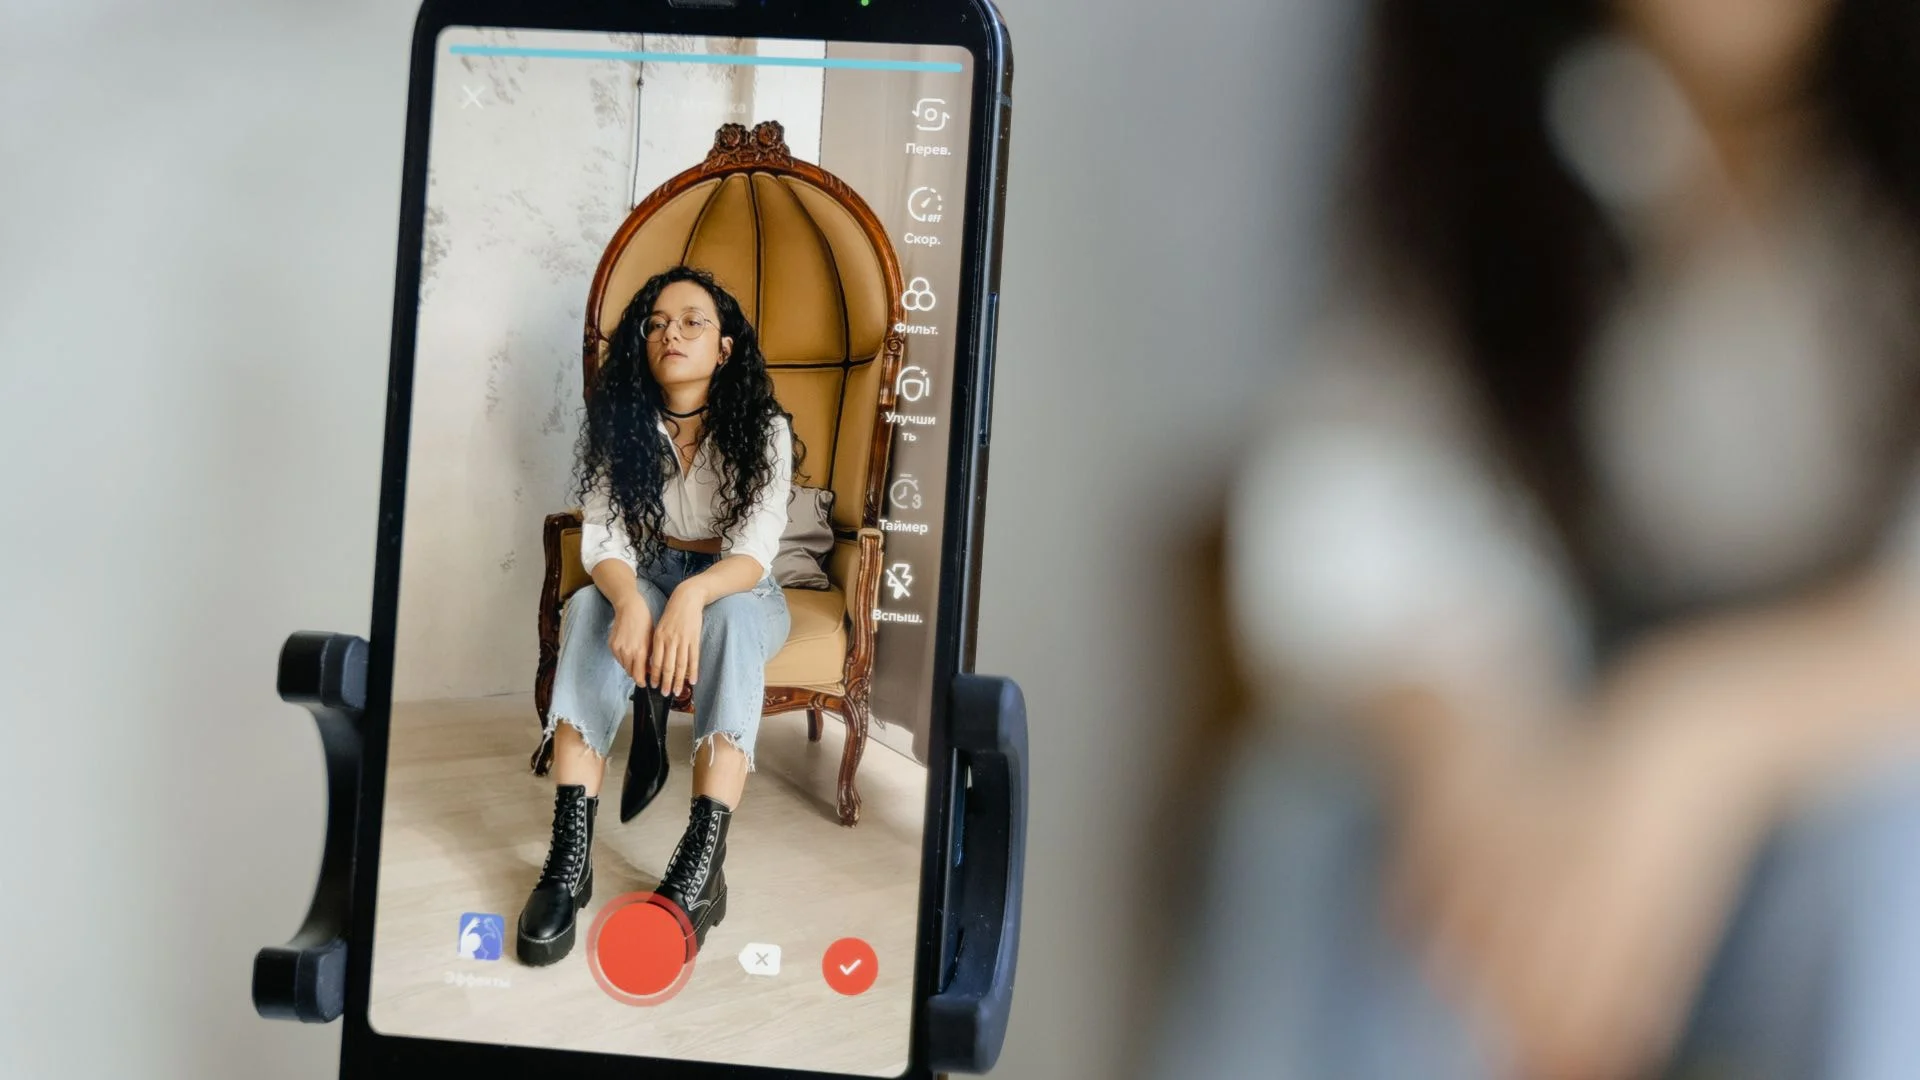
3. Record Your Reel

Before you start recording, familiarize yourself with the various tools available within the Reels camera. You can adjust the speed of your video, add music or audio, apply filters and effects, and set a timer to record hands-free. Once you’re ready, press and hold the capture button to start recording. You can record multiple clips up to 30 seconds in total length.
4. Edit Your Reel
After recording your clips, you can enhance your Reel with additional edits. Tap on the editing tools to trim, rearrange, and delete clips as needed. You can also add text, stickers, drawings, and other creative elements to personalize your Reel and make it more engaging.
5. Add Music or Audio
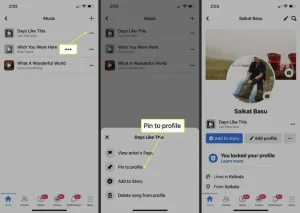
One of the key features of Reels is the ability to add music or audio to your videos. Tap on the music icon to browse through Facebook’s extensive library of songs and audio clips. Select the desired track and adjust the volume as needed to enhance your Reel.
6. Finalize Your Reel
Once you’re satisfied with your Reel, it’s time to finalize and share it with your audience. Add a caption, hashtags, and tags to increase the visibility of your Reel and attract more viewers. You also have the option to share your Reel to your News Feed, Stories, or both.
7. Post Your Reel

After adding all the necessary details, tap on the “Post” button to upload your Reel to Facebook. Depending on your privacy settings, your Reel will be visible to your friends, followers, or the public. You can also choose to share your Reel to specific groups or events to reach a targeted audience.
Summary
By following these simple steps, you can create and upload captivating Reels on Facebook to showcase your creativity, connect with your audience, and stay ahead in the ever-evolving world of social media. So, grab your smartphone, unleash your creativity, and start sharing your Reels with the world!

Tips for editing whatsapp messages. It’s crucial to remember that although these techniques provide means to modify delivered messages, they have drawbacks. If the receiver has previously seen the original communication, for example, they may not be aware of the changes unless specifically mentioned. Additionally, depending on the recipient’s notification settings, modified messages can still show up in notifications.
TIPS FOR EDITING WHATSAPP MESSAGES
In today’s fast-paced digital world, communication often happens in real-time, leading to occasional typos, errors, or unintended messages. WhatsApp, one of the most popular messaging apps worldwide, recognizes the need for users to rectify such mistakes even after hitting the send button. While WhatsApp does offer a built-in feature to edit sent messages directly, there are a few workarounds to achieve this.
1. Quick Fix: Delete and Resend:
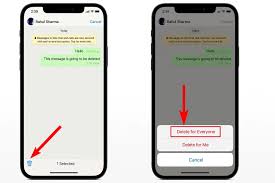
The simplest method is to delete the message immediately after sending it and then resend the corrected version. To do this, long-press the message, tap on the trash bin icon, and confirm deletion. Then, rewrite the message with the necessary corrections and send it again.
2. Edit through Forwarding:
Tips for editing whatsapp messages
Another way to edit a sent message is by forwarding it to the same contact or group with the desired corrections. This method maintains the original message’s context while allowing you to make changes before forwarding it. Simply tap and hold the message, select “Forward,” make the necessary edits in the text field, and then tap the send button.
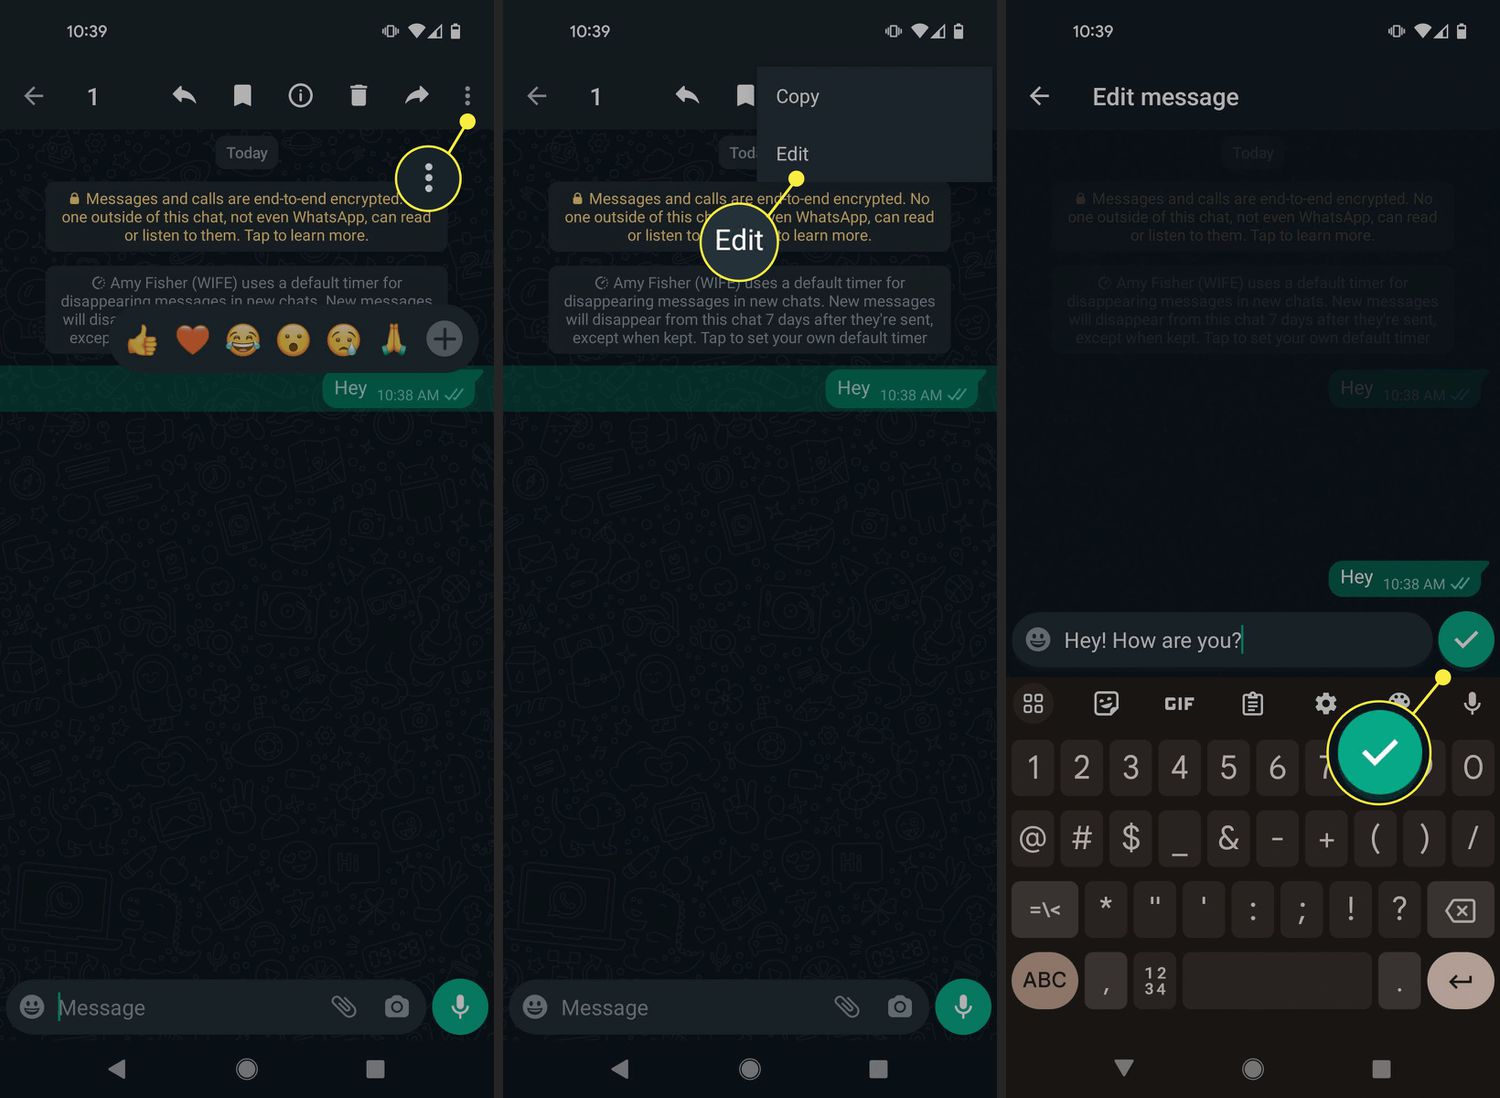
3. Utilize WhatsApp Web or Desktop: If you’re using WhatsApp on your computer through WhatsApp Web or the desktop app, editing sent messages becomes easier. After sending a message, hover over it, click on the three dots that appear on the right side, and select “Edit.” Make the necessary changes and press Enter to save the edited message.
4. Edit it after sending: Updated version of WhatApp supports editing of messages not more than 14 minutes after sending.
Steps
Tips for editing whatsapp messages
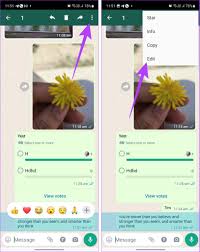
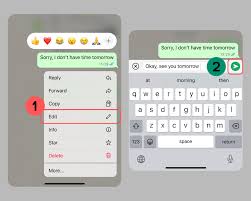
– Hold the sent message and few options will pop up, tap on the edit option.
– After editing the error, retype your typos and tap on ✅ that’s all.
Summary
Within 15 minutes of sending a WhatsApp message, you can amend it by long-pressing it and choosing “amend” from the menu. This enables text modifications without generating a new notification; nevertheless, the message will be marked as “modified”. Media files cannot use this capability, however text messages on Android, iOS, and WhatsApp Web may.

Tips for growing instagram. By putting these tactics into practice, you’re creating a community that is passionate about your content in addition to increasing numbers. Recall that genuine interactions and dialogues are at the core of Instagram. Watch your Instagram engagement grow as you continue to evolve and stay loyal to your business.
TIPS FOR GROWING INSTAGRAM
Instagram is a powerful tool for both individuals and businesses in the busy world of social media. Gaining followers is a necessary first step, but creating genuine engagement is where the true magic happens. This is a thorough approach to improving your Instagram presence and building a vibrant community.
1. Craft Compelling Content:

Tips for growing instagram
• Quality reigns supreme. Develop visually appealing and meaningful content that resonates with your target audience.
• Utilize high-resolution images, captivating captions, and storytelling elements to create a lasting impact.
2. Embrace Consistency:
• Establish a consistent posting schedule to keep your audience engaged.
• Consistency not only maintains visibility but also builds anticipation among your followers.
3. Know Your Audience:

• Understand the demographics and interests of your audience.
• Tailor your content to cater to their preferences, ensuring it aligns with their expectations.
4. Leverage Hashtags Strategically:
• Research and use relevant hashtags to expand the reach of your posts.
• Mix popular and niche hashtags to tap into broader and targeted audiences.
5. Engage in Conversations:

Tips for growing instagram
• Respond promptly to comments and direct messages.
• Encourage conversations by posing questions in captions and engaging with your audience’s responses.
6. Host Giveaways and Contests:
• Create excitement and engagement by hosting giveaways or contests.
• Encourage participants to tag friends and share your content, amplifying your reach.
7. Utilize Instagram Stories and Reels:
• Take advantage of Instagram’s features like Stories and Reels to diversify your content.
• Use interactive elements like polls, quizzes, and countdowns to boost engagement. Read more on how to get more engagements on your instagram reels here
8. Collaborate with Others:
• Partner with influencers or other accounts in your niche for shoutouts or collaborations.
• Cross-promotion introduces your content to new audiences.
9. Post at Optimal Times:

Tips for growing instagram
• Understand your audience’s active hours and schedule posts accordingly.
• Use Instagram Insights to identify peak engagement times.
10. Share User-Generated Content:
• Feature content created by your followers.
• This not only acknowledges your community but also encourages others to contribute.
11. Create Shareable Content:

• Craft content that compels users to share with their followers.
• Whether it’s informative, entertaining, or relatable, shareable content broadens your audience.
12. Optimize Your Instagram Bio:
• Craft a concise and engaging bio with a clear call-to-action.
• Include relevant keywords to enhance discoverability.
13. Run Instagram Ads:
• Invest in targeted Instagram ads to reach a broader audience.
• Use compelling visuals and concise captions to convey your message effectively.
14. Analyze and Adjust:

• Regularly review Instagram Insights to gauge the performance of your content.
• Adjust your strategy based on what works best for your audience.
Summary
In order to expand on Instagram in 2026, concentrate on maintaining a regular publishing schedule of three to five times a week, giving priority to Reels for reach, and interacting with your audience to increase loyalty. Use pertinent hashtags, optimize your profile with a clear bio and searchable keywords, and examine your data to determine which material generates the most interaction.
Tips for creating tiktok ads. Monitoring your advertisements is crucial since it gives you insight into their audience reach and analysis. Recall that producing engaging and genuine content is essential for TikTok advertisements. Make your company stand out in the active TikTok community, get attention fast, and follow the platform’s creative trends.
TIPS FOR CREATING TIKTOK ADS
Produce vertical, native-looking content (lo-fi/iPhone style) that feels genuine rather than like a polished commercial to make high-converting TikTok commercials. Within the opening three seconds, concentrate on a compelling hook; use popular sounds; keep videos fast-paced with rapid cuts; and incorporate clear, on-screen text.
Creating ads on TikTok involves a few straightforward steps:
TikTok Ads Manager:
• Open TikTok Ads Manager on your web browser.
• Sign in or create an account if you don’t have.
2. Campaign Creation
• Click on “Create” to start a new campaign.
• Choose your campaign objective, such as Traffic, Conversions, App Installs, or Video Views.
Ad Group Setup:

TIPS FOR CREATING TIKTOK ADS
• Define your target audience by selecting demographics, interests, and behaviors.
• Set your budget and schedule for the ad group.
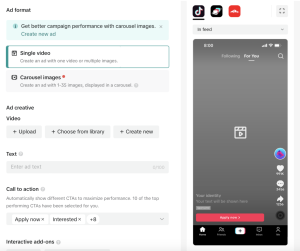
Ad Creative:
• Choose the ad format: In-Feed Ads, Branded Hashtag Challenges, Branded Effects, or TopView.
• Upload your creative elements, including images, videos, captions, and relevant links.
Tracking and Optimization:
• Set up tracking pixels for conversion tracking.
• Optimize your ad delivery based on performance data.
Review and Launch:

TIPS FOR CREATING TIKTOK ADS
• Double-check all details and settings.
• Click “Submit” to launch your TikTok ad campaign.
Monitor and Adjust:
• Regularly check your campaign’s performance in TikTok Ads Manager.
• Adjust targeting, budget, and creative elements based on data and audience response.
Summary
Instead of overly polished advertisements, make content that seems natural to the platform—fast-paced, amusing, and relatable—if you want to thrive with TikTok Ads. To avoid fatigue, concentrate on a compelling 3-second hook, employ vertical video, make use of popular noises, and update creatives every one to two weeks.

Analysing kidney stones

Common causes of red urine

Honey benefits

A Step-by-Step Guide to Deleting Reels on Instagram

A Comprehensive Guide to Setting Up a YouTube Premiere